LT4 Crossover Tube Delete Universal Kit + DYME
As we seem to do often, we have re-invented and improved our cooling packages once again. In this case, we have incorporated some DYME quick connect fittings into our popular crossover delete package. Therefore, this package is on standby until finished. That said, these should be ready to start shipping by 11.25.26. Stay tuned for more. They will be worth the wait!
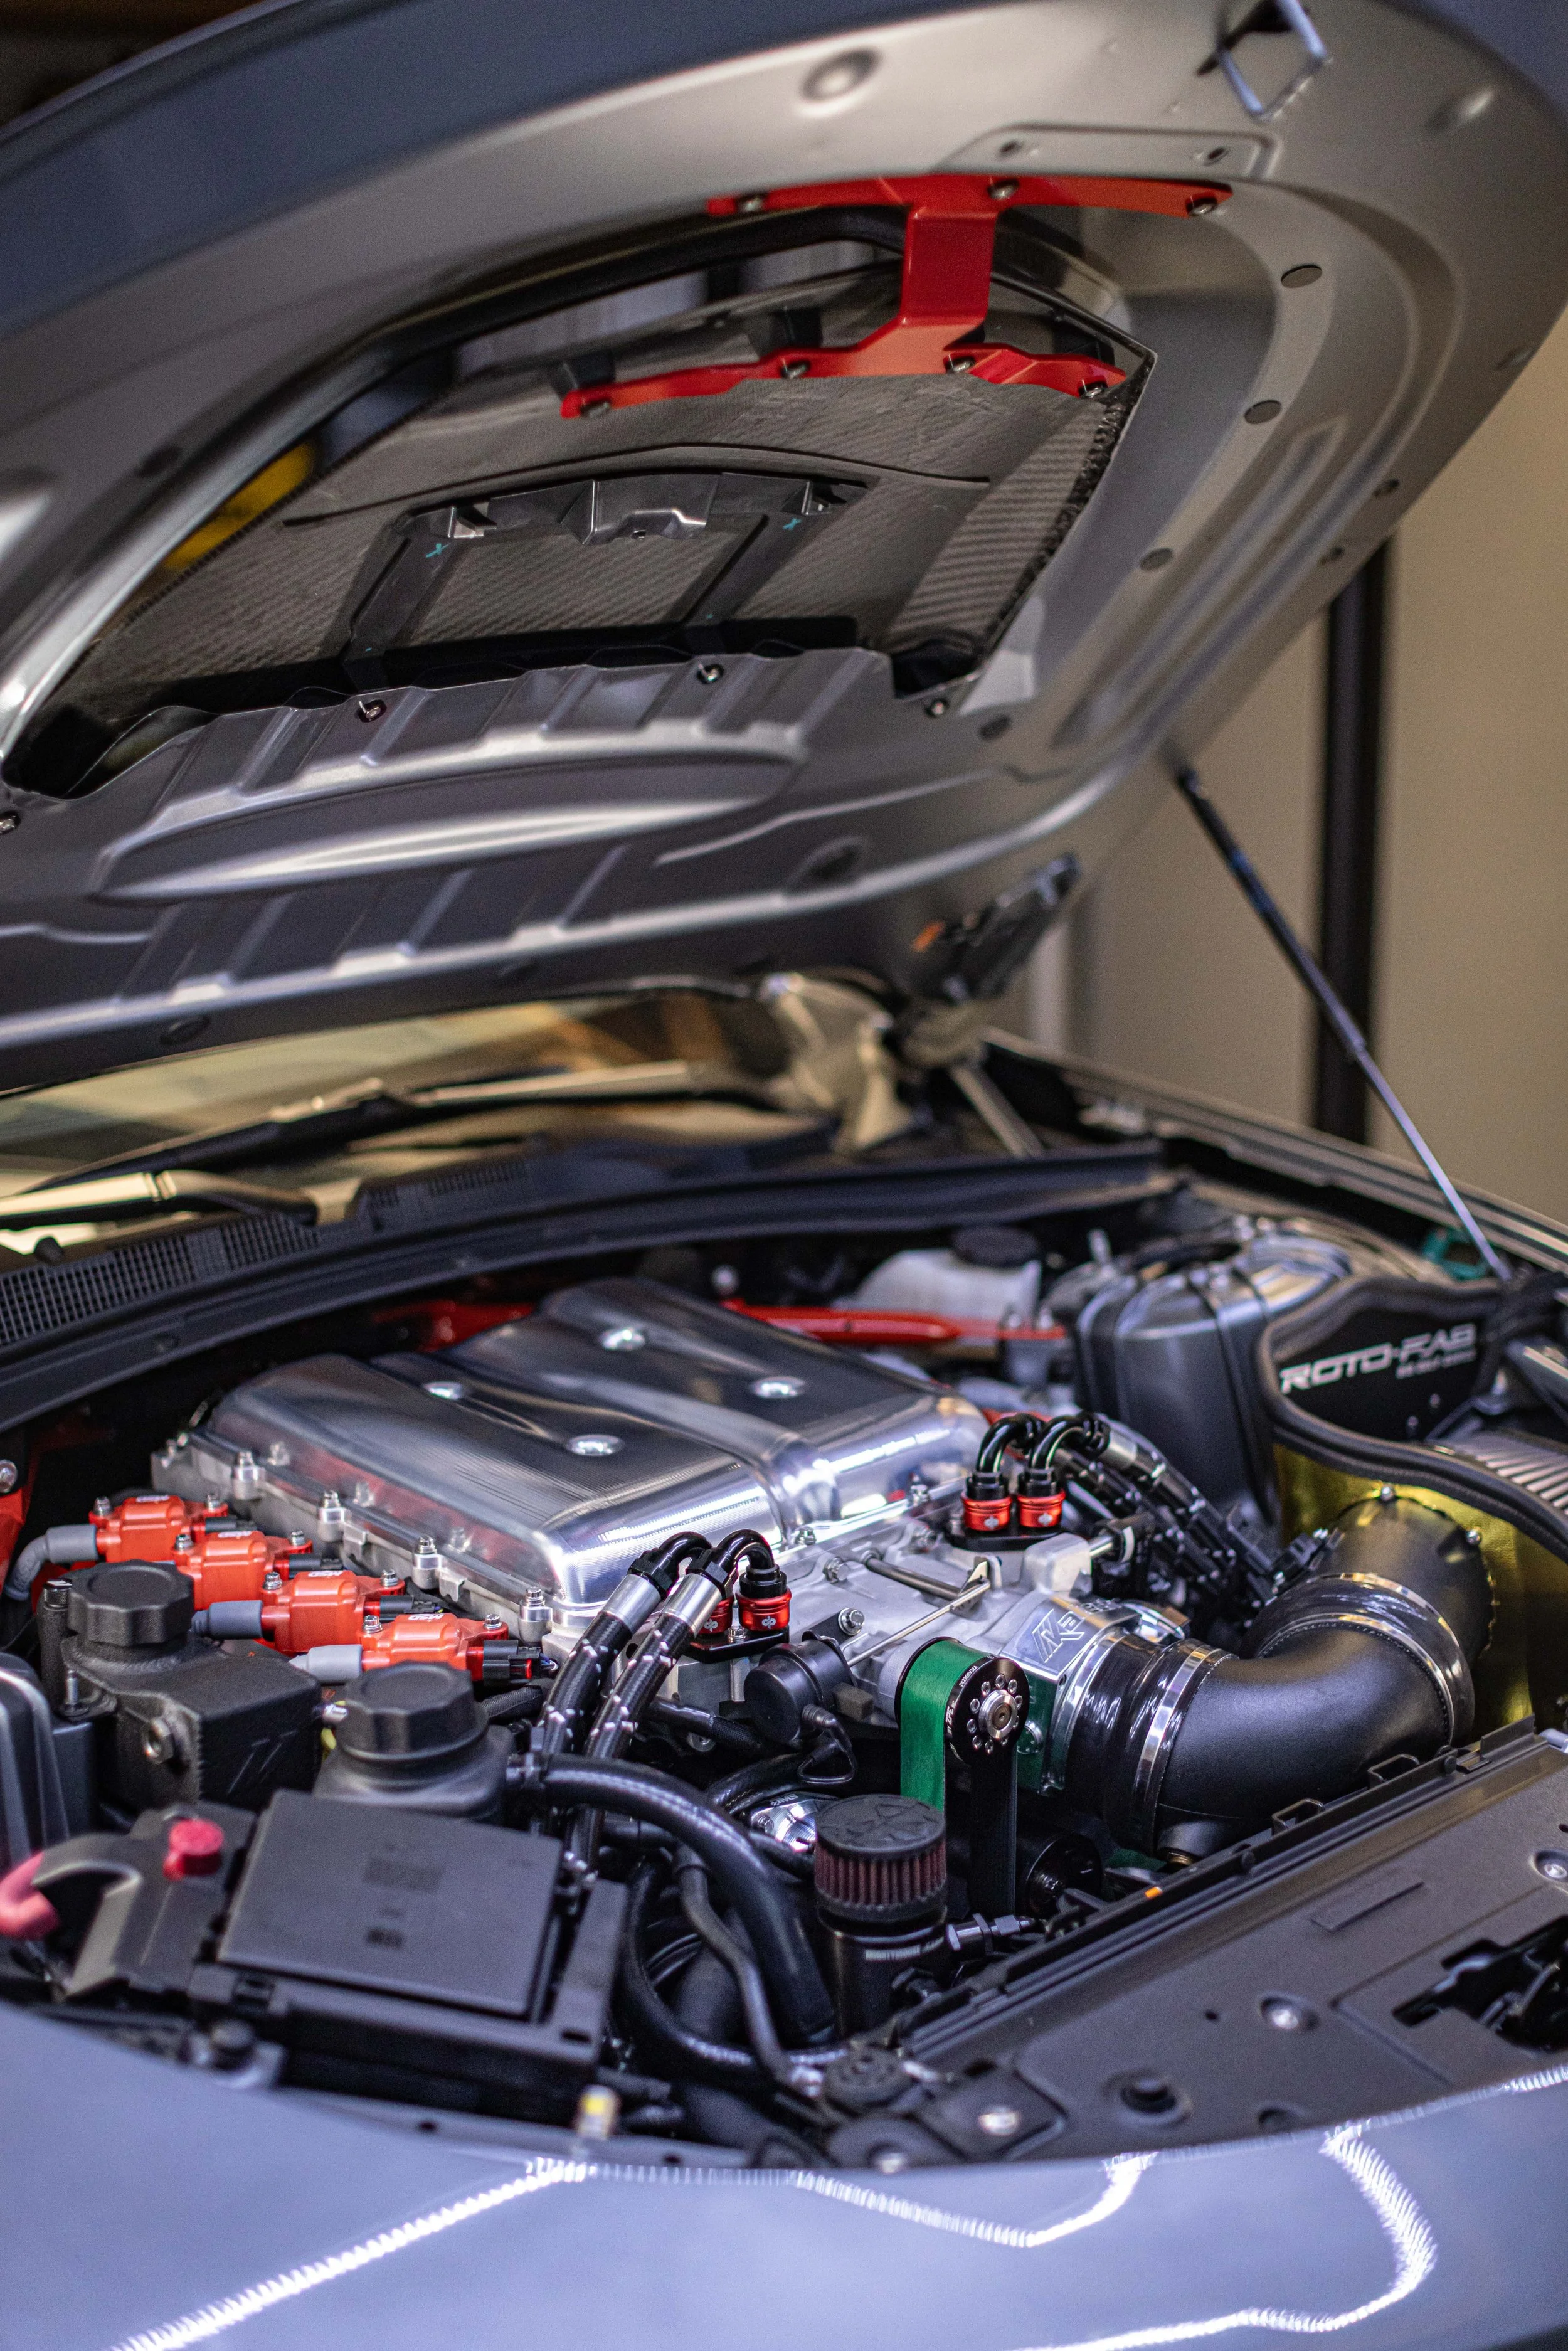
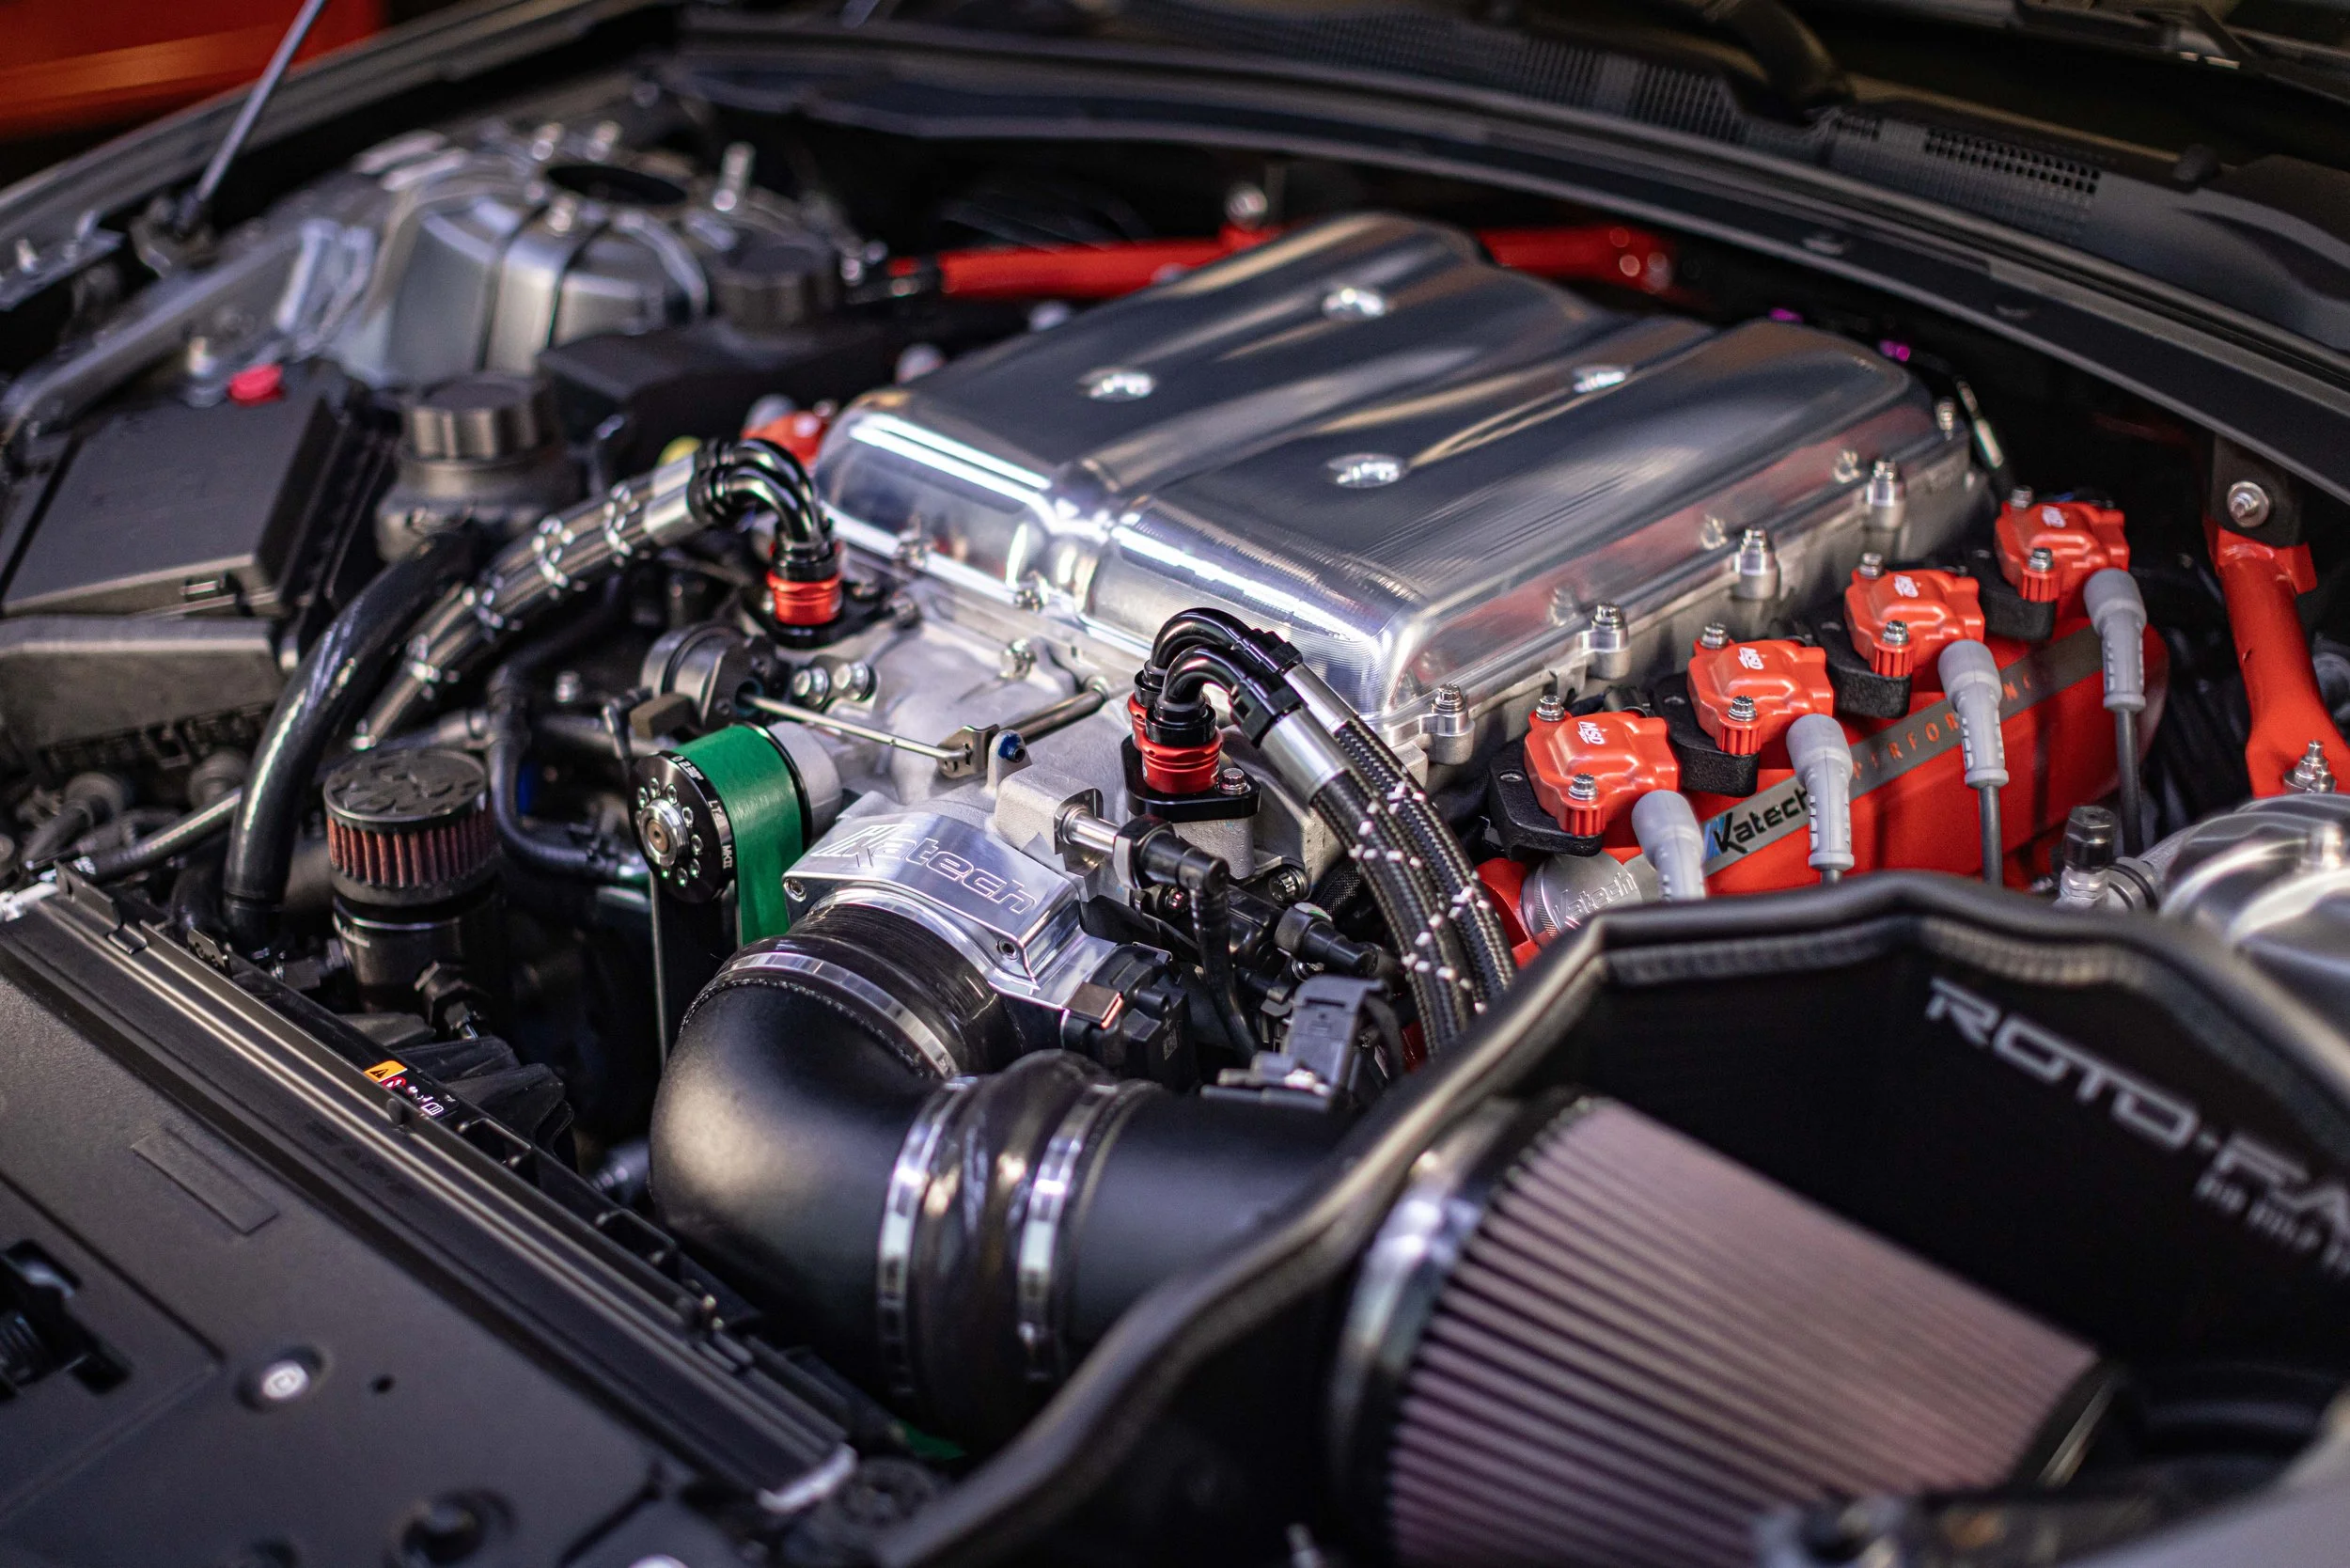
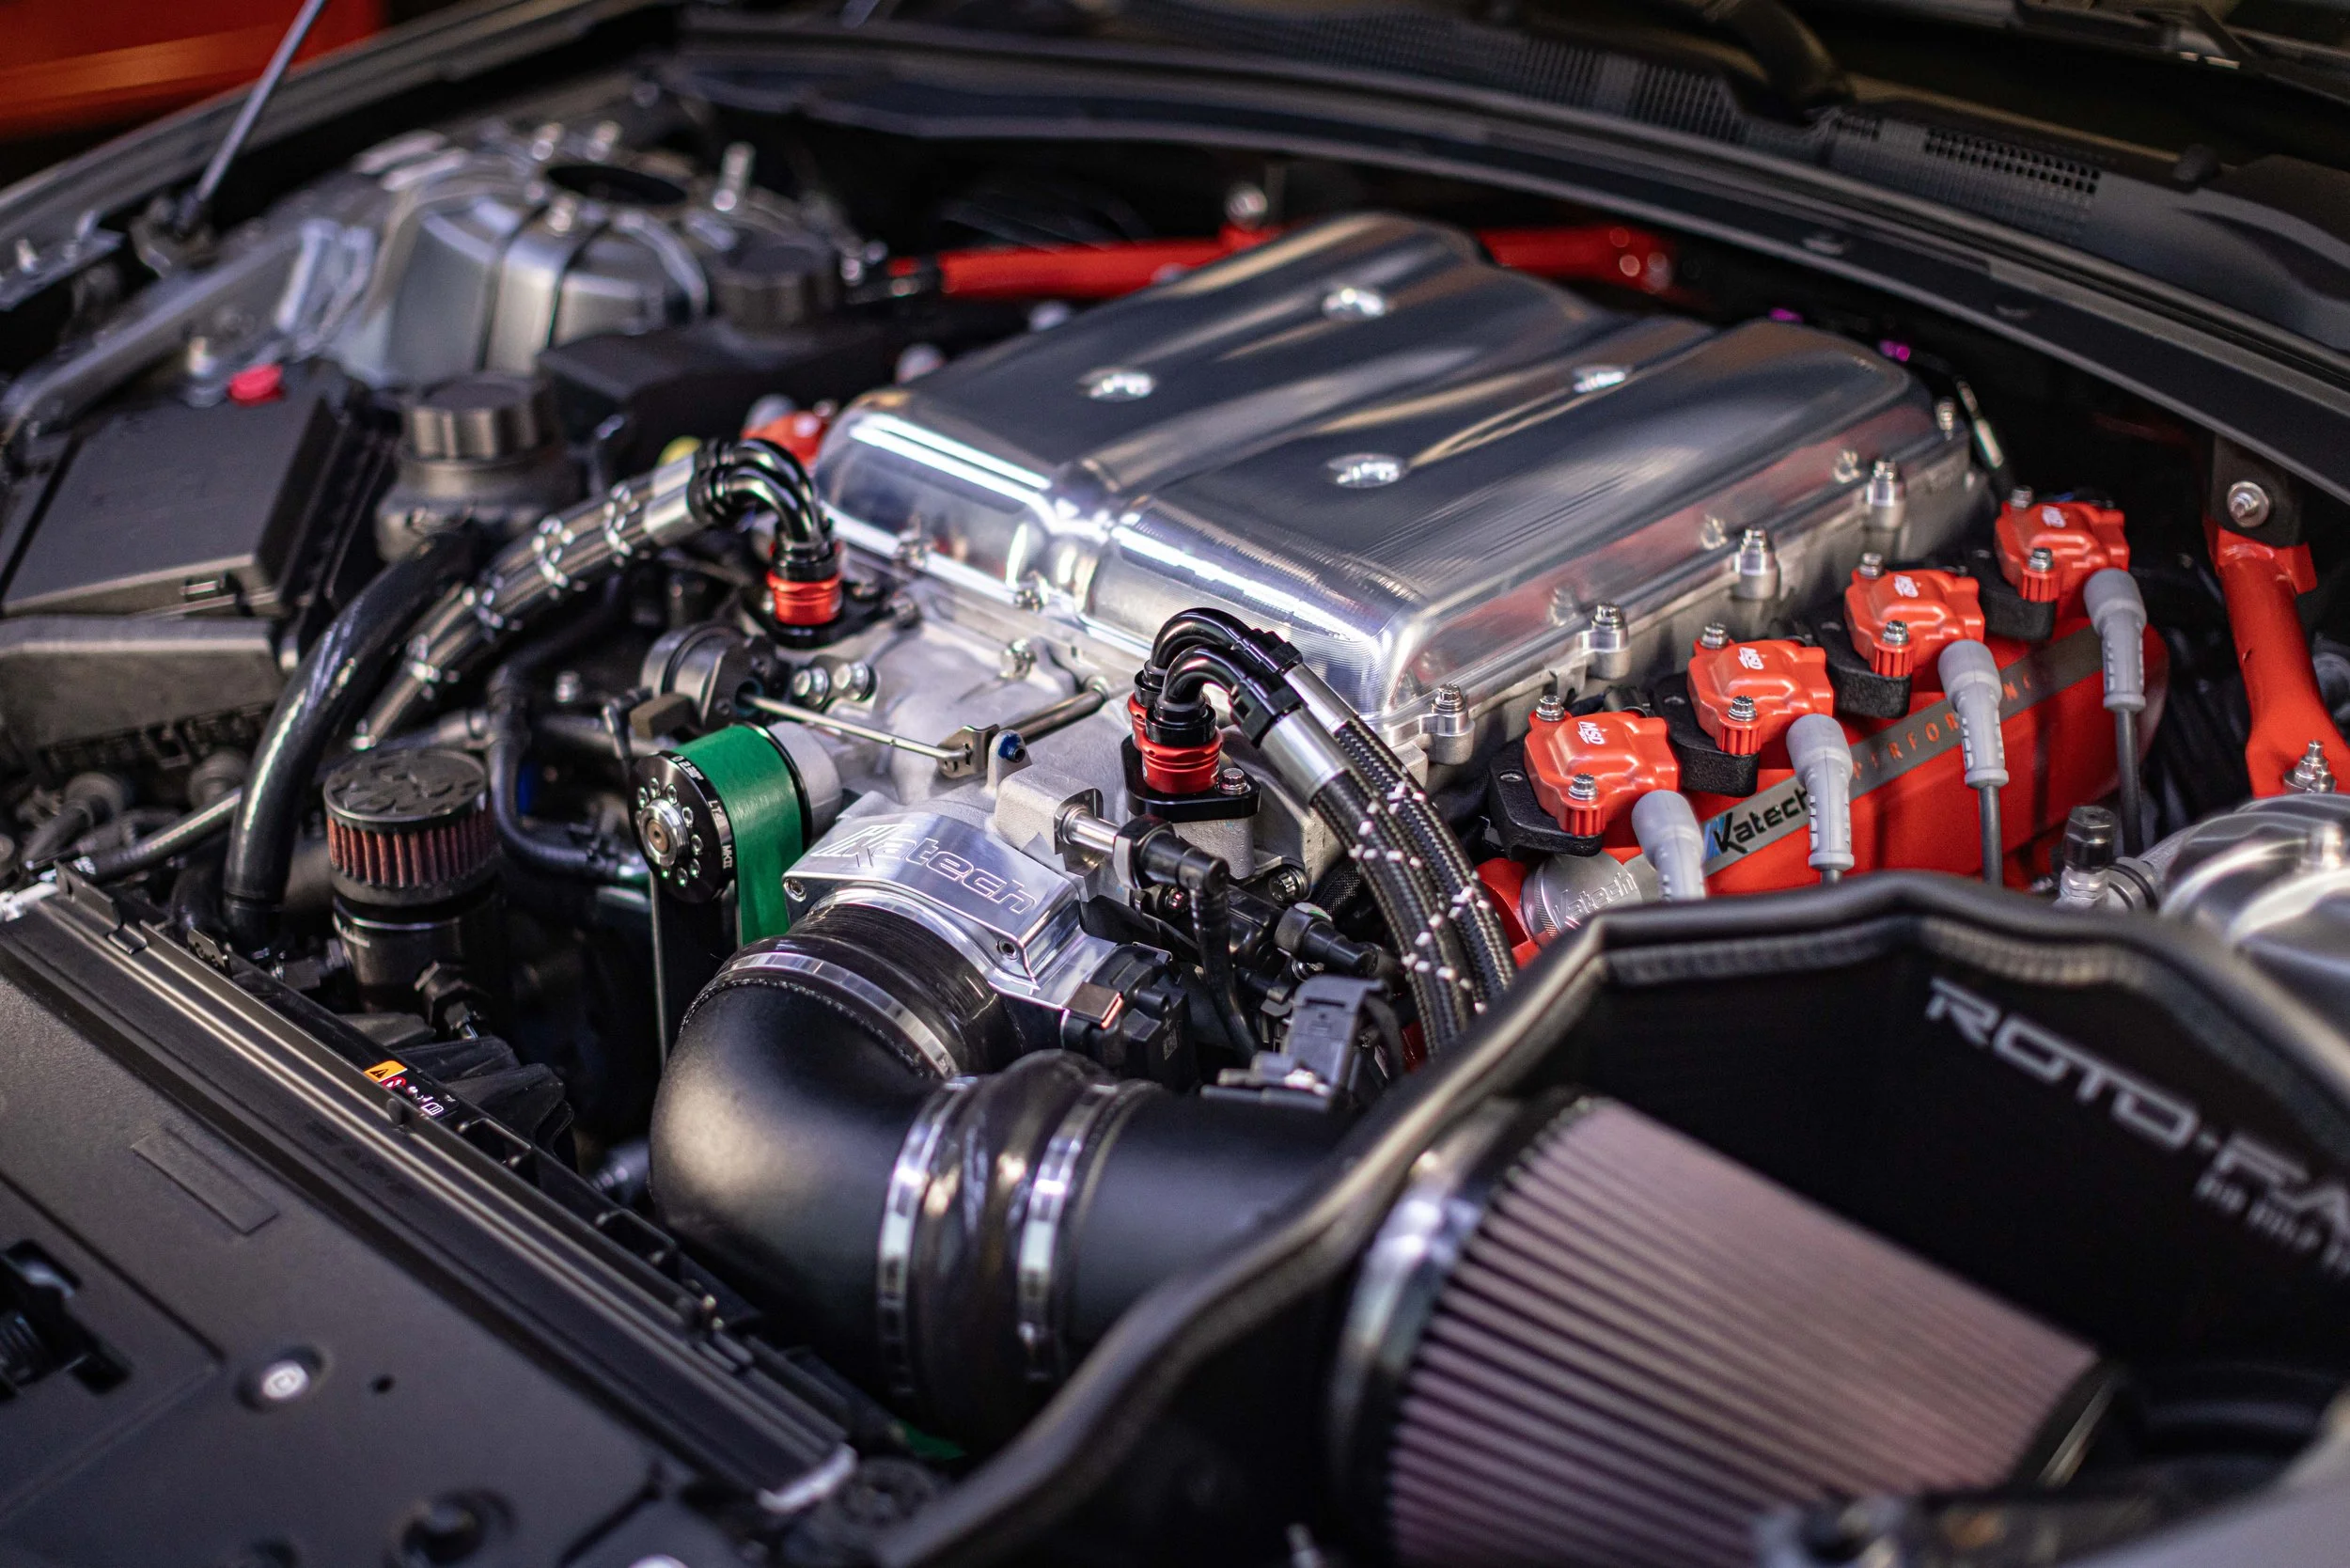
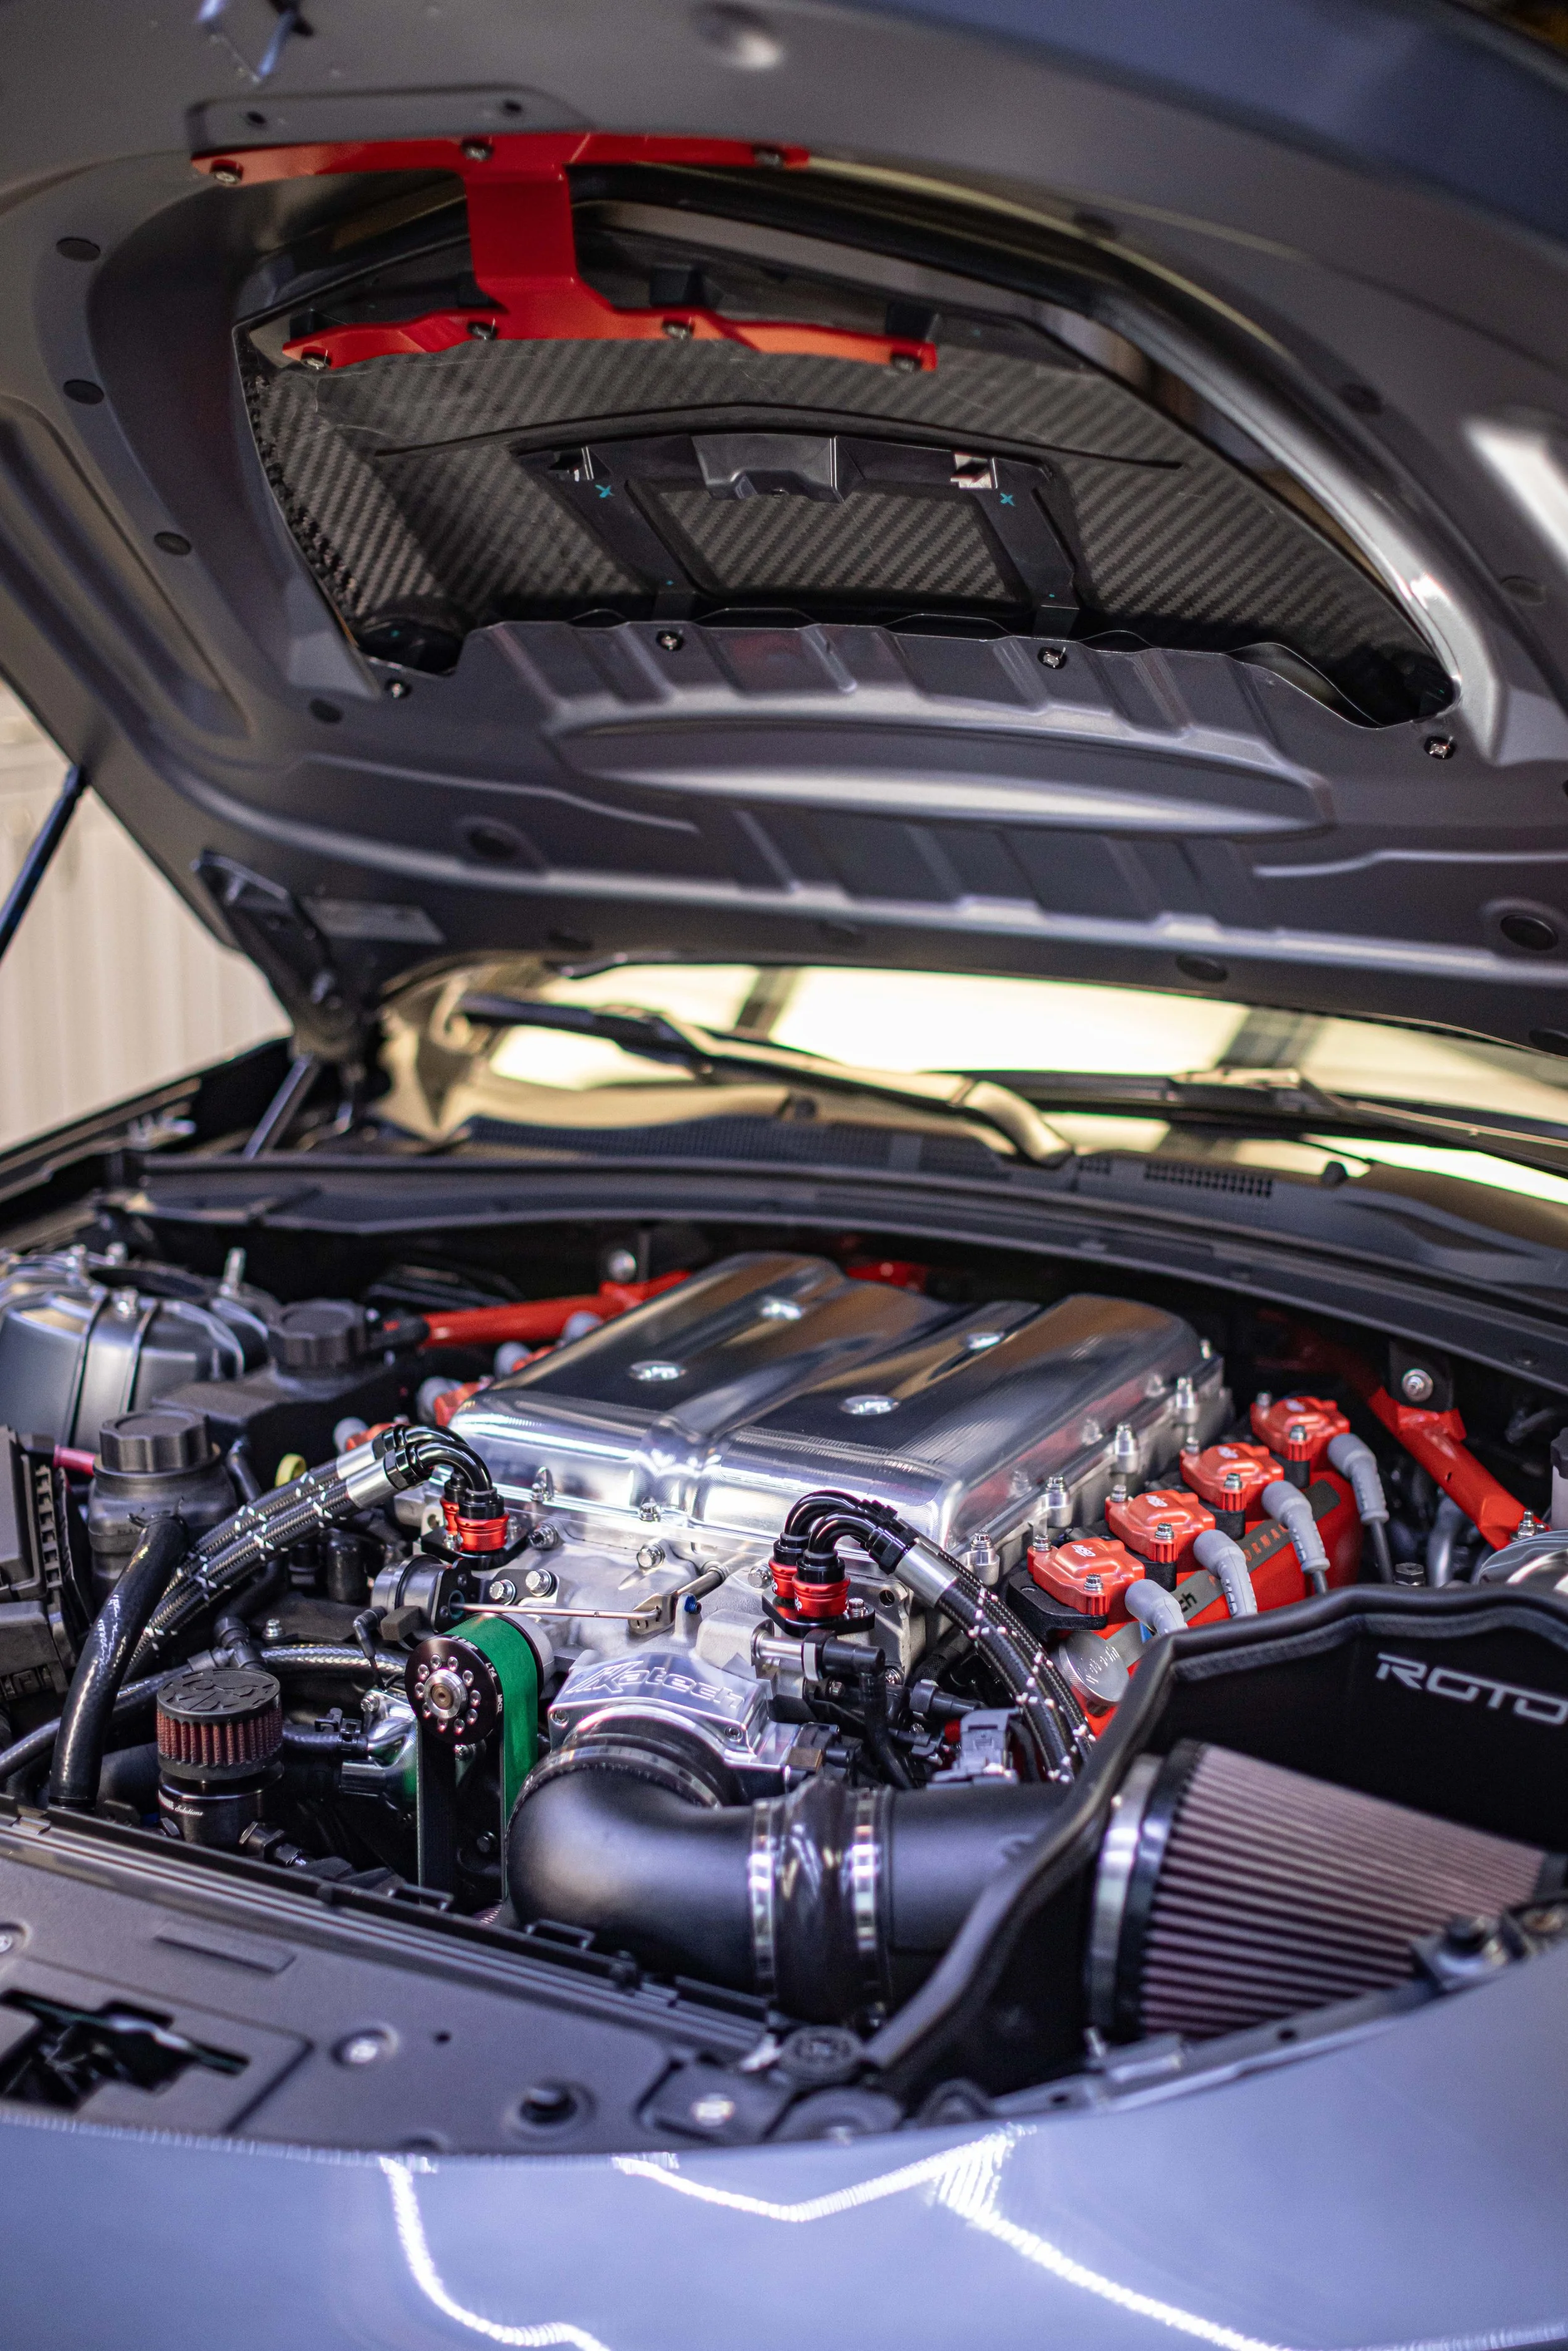
By popular demand, we have added a universal adapter and hose kit that will help not only maximize the effectiveness of the HX system, but will upgrade the appearance of your 1.7L engine bay. Our goal in developing of our Stage.III Supercharger Cooling System was simple. Improve the efficiency and effectiveness of the heat exchanger system by finding and eliminating the major restrictions, as well as adding and replacing components to improve volume and overall efficiency all while utilizing the OEM pump. Although we were seeing great results with our Stage.II system with a flow rate up to 4.0GPM we knew there was more restriction in the system, and we aimed our sights at the restrictive crossover tube. Knowing that we wanted our kit to look as good as it performed, and still be able to offer a bundle discount, it was critical to get the part combination perfect. After testing several combinations and hose configurations we settled on what you see now. A universal kit that not only adds that upgraded richer look, but also unlocked another 25%+ increase in HX coolant flow bumping our test car up to 5.1GPM (thats a 54% increase from our 2.8GPM baseline) all while utilizing the OEM pump. To make things even better our bundle pricing saves you over $150 versus purchasing separately!
Why Delete the Factory Crossover?
A larger heat exchanger and a stronger pump are only part of an effective supercharger cooling system. The plumbing between those components and the intercooler bricks also determines how much resistance the pump has to overcome.
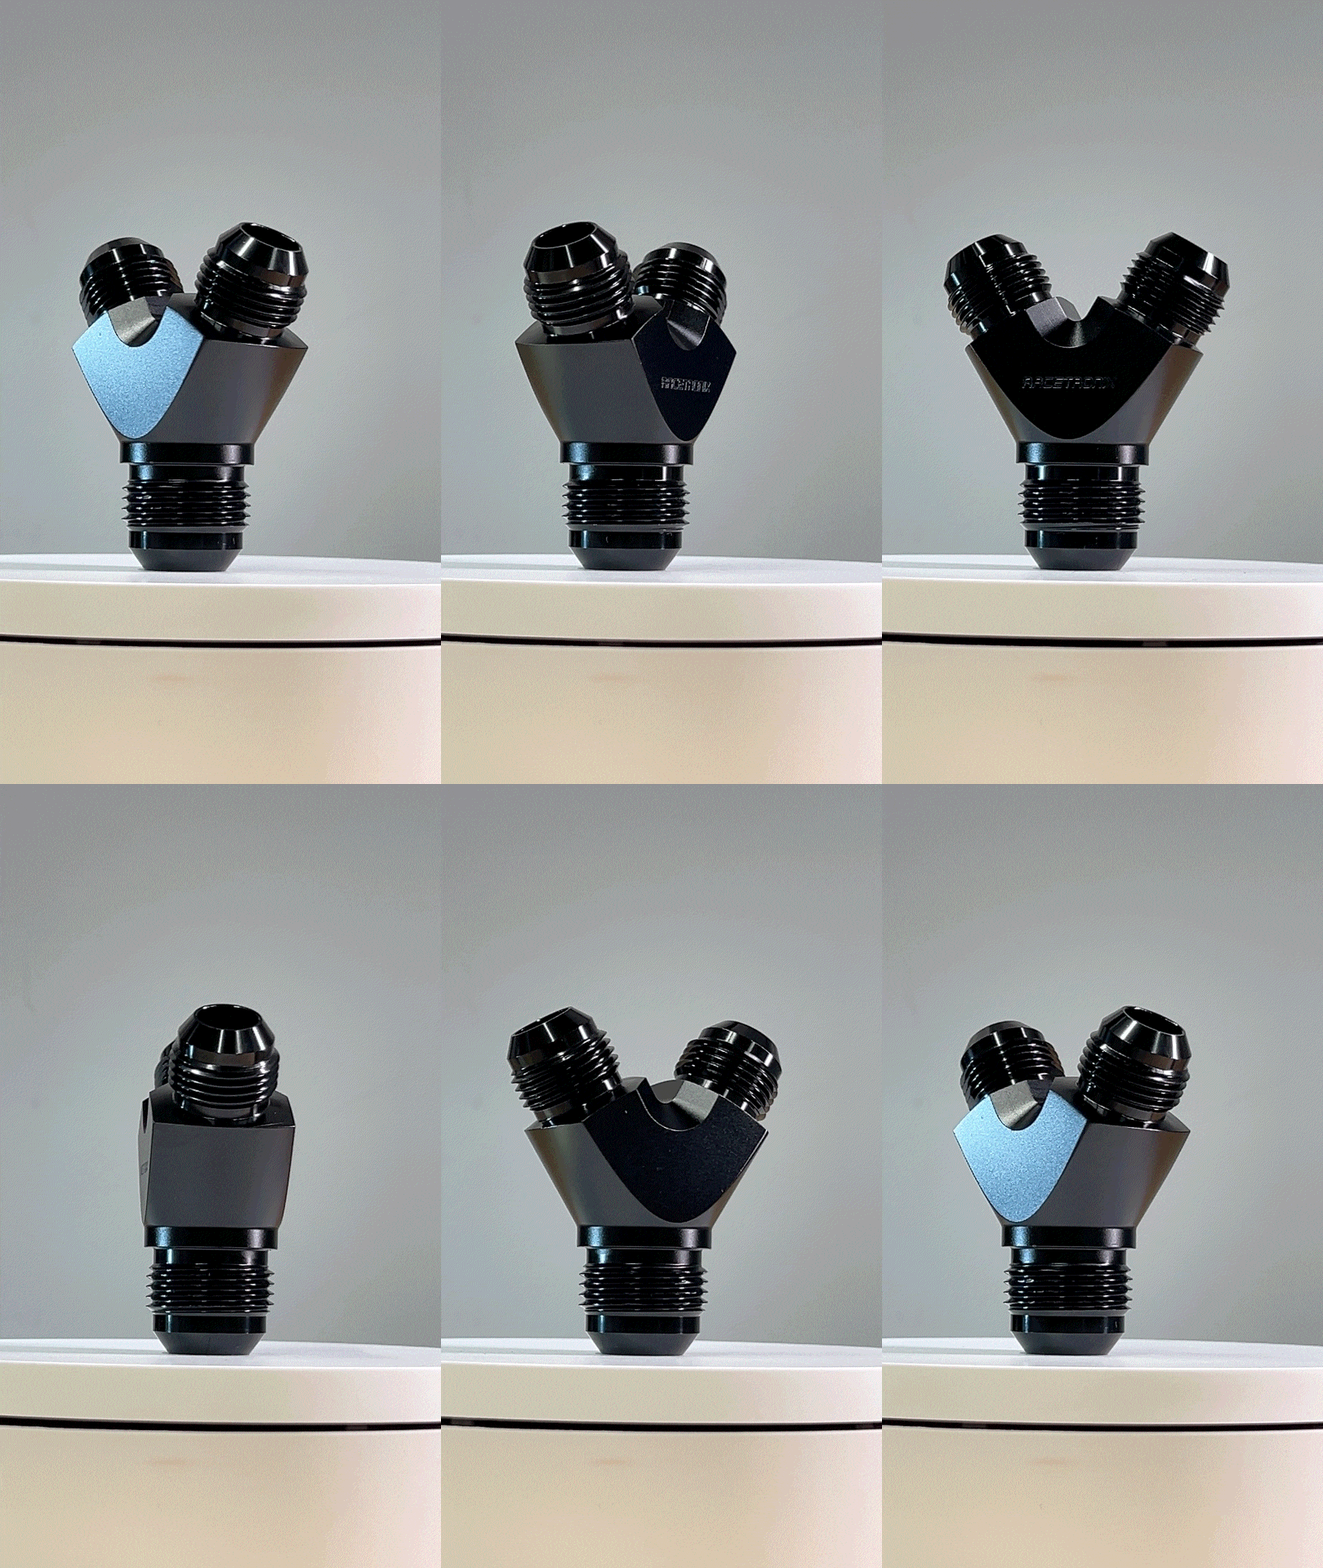
Our crossover-delete arrangement replaces the factory front crossover with individual manifolds and external supply and return branches. One Racetronix Y-block divides the incoming supply between the bricks; the other brings their return flow back together.
That gives each brick its own coolant route and opens up more control over hose layout. Another overlooked issue with the OEM crossover tube design is the fact that it creates an IAT imbalance from bank to bank due to inefficient design. Recent test verified a 10 degree difference between the driver and passenger side due to coolant velocity which causes a starving effect on the drivers side intercooler brick. Another issue resolved with this new dedicated in/out kit.
Custom GMS Monoblock Manifolds
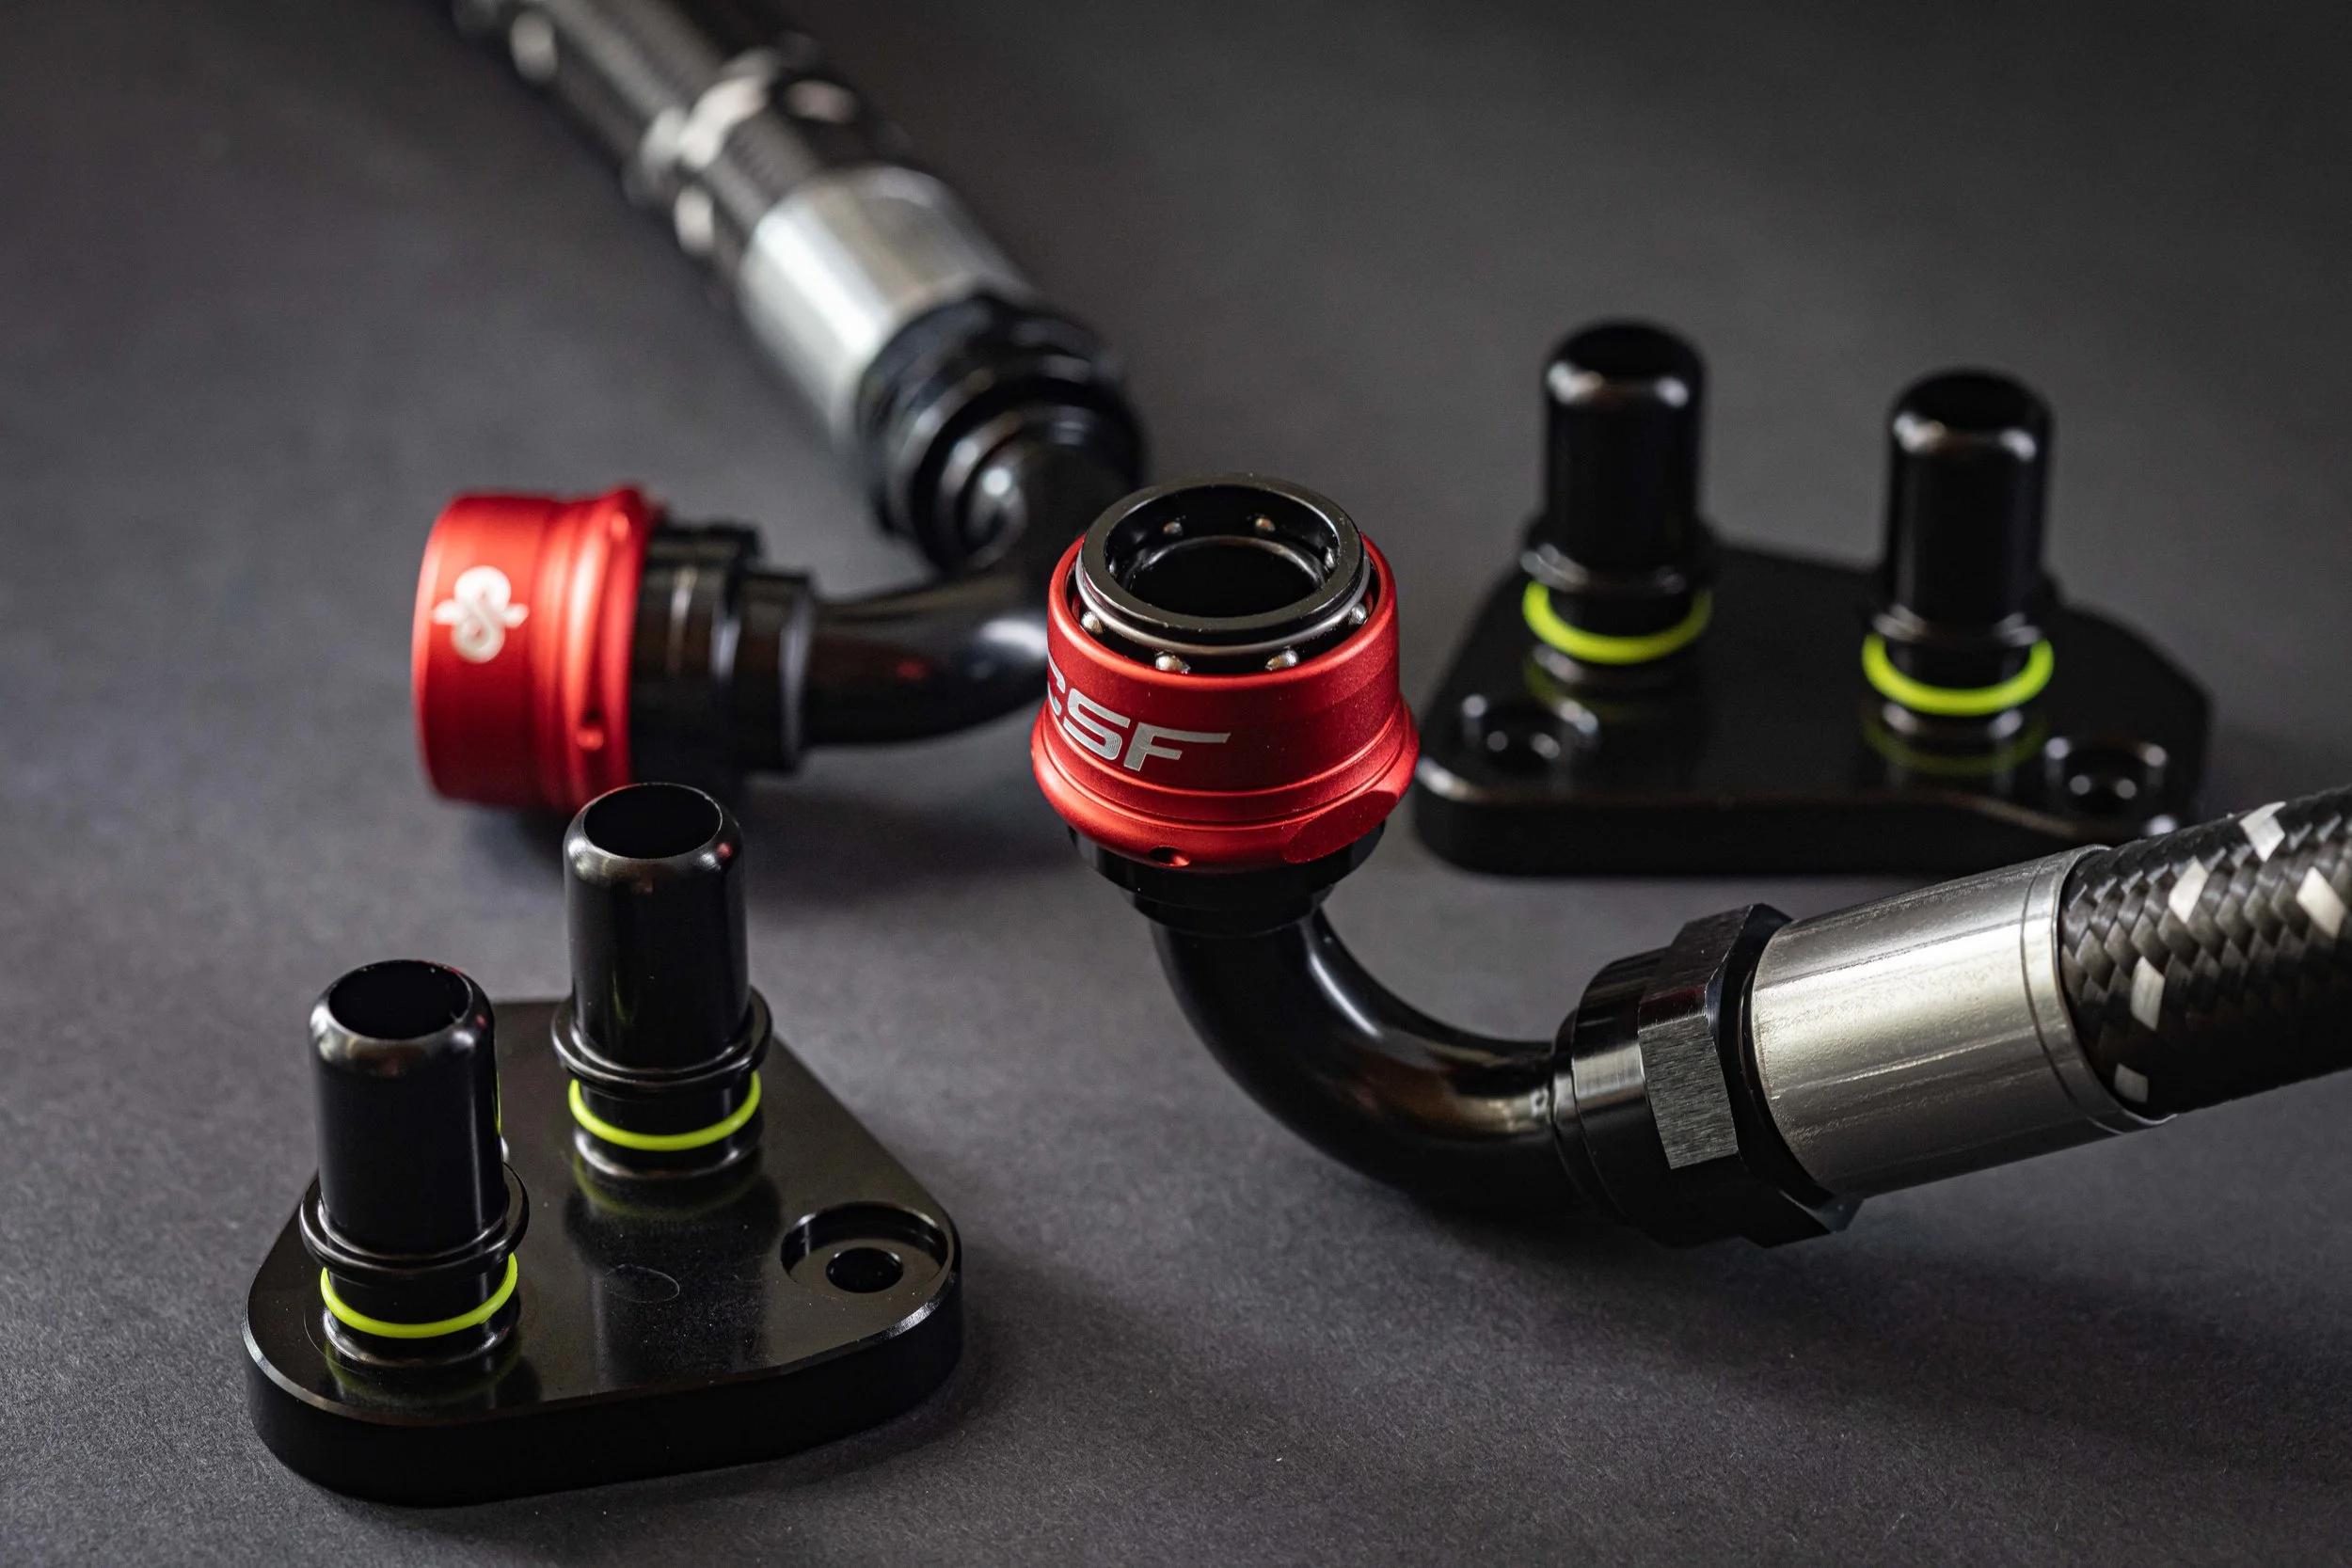
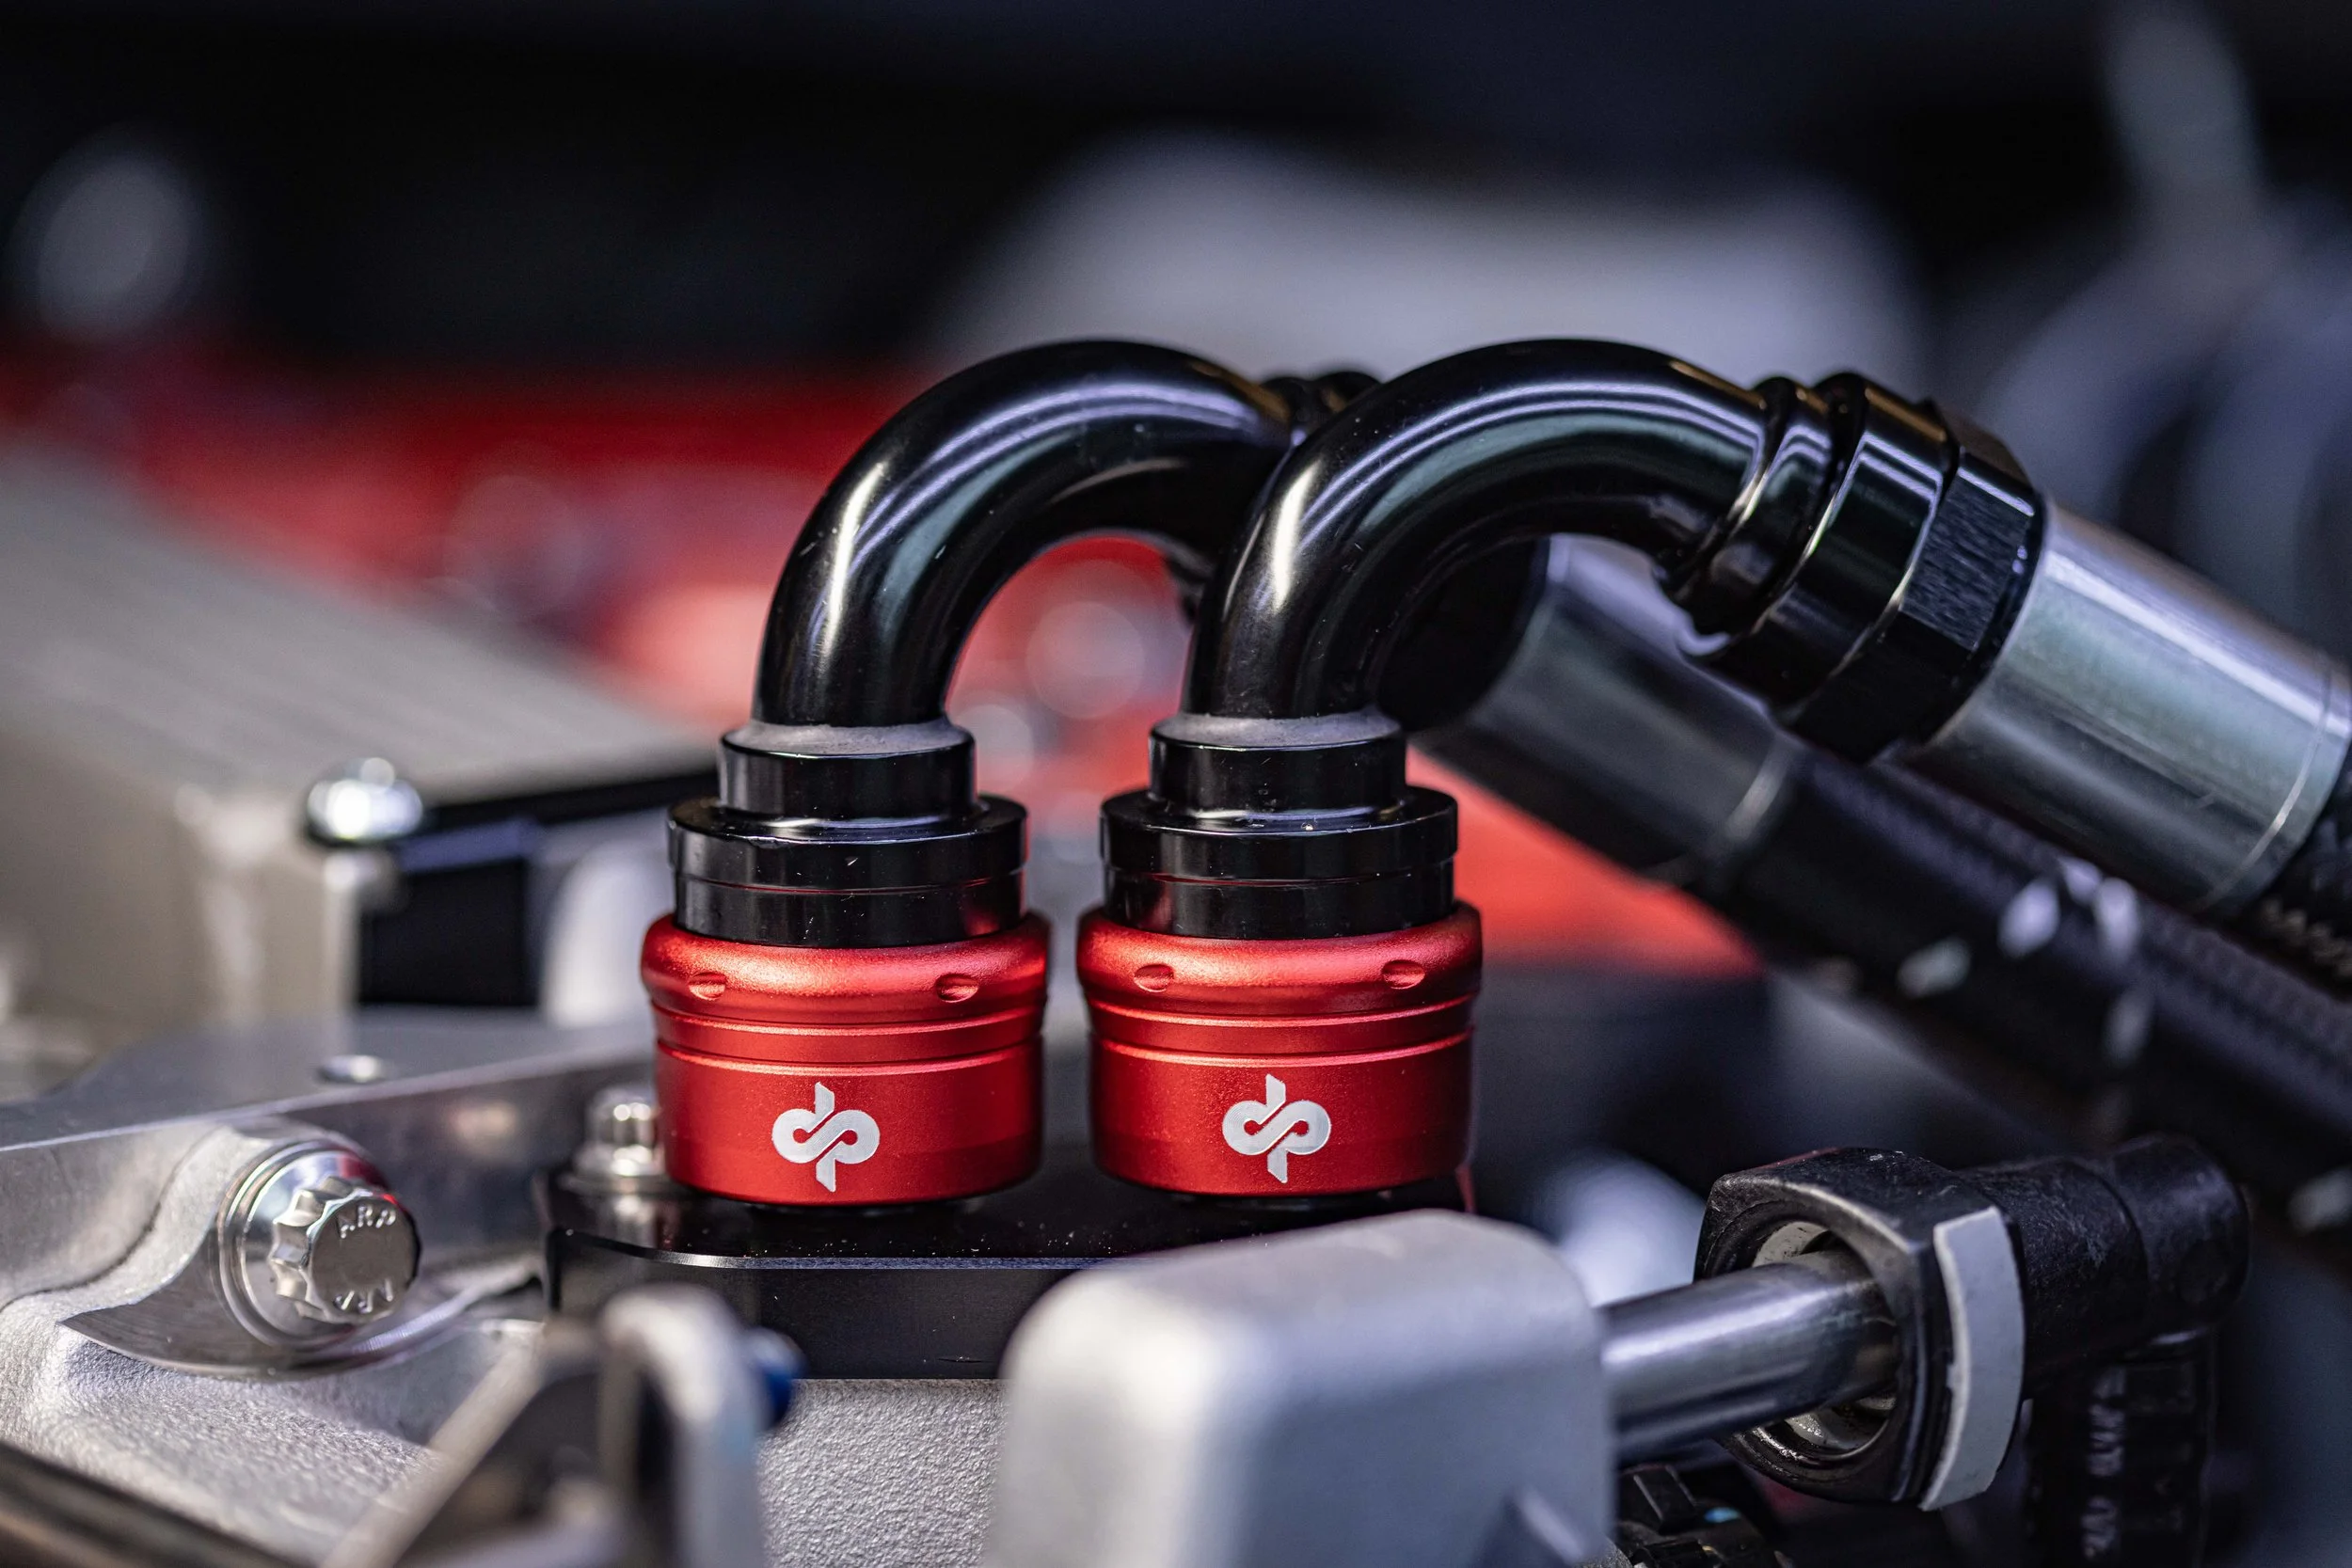
In order to prevent additional leak points and allow for easy installation, we had these manifolds made specifically around the revised connection arrangement. Each monoblock is machined from billet aluminum and finished in black anodizing, with black mounting hardware. The one-piece construction provides a clean foundation for the DYME connections and a finished appearance that belongs alongside the other carefully selected parts in your engine bay. Just as importantly, the manifold connections are designed for easy hose removal when you need access to the supercharger.
DYME Quick Connects
If you enjoy wrenching on your car as much as driving it, you know that serviceability becomes part of the upgrade the first time something needs to come back apart.
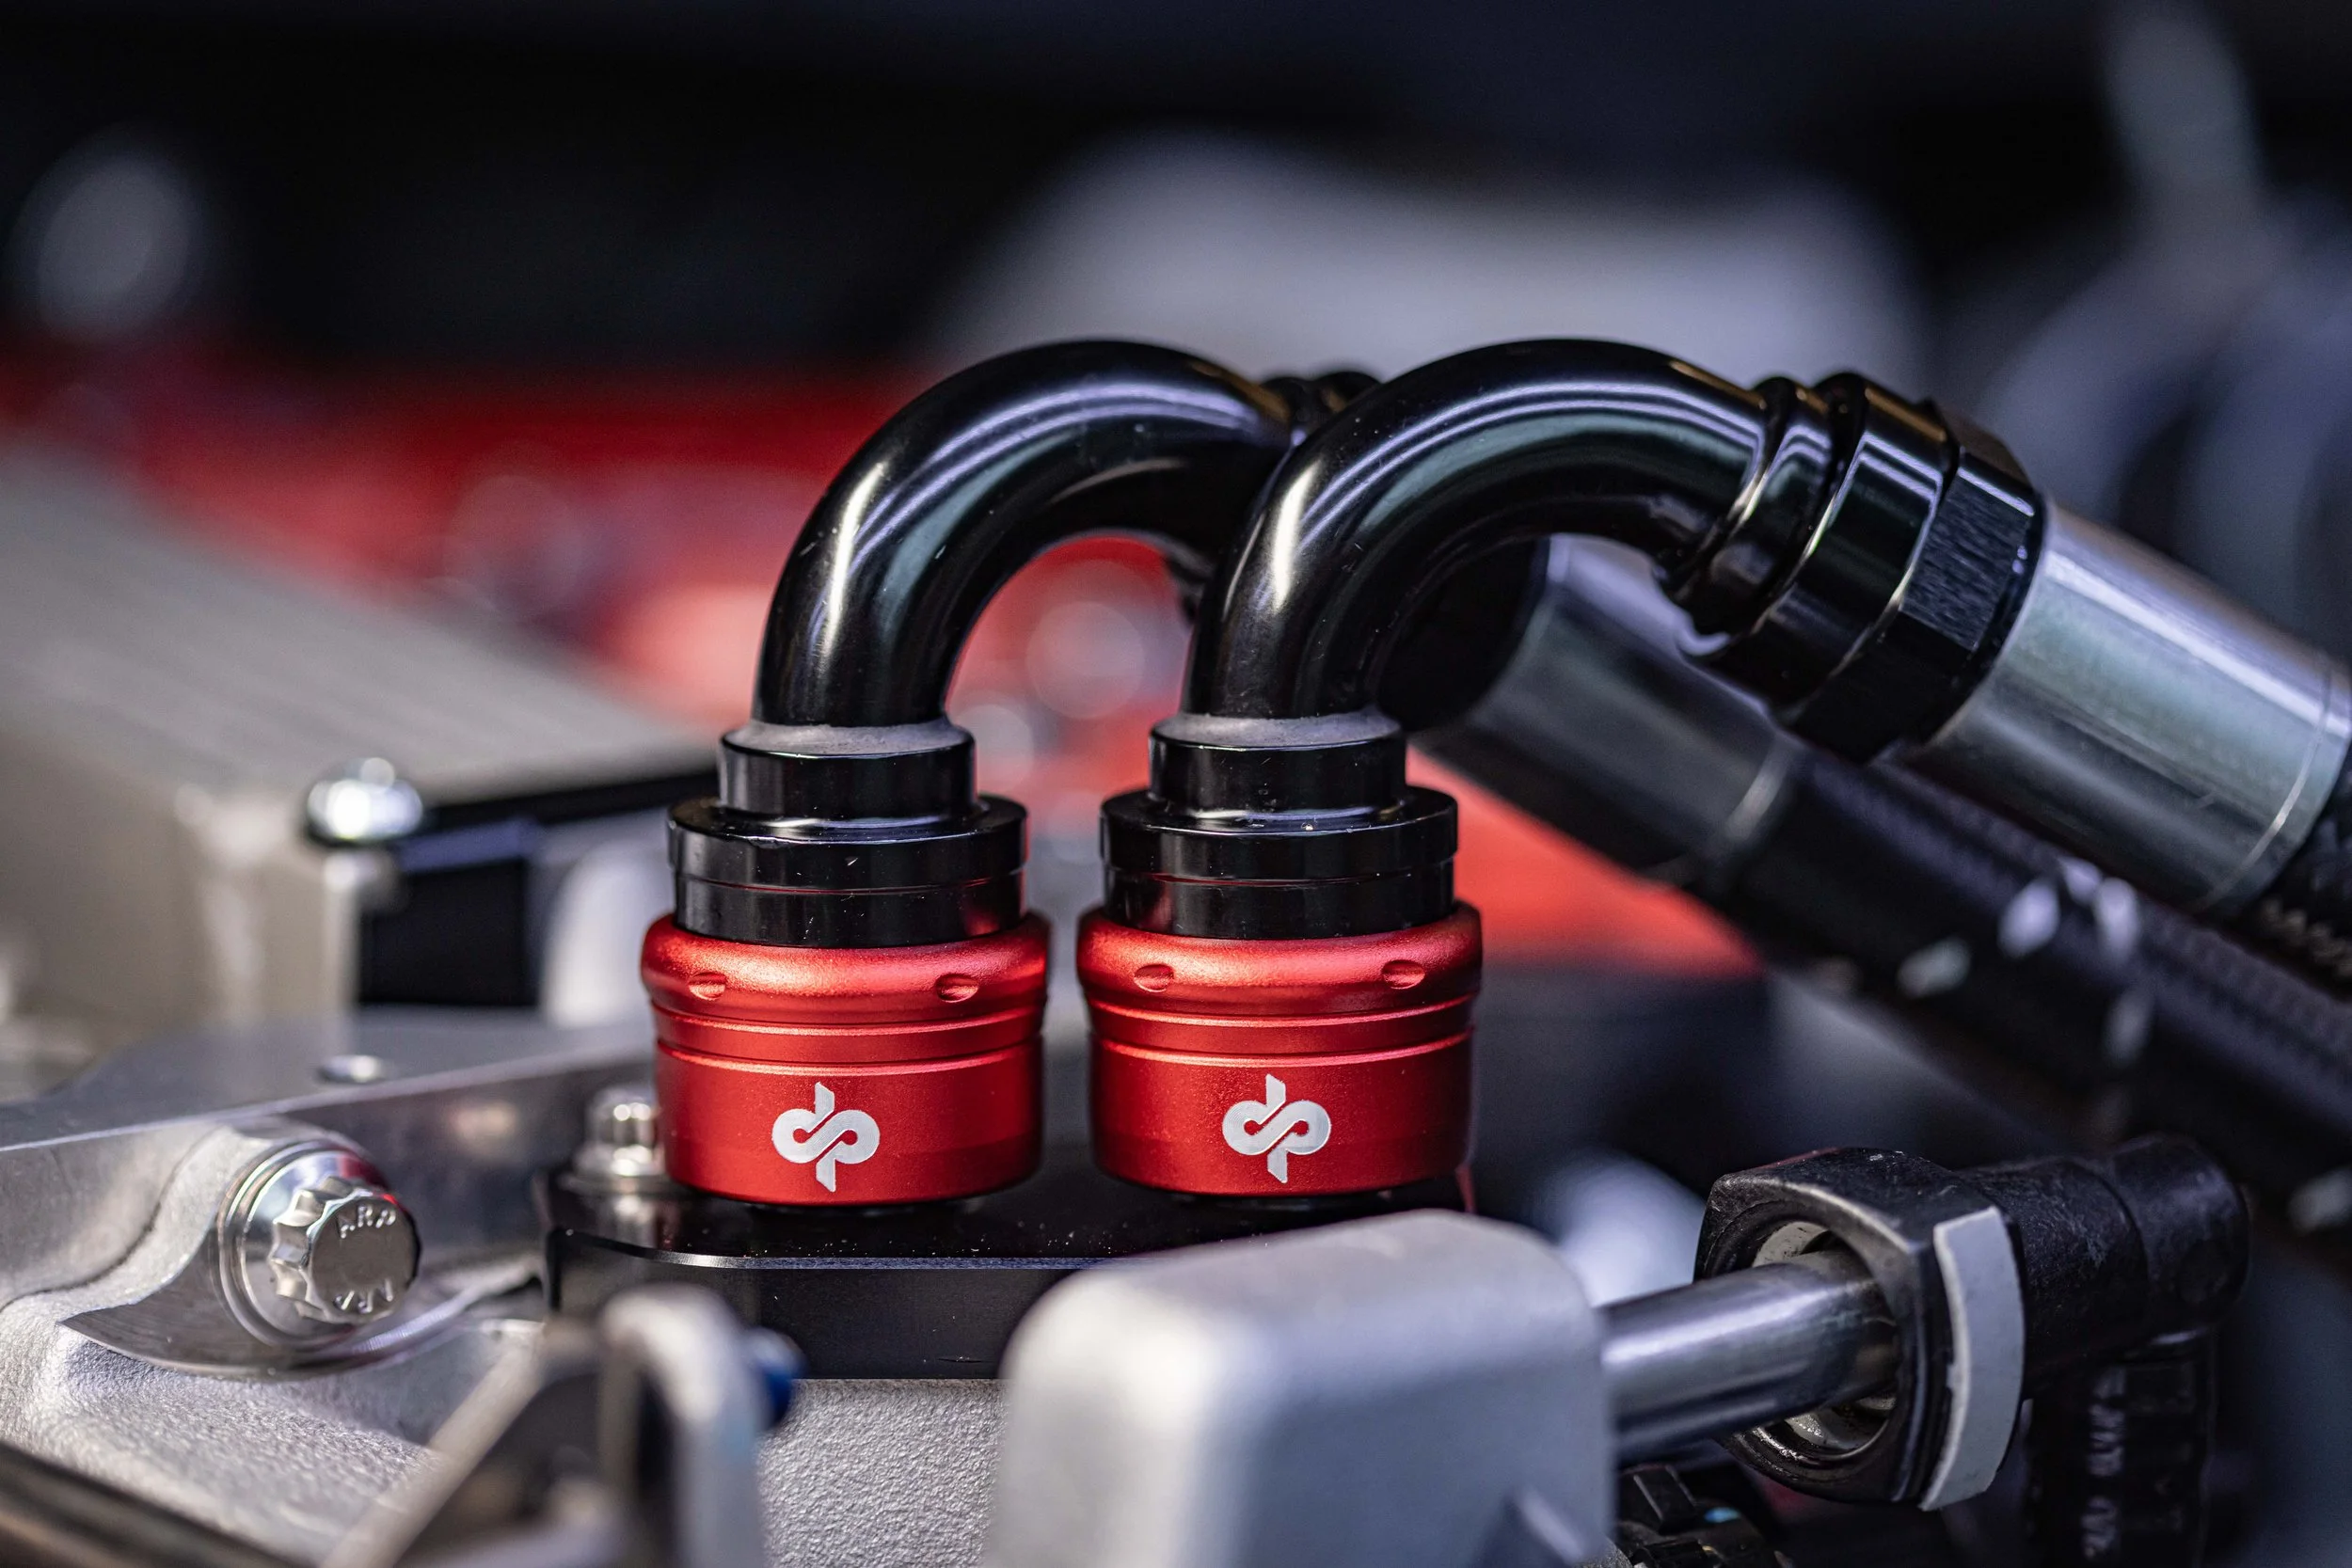
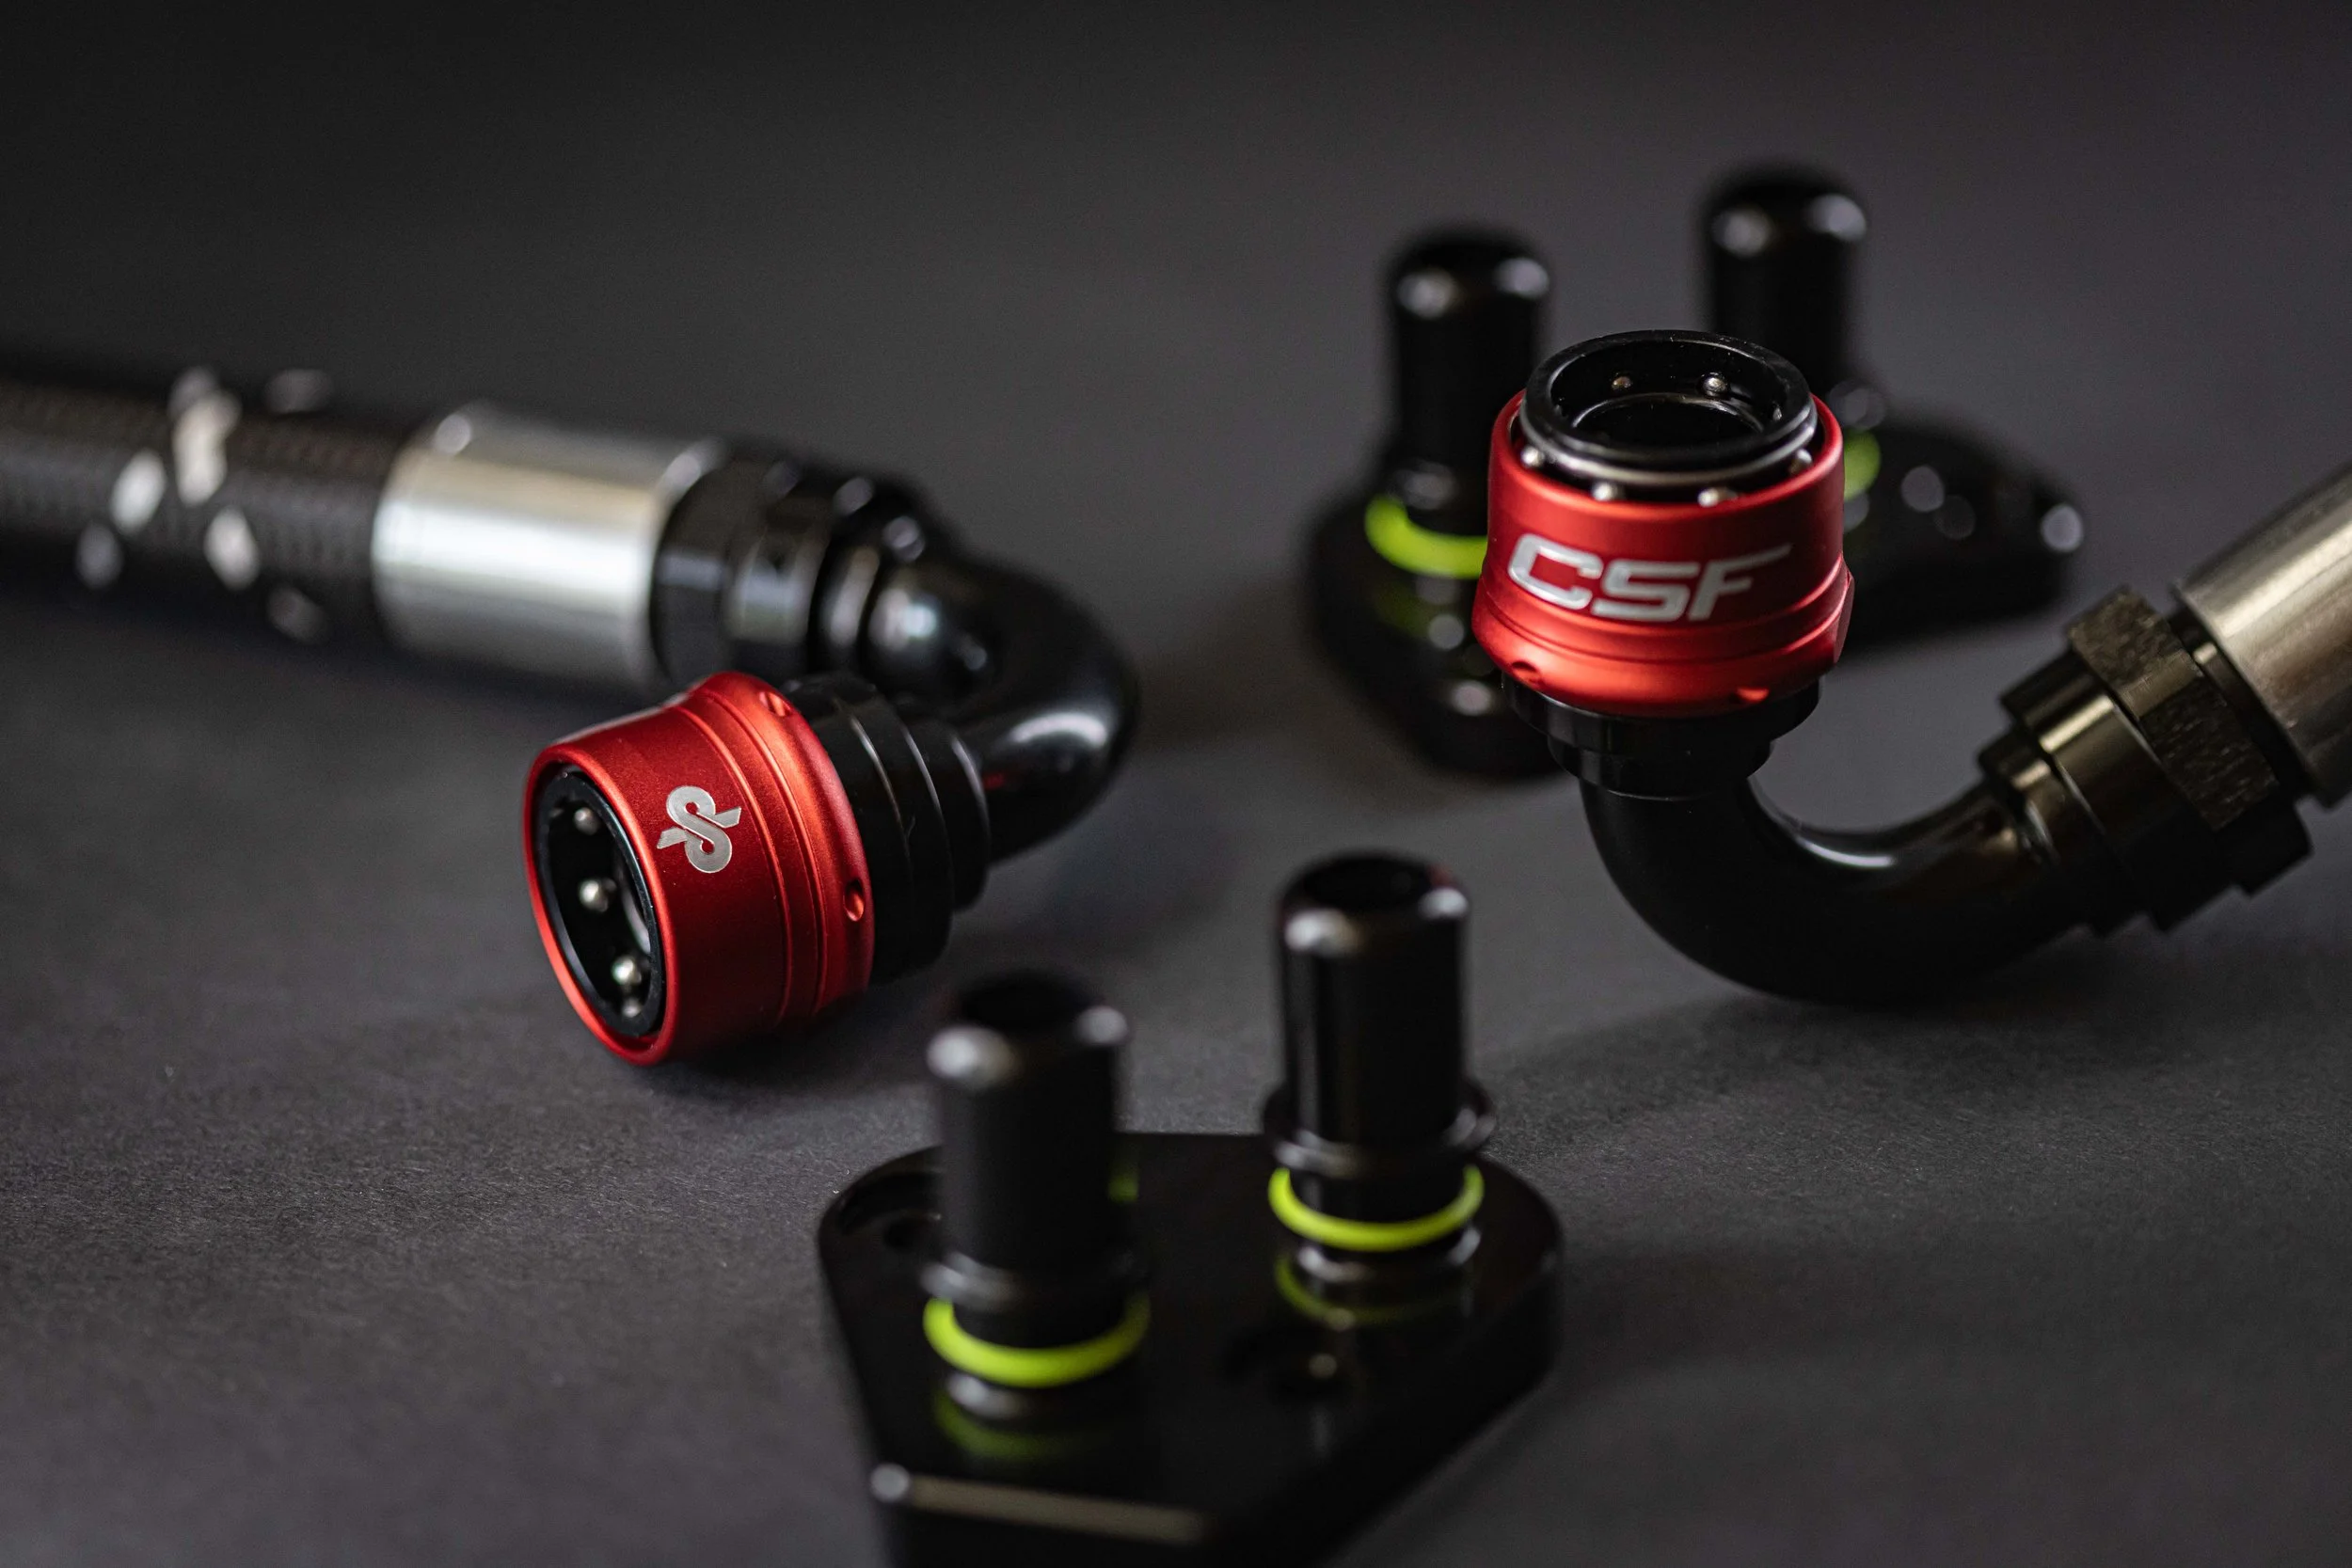
DYME’s quick-connect interface lets you separate the hose from its mating connection at the manifold without repeatedly loosening a conventional threaded AN union. The hose end stays assembled, making access simpler during supercharger service, intercooler work or future changes to the combination. Despite our greatest care, even we could not avoid scratching our AN fittings over the years, which is another reason we like this system so much!
The crimped & precut or builder & compression versions both retain quick-connect service at the manifolds. Your choice determines how the hose ends attach to the hose.
Choose Your Hose Assembly
Pre-Cut Crimped Kit — DYME SUPERSTRASSE-C
Choose this version when the GMS hose layout suits your installation and you want the hose assemblies prepared for you.
DYME -10 SUPERSTRASSE-C hose cut to the specified kit lengths.
Matched crimp-style hose ends assembled onto the hoses.
DYME quick-connect service at the manifold connections.
A convenient option when you want to spend less time building hoses.
Confirm the routing suits your vehicle and existing cooling components before ordering a pre-cut set.
Builder Kit — DYME SUPERSTRASSE-R
For those of us who want to control every bend and every inch of hose, the builder kit leaves the routing in your hands.
Includes 10 feet of DYME -10 SUPERSTRASSE-R hose.
Supplied with matching reusable compression-style hose ends.
Cut and assemble the hoses to suit your particular layout.
Useful for custom reservoir locations, modified engine bays and individually planned coolant routing.
Tools are used to build the reusable hose assemblies; subsequent manifold disconnection takes place at the DYME quick-connect interface.
Why SUPERSTRASSE Hose?
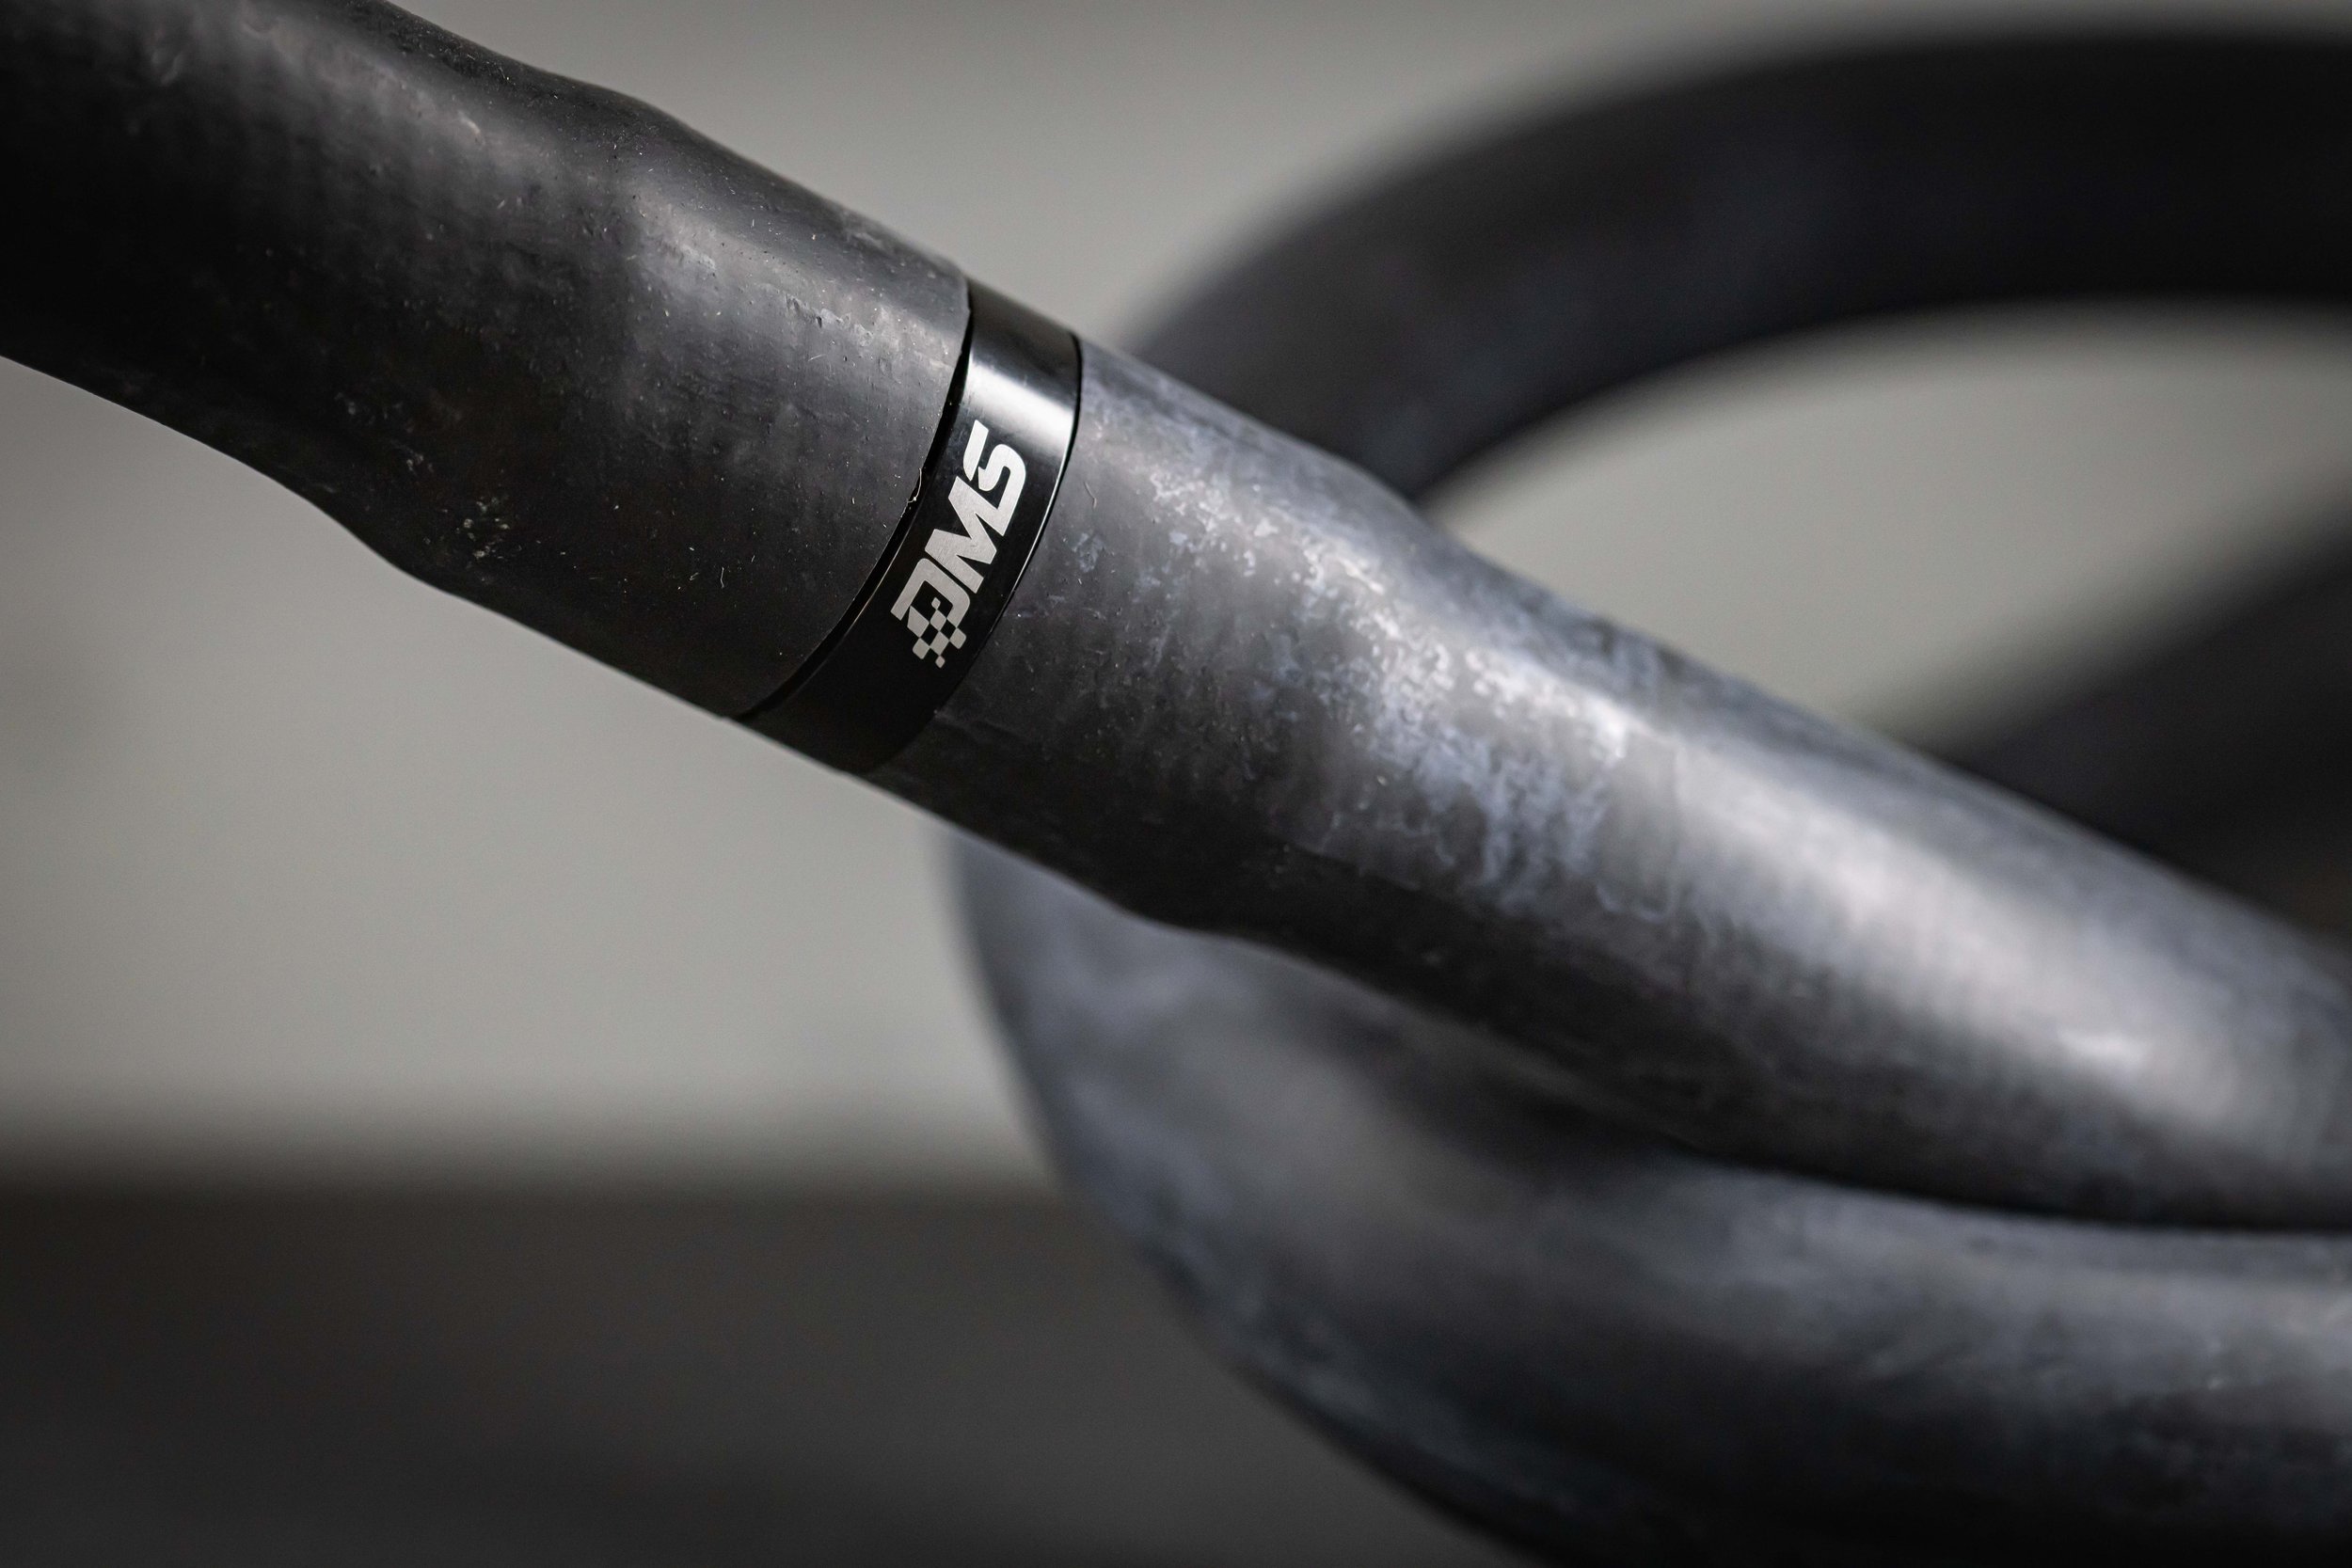
Both versions use CPE-lined rubber hose with 304 stainless-steel reinforcement and a protective outer braid. DYME specifies a continuous hose temperature capability of up to 302°F (150°C).
That construction combines reinforcement with the flexibility needed to route around a crowded LT4 engine bay. The crimp and reusable versions are selected to match their respective hose-end systems.
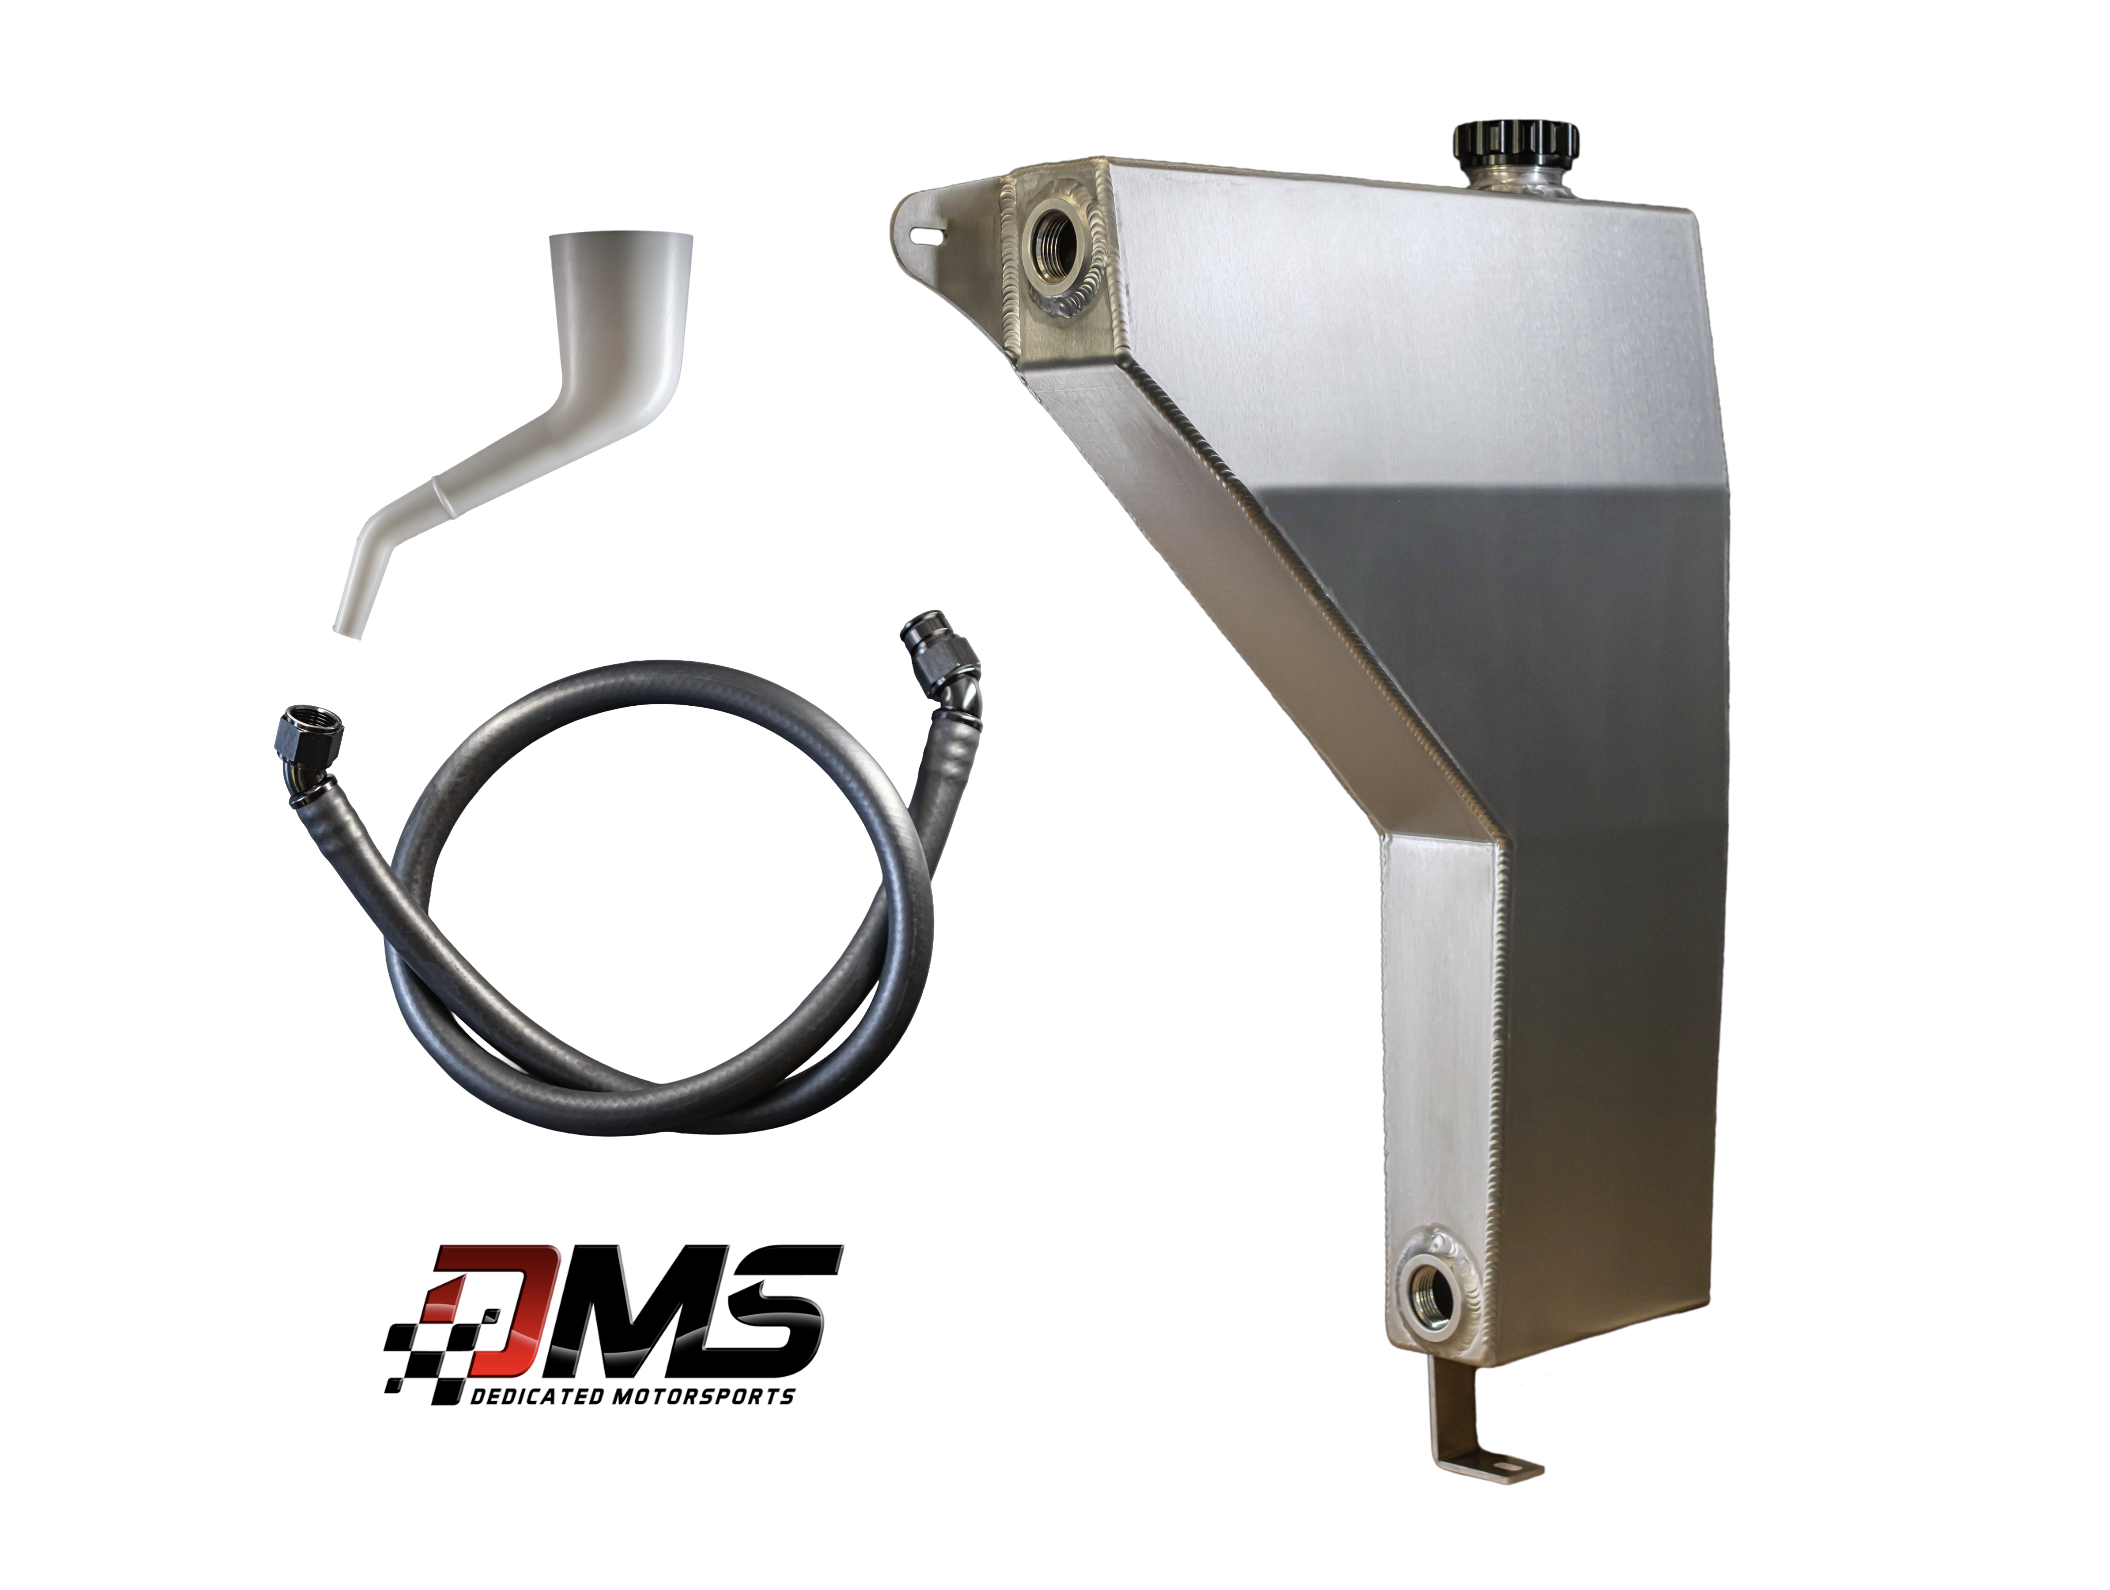
Why the reservoir matters…
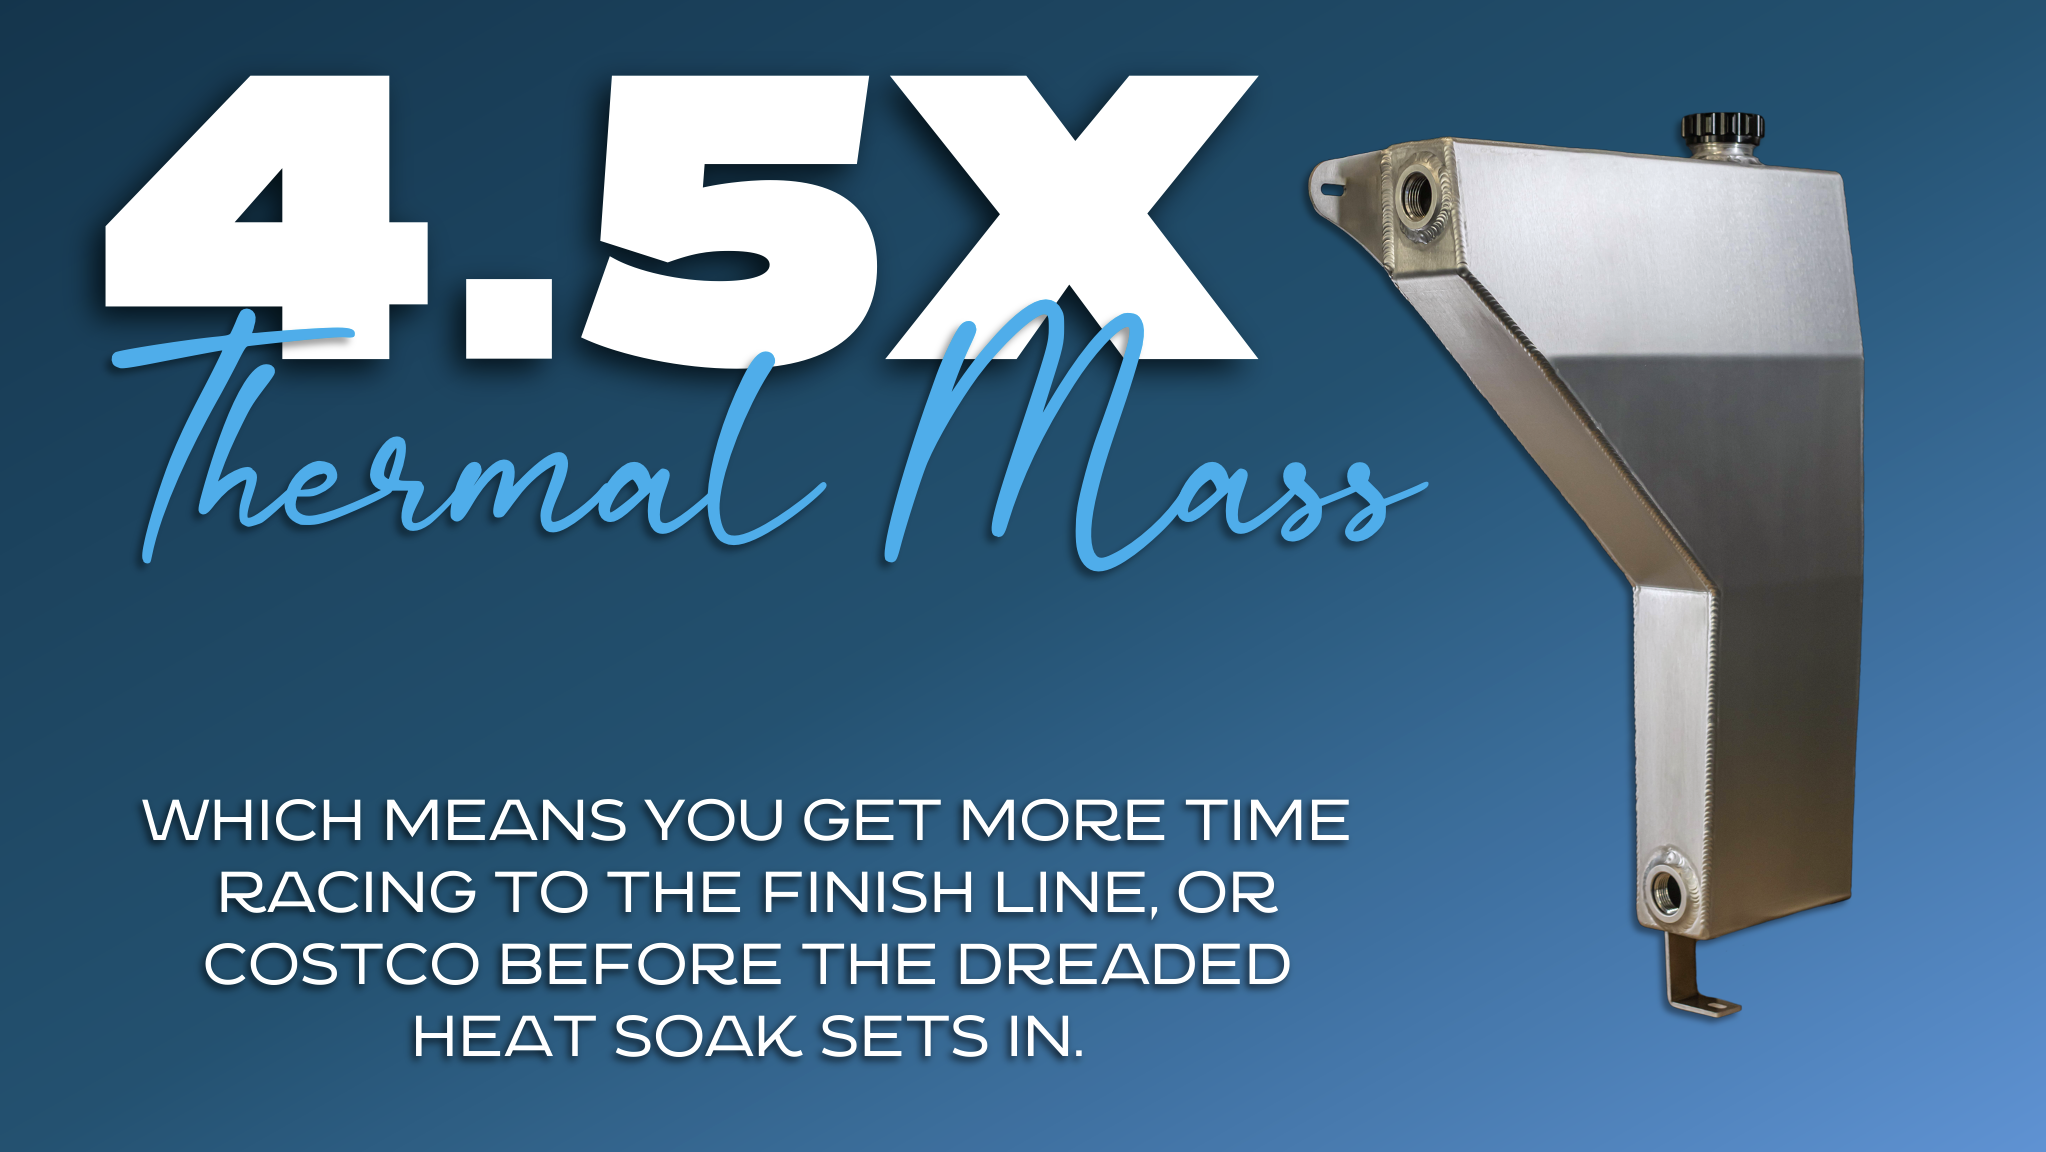
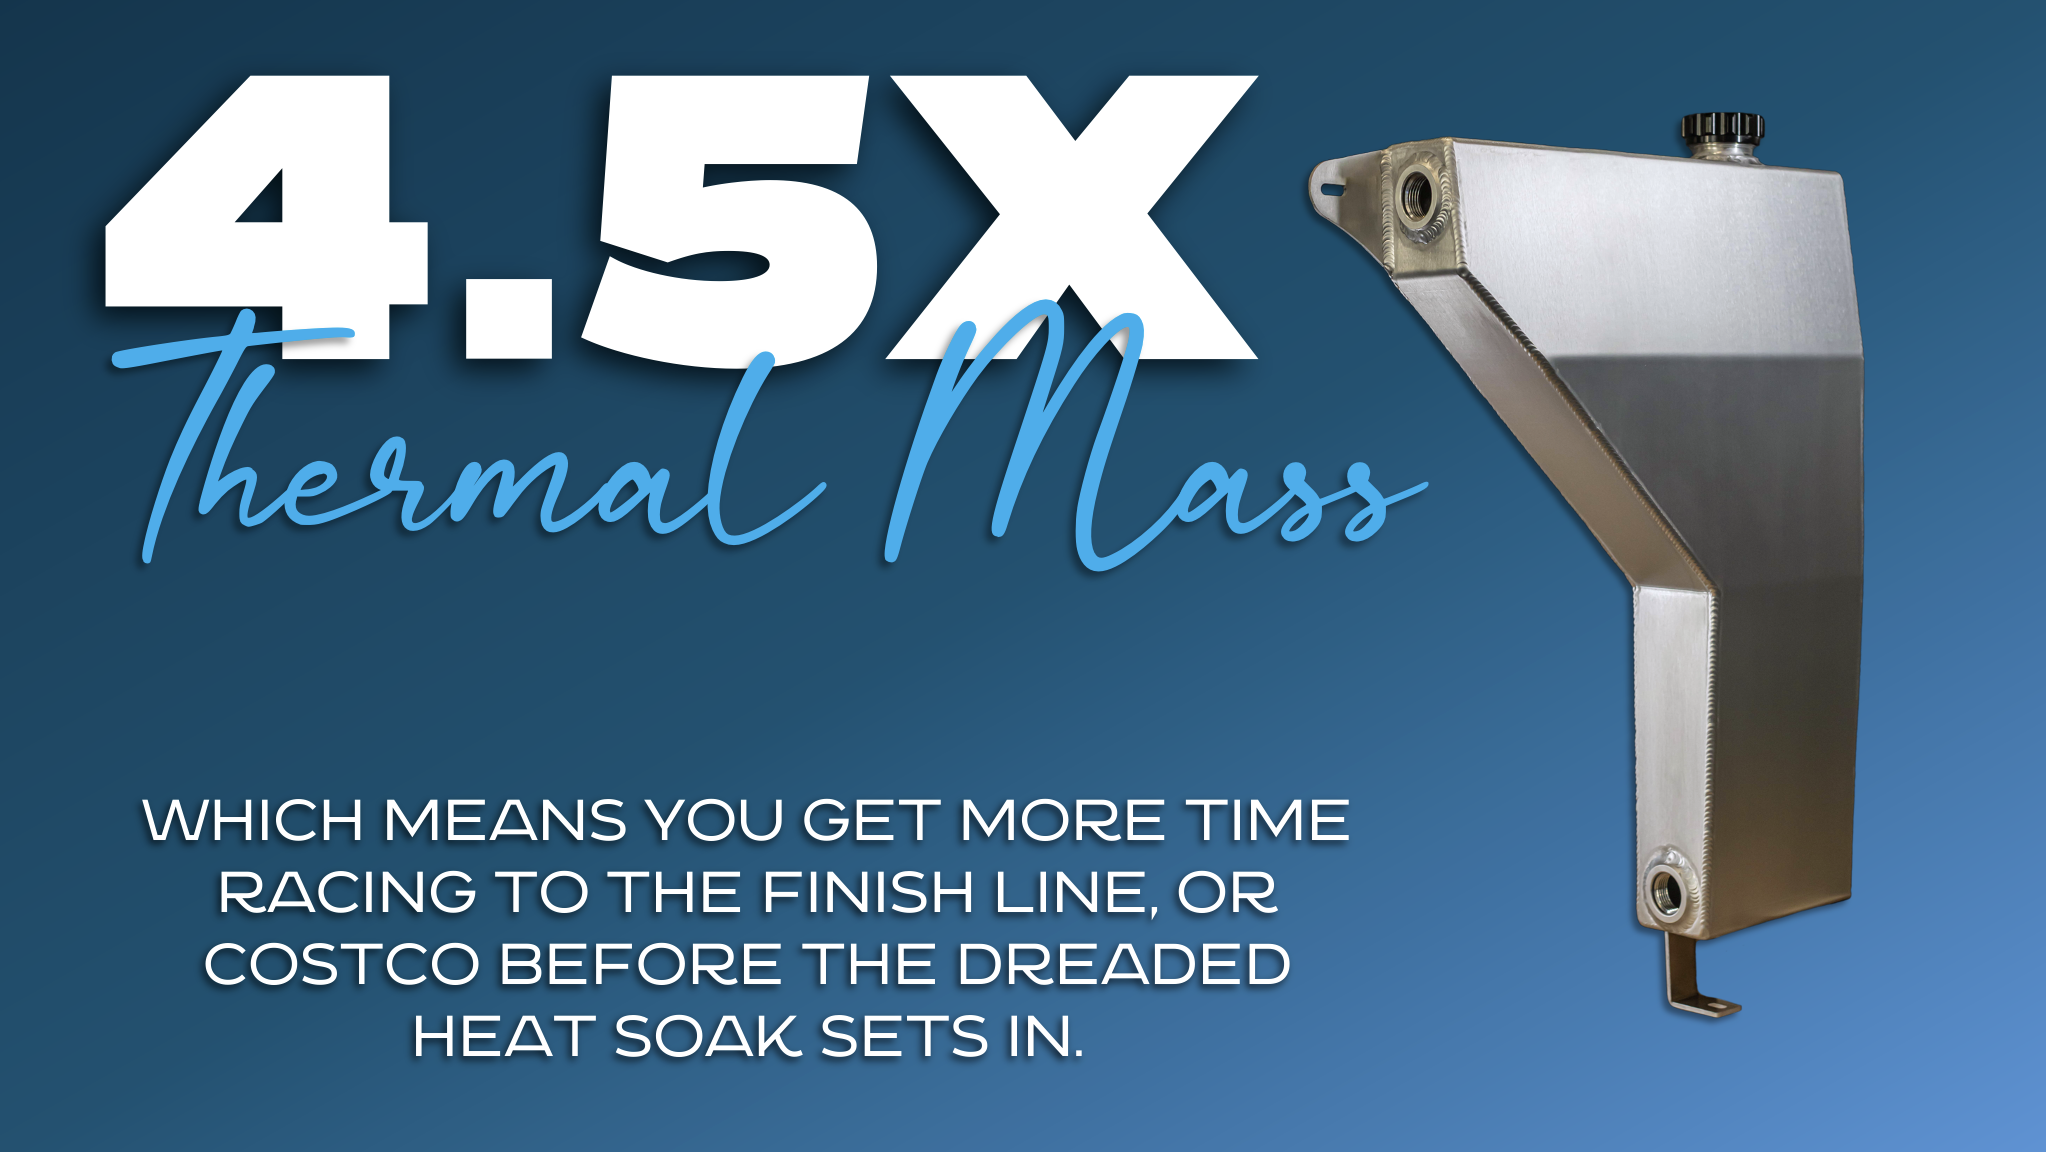
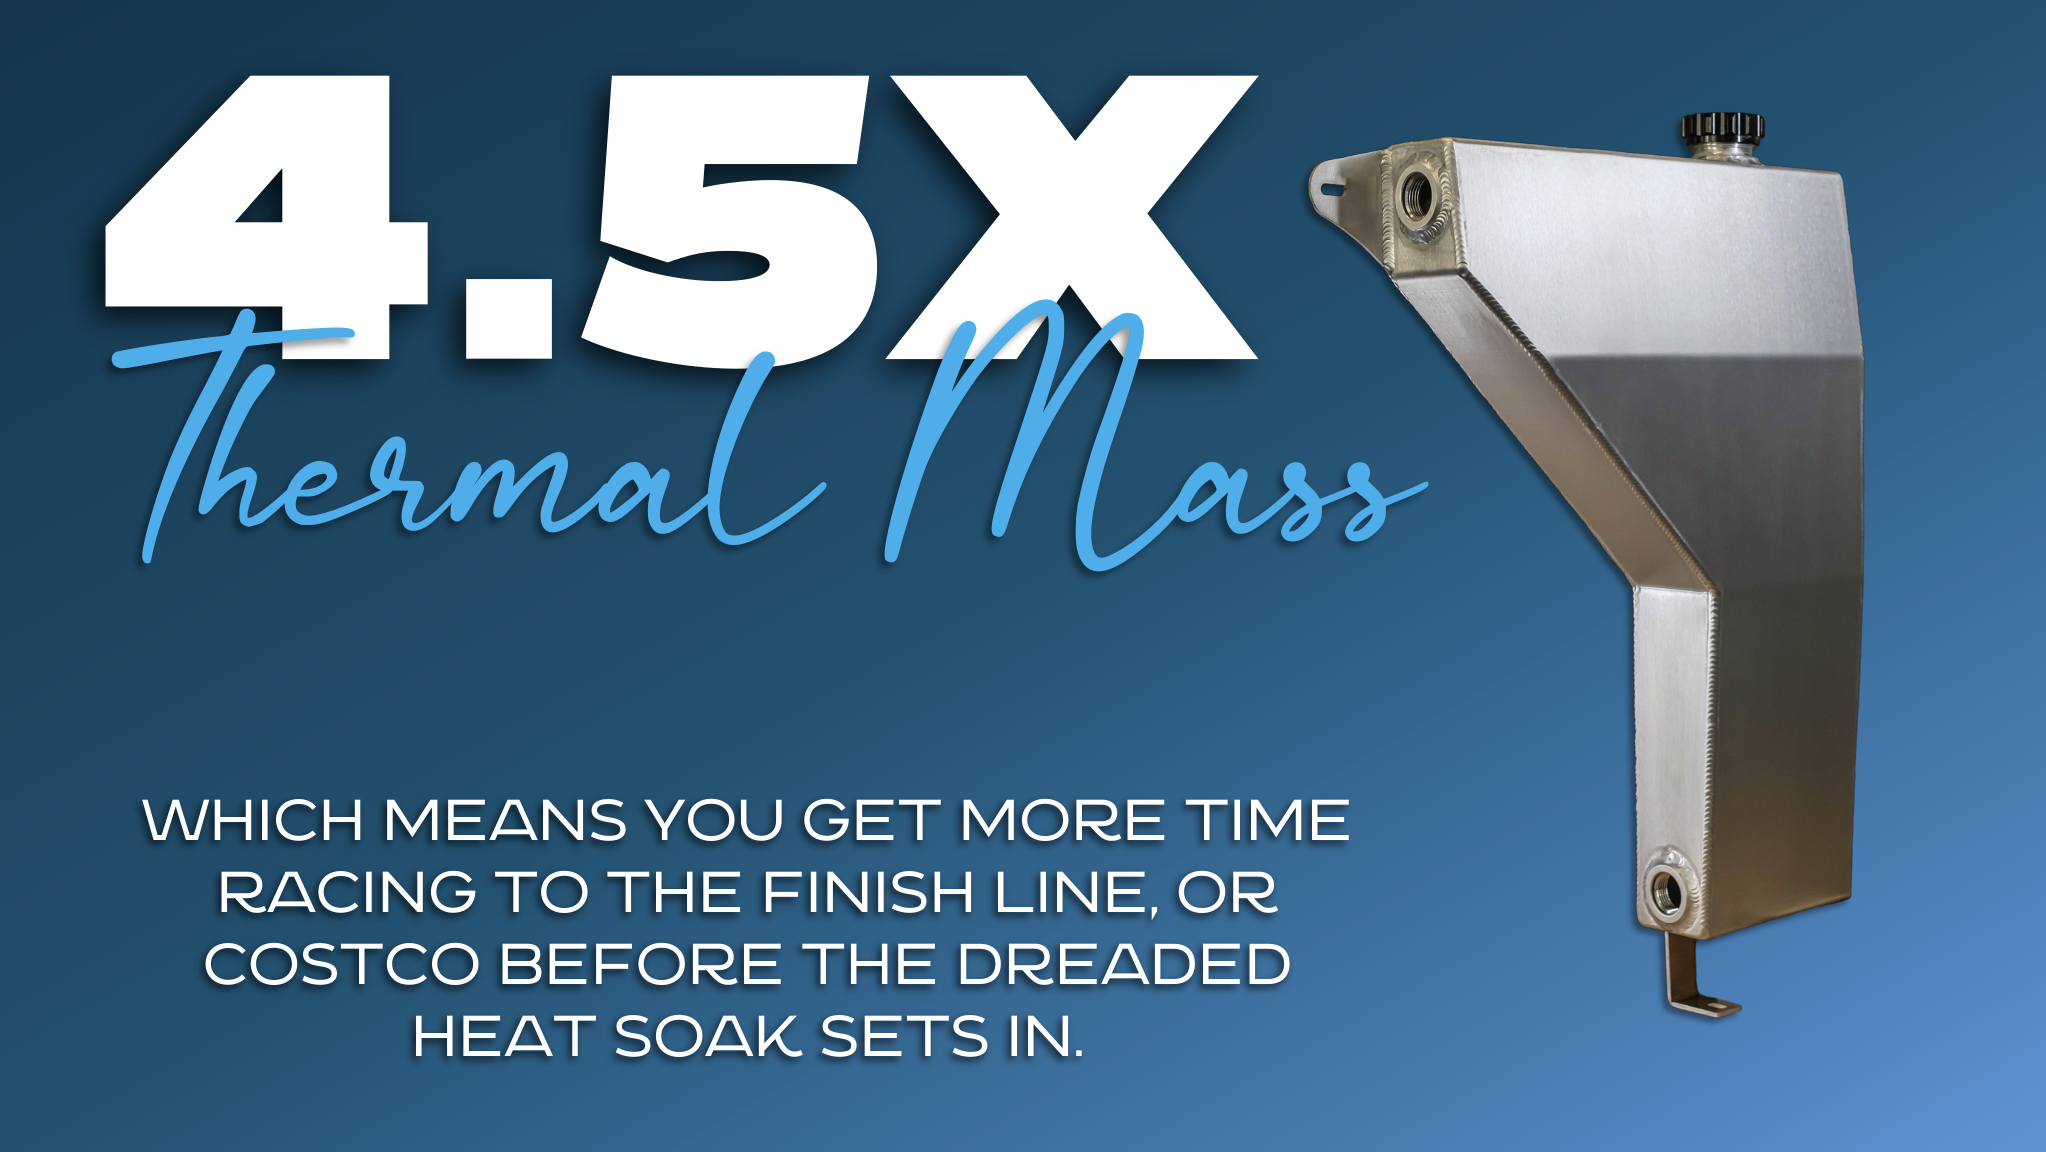
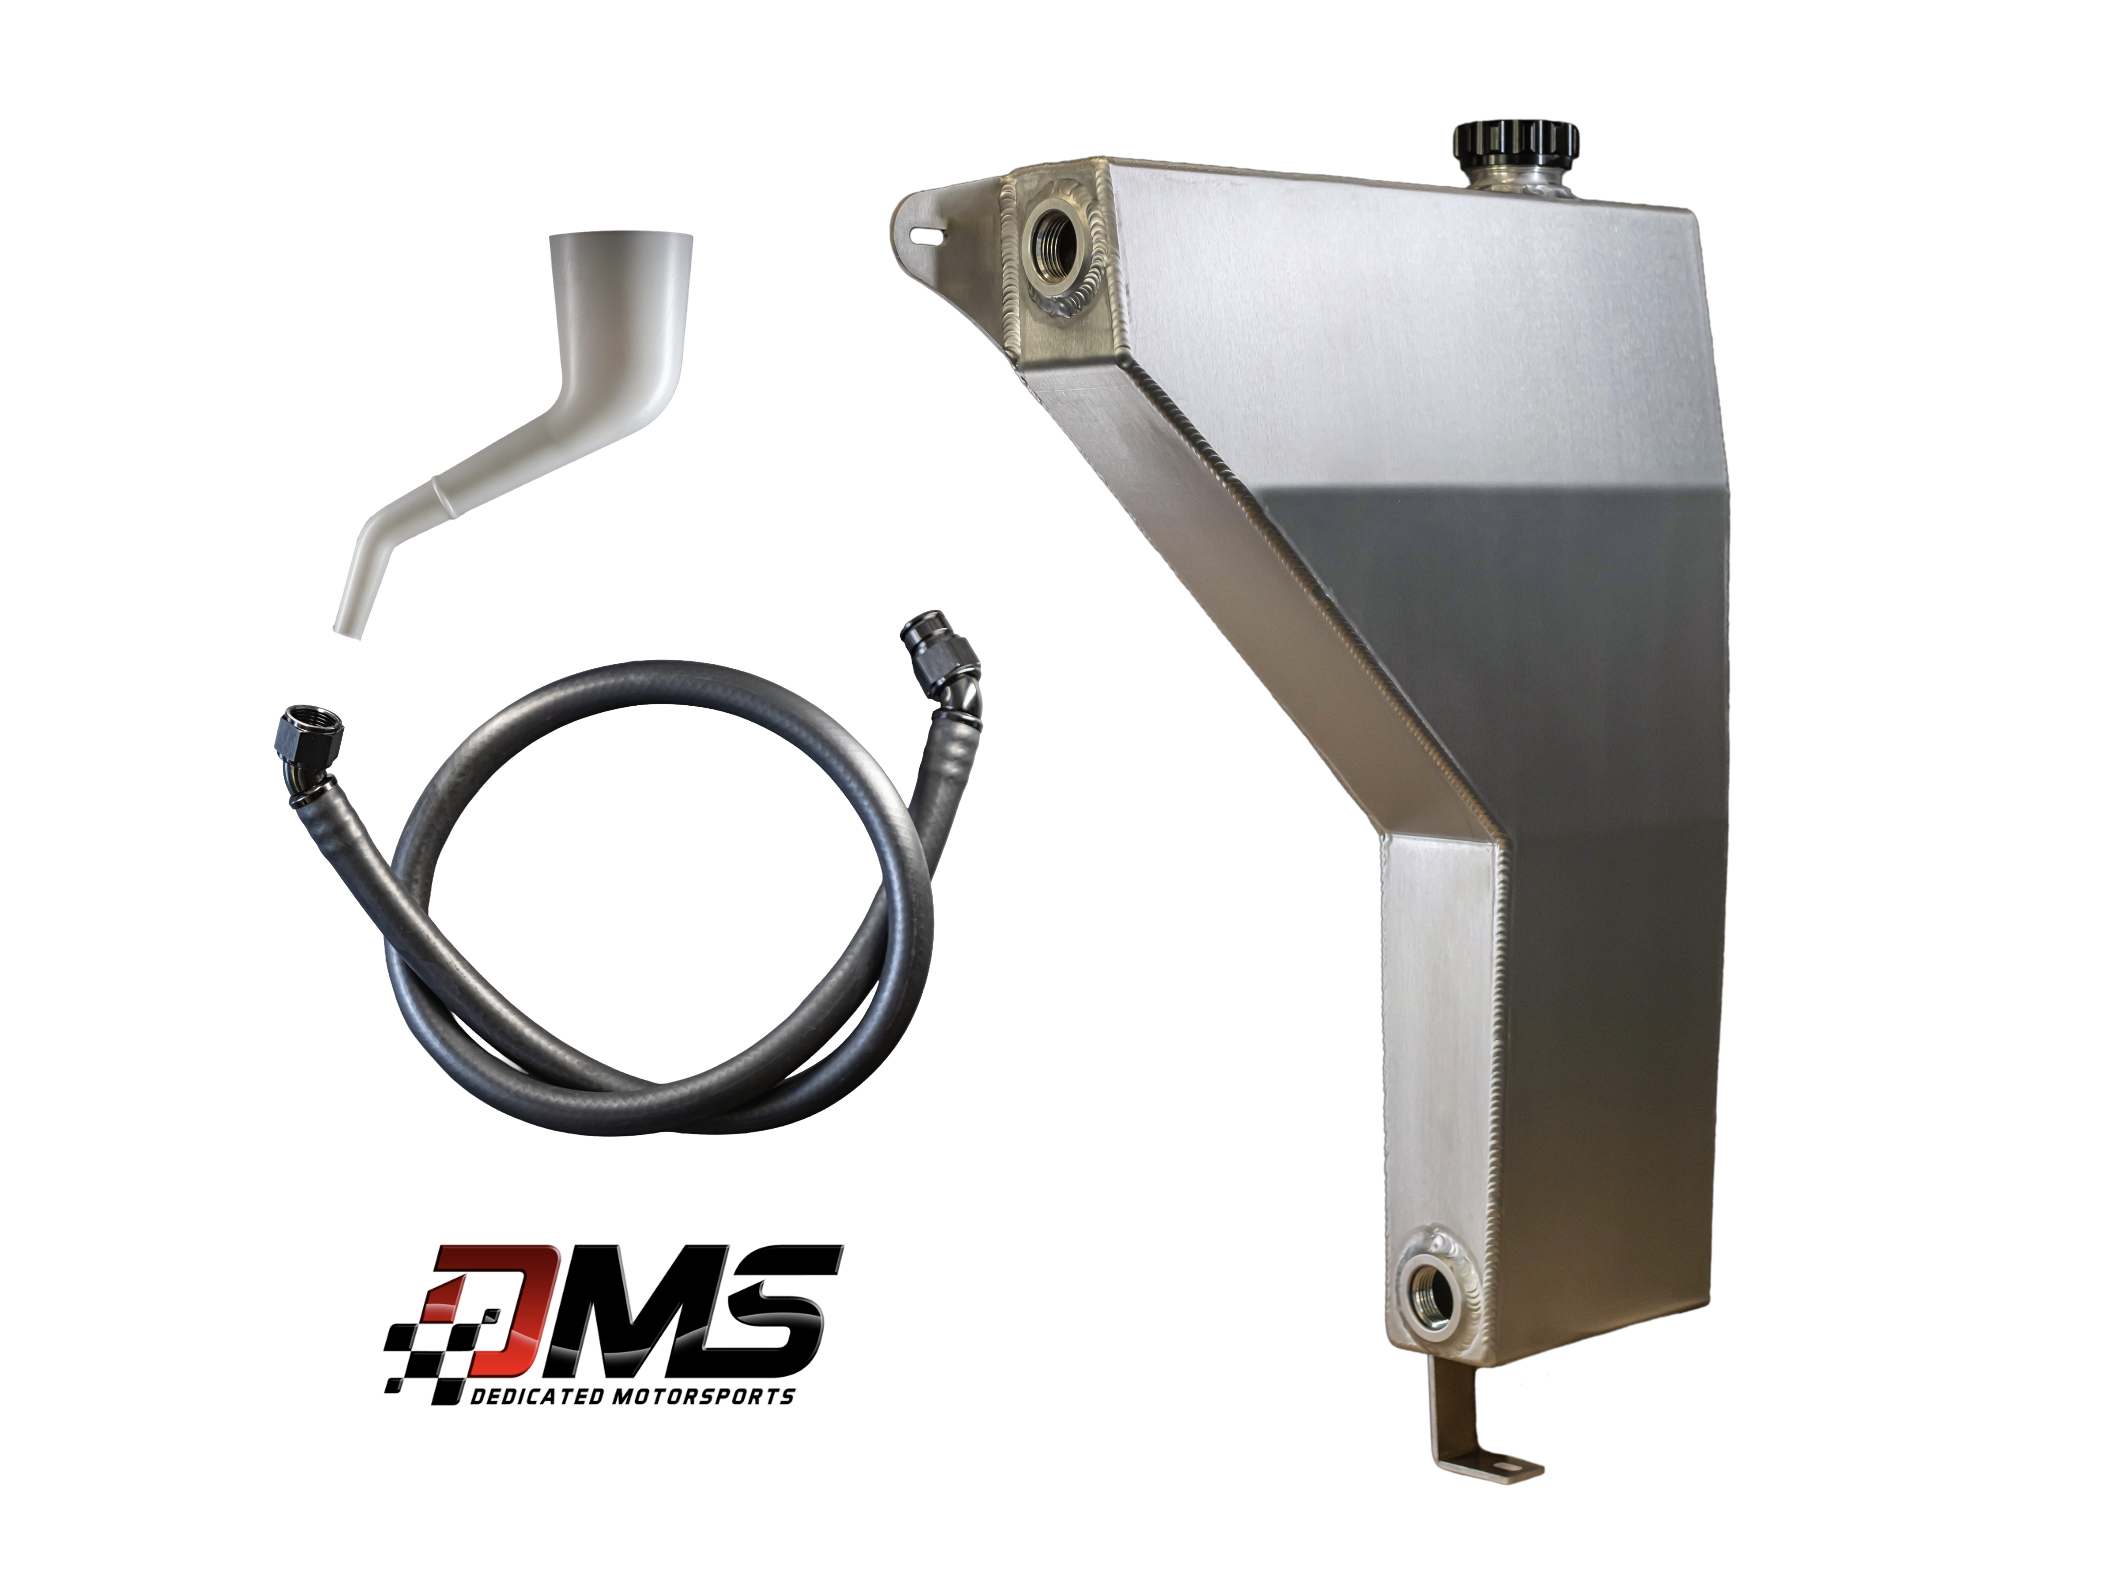
The next step was finding a reservoir solution. For that, the location was critical to it’s effectiveness, and we did not stop testing until we were able to check all the boxes. Our goal was to keep it away from the heat of the headers which eliminated it from the common location on the drivers side strut brace which unfortunately places is directly above the red hot headers, and seems to be counter intuitive to the efforts of keeping this fluid as cool as possible. The other easy location is directly in front of the thermostat, but that is where most of the catch can offerings are used (including my Might Mouse Catch Can). That left us only one small space to try and use. One that required the perfect size reservoir, and a custom 2-piece bracket design in order for it to fit. After several weeks and 6 iterations, the solution was not only complete, it was effective, looked OEM and costs ½ of what some of the other customs solutions cost.
This location now provides the perfect place to add fluid in order to prime the pump, and keeps the canister away from the direct heat of the headers, while providing large 3/4” hose barbs which allows us to upgrade all of the hose in the HX system to 3/4” between the pump, fender tank and heat exchangers for even more flow, and system capacity.
For those who already have or wish to use our DMS fender tank, they do work great in combination, but the fender tank does not replace the need for this reservoir. Although the DMS Fender Tank allows for easy system filling, and easy bleeding due to the “high point” of the system factor, it does not provide a pressure cap, and does not allow for easy pump priming. Which is why we added this perfectly fit Edelbrock coolant reservoir to the system and mounted it in a way that allows for easy pump priming as it’s placed between the ECU and engine coolant tank using a custom bracket that bolts to the top of the OEM PCV box.
When it comes time to fill / prime the system, we always begin filling from the reservoir while keeping the fender tank lid open until the system fills enough to remove all major air pockets, and the coolant reservoir is nearly full, and flowing freely. At that point we tighten the 16psi pressure cap, and allow the system to continue to bleed and burp from the fender tank and pressure relief valve provided for the top of the main front HX. Once the system is bleed and the fender tank is approximately 90% full we cap the fender tank and continue to circulate the system allowing it to build pressure and move any air bubbles to the highest point (the fender tank) After 5 minutes we crack open the tank to allow the air to escape, then cap and repeat a few more times for good measure. Note; once the system is full we do not recommend opening the small reservoirs pressure cap, as it sits below the supercharger bricks and will be full and under pressure. The reservoir is only opened when the system has been emptied and is ready to refill. Periodic fillings should be serviced from the fender tank.
Note; Although this is technically an expansion tank, I am refraining to use that term, as it’s not designed to add capacity, it’s designed to be a filling / pump priming point. That said, this reservoir does holds approx. 3.5 cups or .85L of fluid and includes a bottom center mounted 3/4” barb and a top side inlet 3/4” barb. Expansion tank? not really…
A little about Flexlab Silicone Hose.
Flexlab silicone coolant hose is engineered for hostile engine environments, this coolant hose is ideal for extreme temperature and pressure ranges where high-performance levels are required. Silicone resists hardening, cracking, cold leaks, aging, and a number of chemicals, making it a durable, long-lasting solution for your applications.
Extreme Temperature Resistance.
Extreme Duty Cycle Tested for Hostile Engine Environments.
Durable Construction for Various Pressure Ranges.
-65F to 350F temperature range.
Extremely flexible and easy to work with.
SYSTEM BENEFITS
Dedicated IN/OUT manifolds prevent driver side supercharger brick coolant starvation by feeding each brick its own balanced pressure and flow rate thanks to our Y-block fittings.
Manifolds are precision cut from billet aluminum for a perfect fit and treated to a beautiful black anodized finish. Each manifold comes with black hardware.
25% increase in HX coolant flow observed in our test vehicle while using the OEM pump with our triple HX package and upgraded 3/4” silicone hoses.
Perfect addition to a MAX EFFORT 1.7L supercharger build.
Better flow and balanced distribution gets your cold fluid into the bricks faster for better heat transfer and supercharger cooling efficiency.
Universal kit is set up and ready for you to mesh with your current set up. All you need is the mating fitting from the -12AN feeder on the Y-block to your specific hose sizes. Although we suggest 3/4” hose for best efficiency you can also reduce this down to the factory 5/8” line if desired.
Works best with our upgraded AUX coolers and upgraded 3/4” hose kit to help upgrade your entire cooling system for maximum flow, and reduced restrictions.
Easy Pump Priming with the location of our reservoir.
Save $150 vs purchasing separate.
WHAT’S IN THE BOX?
BUILDER KIT (compression fittings)
(1) Pair of Powder Coated Brackets with SS Hardware
(4) -10 AN 120 degree DYME Quick Connect Fittings
(2) -12 AN to -10 AN Racetronix Y-Block Connectors
(1) Edelbrock Coolant Reservoir “expansion tank”
(4) -10 AN 45 degree DYME Standard AN Fittings
(10) Feet of DYME -10 SUPERSTRASSE-R hose
(2) -10 AN Billet Coolant Manifold Adapters
(1) 3/4” to 5/8” Hose Splice Connectors
(4) Feet of 3/4” Black Silicone Hose
(4) 3/4” Constant Tension Clamps
(1) 16psi Pressure Release Cap
(2) -12 AN to 3/4” Hose Barbs
BUILDER KIT (crimped fittings)
(4) Pre-cut SUPERSTRASSE-C hose with crimped -10 AN 120 degree DYME Quick Connect Fittings on one end and -10 AN 45 degree DYME Standard AN Fittings on the other end.
(1) Pair of Powder Coated Brackets with SS Hardware
(2) -12 AN to -10 AN Racetronix Y-Block Connectors
(1) Edelbrock Coolant Reservoir “expansion tank”
(10) Feet of DYME -10 SUPERSTRASSE-R hose
(2) -10 AN Billet Coolant Manifold Adapters
(1) 3/4” to 5/8” Hose Splice Connectors
(4) Feet of 3/4” Black Silicone Hose
(4) 3/4” Constant Tension Clamps
(1) 16psi Pressure Release Cap
(2) -12 AN to 3/4” Hose Barbs
What YOU will need to provide:
Patience and attention to detail for installation... or, someone like that, who you trust with your beloved, adorned, magnificent, earth shaking, alarm sounding LT4 powered beast!
Cut-off wheel or large cable cutters in order to cut your braided lines to fit.
Additional connectors, hoses and fittings may be needed depending on your existing system design or preferred routing path. Remember this is intended to be a universal kit. Email me if you have any other needs or questions about path design.
More 50/50 coolant. Some nice hose pinch clamps are not required, but a good addition for peace of mind even when using hose barbs.
Auxiliary reservoir with pressure cap for HX system filling and burping.
Fitment: Designed for LT4 applications retaining compatible factory Eaton TVS 1.7L supercharger coolant connections. The builder kit allows custom hose routing across different platforms. Confirm manifold compatibility, clearances and hose lengths before ordering a pre-cut kit. Aftermarket supercharger applications require separate verification.
LT4 Crossover Tube Delete Universal Kit + DYME
As we seem to do often, we have re-invented and improved our cooling packages once again. In this case, we have incorporated some DYME quick connect fittings into our popular crossover delete package. Therefore, this package is on standby until finished. That said, these should be ready to start shipping by 11.25.26. Stay tuned for more. They will be worth the wait!
By popular demand, we have added a universal adapter and hose kit that will help not only maximize the effectiveness of the HX system, but will upgrade the appearance of your 1.7L engine bay. Our goal in developing of our Stage.III Supercharger Cooling System was simple. Improve the efficiency and effectiveness of the heat exchanger system by finding and eliminating the major restrictions, as well as adding and replacing components to improve volume and overall efficiency all while utilizing the OEM pump. Although we were seeing great results with our Stage.II system with a flow rate up to 4.0GPM we knew there was more restriction in the system, and we aimed our sights at the restrictive crossover tube. Knowing that we wanted our kit to look as good as it performed, and still be able to offer a bundle discount, it was critical to get the part combination perfect. After testing several combinations and hose configurations we settled on what you see now. A universal kit that not only adds that upgraded richer look, but also unlocked another 25%+ increase in HX coolant flow bumping our test car up to 5.1GPM (thats a 54% increase from our 2.8GPM baseline) all while utilizing the OEM pump. To make things even better our bundle pricing saves you over $150 versus purchasing separately!
Why Delete the Factory Crossover?
A larger heat exchanger and a stronger pump are only part of an effective supercharger cooling system. The plumbing between those components and the intercooler bricks also determines how much resistance the pump has to overcome.
Our crossover-delete arrangement replaces the factory front crossover with individual manifolds and external supply and return branches. One Racetronix Y-block divides the incoming supply between the bricks; the other brings their return flow back together.
That gives each brick its own coolant route and opens up more control over hose layout. Another overlooked issue with the OEM crossover tube design is the fact that it creates an IAT imbalance from bank to bank due to inefficient design. Recent test verified a 10 degree difference between the driver and passenger side due to coolant velocity which causes a starving effect on the drivers side intercooler brick. Another issue resolved with this new dedicated in/out kit.
Custom GMS Monoblock Manifolds
In order to prevent additional leak points and allow for easy installation, we had these manifolds made specifically around the revised connection arrangement. Each monoblock is machined from billet aluminum and finished in black anodizing, with black mounting hardware. The one-piece construction provides a clean foundation for the DYME connections and a finished appearance that belongs alongside the other carefully selected parts in your engine bay. Just as importantly, the manifold connections are designed for easy hose removal when you need access to the supercharger.
DYME Quick Connects
If you enjoy wrenching on your car as much as driving it, you know that serviceability becomes part of the upgrade the first time something needs to come back apart.
DYME’s quick-connect interface lets you separate the hose from its mating connection at the manifold without repeatedly loosening a conventional threaded AN union. The hose end stays assembled, making access simpler during supercharger service, intercooler work or future changes to the combination. Despite our greatest care, even we could not avoid scratching our AN fittings over the years, which is another reason we like this system so much!
The crimped & precut or builder & compression versions both retain quick-connect service at the manifolds. Your choice determines how the hose ends attach to the hose.
Choose Your Hose Assembly
Pre-Cut Crimped Kit — DYME SUPERSTRASSE-C
Choose this version when the GMS hose layout suits your installation and you want the hose assemblies prepared for you.
DYME -10 SUPERSTRASSE-C hose cut to the specified kit lengths.
Matched crimp-style hose ends assembled onto the hoses.
DYME quick-connect service at the manifold connections.
A convenient option when you want to spend less time building hoses.
Confirm the routing suits your vehicle and existing cooling components before ordering a pre-cut set.
Builder Kit — DYME SUPERSTRASSE-R
For those of us who want to control every bend and every inch of hose, the builder kit leaves the routing in your hands.
Includes 10 feet of DYME -10 SUPERSTRASSE-R hose.
Supplied with matching reusable compression-style hose ends.
Cut and assemble the hoses to suit your particular layout.
Useful for custom reservoir locations, modified engine bays and individually planned coolant routing.
Tools are used to build the reusable hose assemblies; subsequent manifold disconnection takes place at the DYME quick-connect interface.
Why SUPERSTRASSE Hose?
Both versions use CPE-lined rubber hose with 304 stainless-steel reinforcement and a protective outer braid. DYME specifies a continuous hose temperature capability of up to 302°F (150°C).
That construction combines reinforcement with the flexibility needed to route around a crowded LT4 engine bay. The crimp and reusable versions are selected to match their respective hose-end systems.
Why the reservoir matters…
The next step was finding a reservoir solution. For that, the location was critical to it’s effectiveness, and we did not stop testing until we were able to check all the boxes. Our goal was to keep it away from the heat of the headers which eliminated it from the common location on the drivers side strut brace which unfortunately places is directly above the red hot headers, and seems to be counter intuitive to the efforts of keeping this fluid as cool as possible. The other easy location is directly in front of the thermostat, but that is where most of the catch can offerings are used (including my Might Mouse Catch Can). That left us only one small space to try and use. One that required the perfect size reservoir, and a custom 2-piece bracket design in order for it to fit. After several weeks and 6 iterations, the solution was not only complete, it was effective, looked OEM and costs ½ of what some of the other customs solutions cost.
This location now provides the perfect place to add fluid in order to prime the pump, and keeps the canister away from the direct heat of the headers, while providing large 3/4” hose barbs which allows us to upgrade all of the hose in the HX system to 3/4” between the pump, fender tank and heat exchangers for even more flow, and system capacity.
For those who already have or wish to use our DMS fender tank, they do work great in combination, but the fender tank does not replace the need for this reservoir. Although the DMS Fender Tank allows for easy system filling, and easy bleeding due to the “high point” of the system factor, it does not provide a pressure cap, and does not allow for easy pump priming. Which is why we added this perfectly fit Edelbrock coolant reservoir to the system and mounted it in a way that allows for easy pump priming as it’s placed between the ECU and engine coolant tank using a custom bracket that bolts to the top of the OEM PCV box.
When it comes time to fill / prime the system, we always begin filling from the reservoir while keeping the fender tank lid open until the system fills enough to remove all major air pockets, and the coolant reservoir is nearly full, and flowing freely. At that point we tighten the 16psi pressure cap, and allow the system to continue to bleed and burp from the fender tank and pressure relief valve provided for the top of the main front HX. Once the system is bleed and the fender tank is approximately 90% full we cap the fender tank and continue to circulate the system allowing it to build pressure and move any air bubbles to the highest point (the fender tank) After 5 minutes we crack open the tank to allow the air to escape, then cap and repeat a few more times for good measure. Note; once the system is full we do not recommend opening the small reservoirs pressure cap, as it sits below the supercharger bricks and will be full and under pressure. The reservoir is only opened when the system has been emptied and is ready to refill. Periodic fillings should be serviced from the fender tank.
Note; Although this is technically an expansion tank, I am refraining to use that term, as it’s not designed to add capacity, it’s designed to be a filling / pump priming point. That said, this reservoir does holds approx. 3.5 cups or .85L of fluid and includes a bottom center mounted 3/4” barb and a top side inlet 3/4” barb. Expansion tank? not really…
A little about Flexlab Silicone Hose.
Flexlab silicone coolant hose is engineered for hostile engine environments, this coolant hose is ideal for extreme temperature and pressure ranges where high-performance levels are required. Silicone resists hardening, cracking, cold leaks, aging, and a number of chemicals, making it a durable, long-lasting solution for your applications.
Extreme Temperature Resistance.
Extreme Duty Cycle Tested for Hostile Engine Environments.
Durable Construction for Various Pressure Ranges.
-65F to 350F temperature range.
Extremely flexible and easy to work with.
SYSTEM BENEFITS
Dedicated IN/OUT manifolds prevent driver side supercharger brick coolant starvation by feeding each brick its own balanced pressure and flow rate thanks to our Y-block fittings.
Manifolds are precision cut from billet aluminum for a perfect fit and treated to a beautiful black anodized finish. Each manifold comes with black hardware.
25% increase in HX coolant flow observed in our test vehicle while using the OEM pump with our triple HX package and upgraded 3/4” silicone hoses.
Perfect addition to a MAX EFFORT 1.7L supercharger build.
Better flow and balanced distribution gets your cold fluid into the bricks faster for better heat transfer and supercharger cooling efficiency.
Universal kit is set up and ready for you to mesh with your current set up. All you need is the mating fitting from the -12AN feeder on the Y-block to your specific hose sizes. Although we suggest 3/4” hose for best efficiency you can also reduce this down to the factory 5/8” line if desired.
Works best with our upgraded AUX coolers and upgraded 3/4” hose kit to help upgrade your entire cooling system for maximum flow, and reduced restrictions.
Easy Pump Priming with the location of our reservoir.
Save $150 vs purchasing separate.
WHAT’S IN THE BOX?
BUILDER KIT (compression fittings)
(1) Pair of Powder Coated Brackets with SS Hardware
(4) -10 AN 120 degree DYME Quick Connect Fittings
(2) -12 AN to -10 AN Racetronix Y-Block Connectors
(1) Edelbrock Coolant Reservoir “expansion tank”
(4) -10 AN 45 degree DYME Standard AN Fittings
(10) Feet of DYME -10 SUPERSTRASSE-R hose
(2) -10 AN Billet Coolant Manifold Adapters
(1) 3/4” to 5/8” Hose Splice Connectors
(4) Feet of 3/4” Black Silicone Hose
(4) 3/4” Constant Tension Clamps
(1) 16psi Pressure Release Cap
(2) -12 AN to 3/4” Hose Barbs
BUILDER KIT (crimped fittings)
(4) Pre-cut SUPERSTRASSE-C hose with crimped -10 AN 120 degree DYME Quick Connect Fittings on one end and -10 AN 45 degree DYME Standard AN Fittings on the other end.
(1) Pair of Powder Coated Brackets with SS Hardware
(2) -12 AN to -10 AN Racetronix Y-Block Connectors
(1) Edelbrock Coolant Reservoir “expansion tank”
(10) Feet of DYME -10 SUPERSTRASSE-R hose
(2) -10 AN Billet Coolant Manifold Adapters
(1) 3/4” to 5/8” Hose Splice Connectors
(4) Feet of 3/4” Black Silicone Hose
(4) 3/4” Constant Tension Clamps
(1) 16psi Pressure Release Cap
(2) -12 AN to 3/4” Hose Barbs
What YOU will need to provide:
Patience and attention to detail for installation... or, someone like that, who you trust with your beloved, adorned, magnificent, earth shaking, alarm sounding LT4 powered beast!
Cut-off wheel or large cable cutters in order to cut your braided lines to fit.
Additional connectors, hoses and fittings may be needed depending on your existing system design or preferred routing path. Remember this is intended to be a universal kit. Email me if you have any other needs or questions about path design.
More 50/50 coolant. Some nice hose pinch clamps are not required, but a good addition for peace of mind even when using hose barbs.
Auxiliary reservoir with pressure cap for HX system filling and burping.
Fitment: Designed for LT4 applications retaining compatible factory Eaton TVS 1.7L supercharger coolant connections. The builder kit allows custom hose routing across different platforms. Confirm manifold compatibility, clearances and hose lengths before ordering a pre-cut kit. Aftermarket supercharger applications require separate verification.

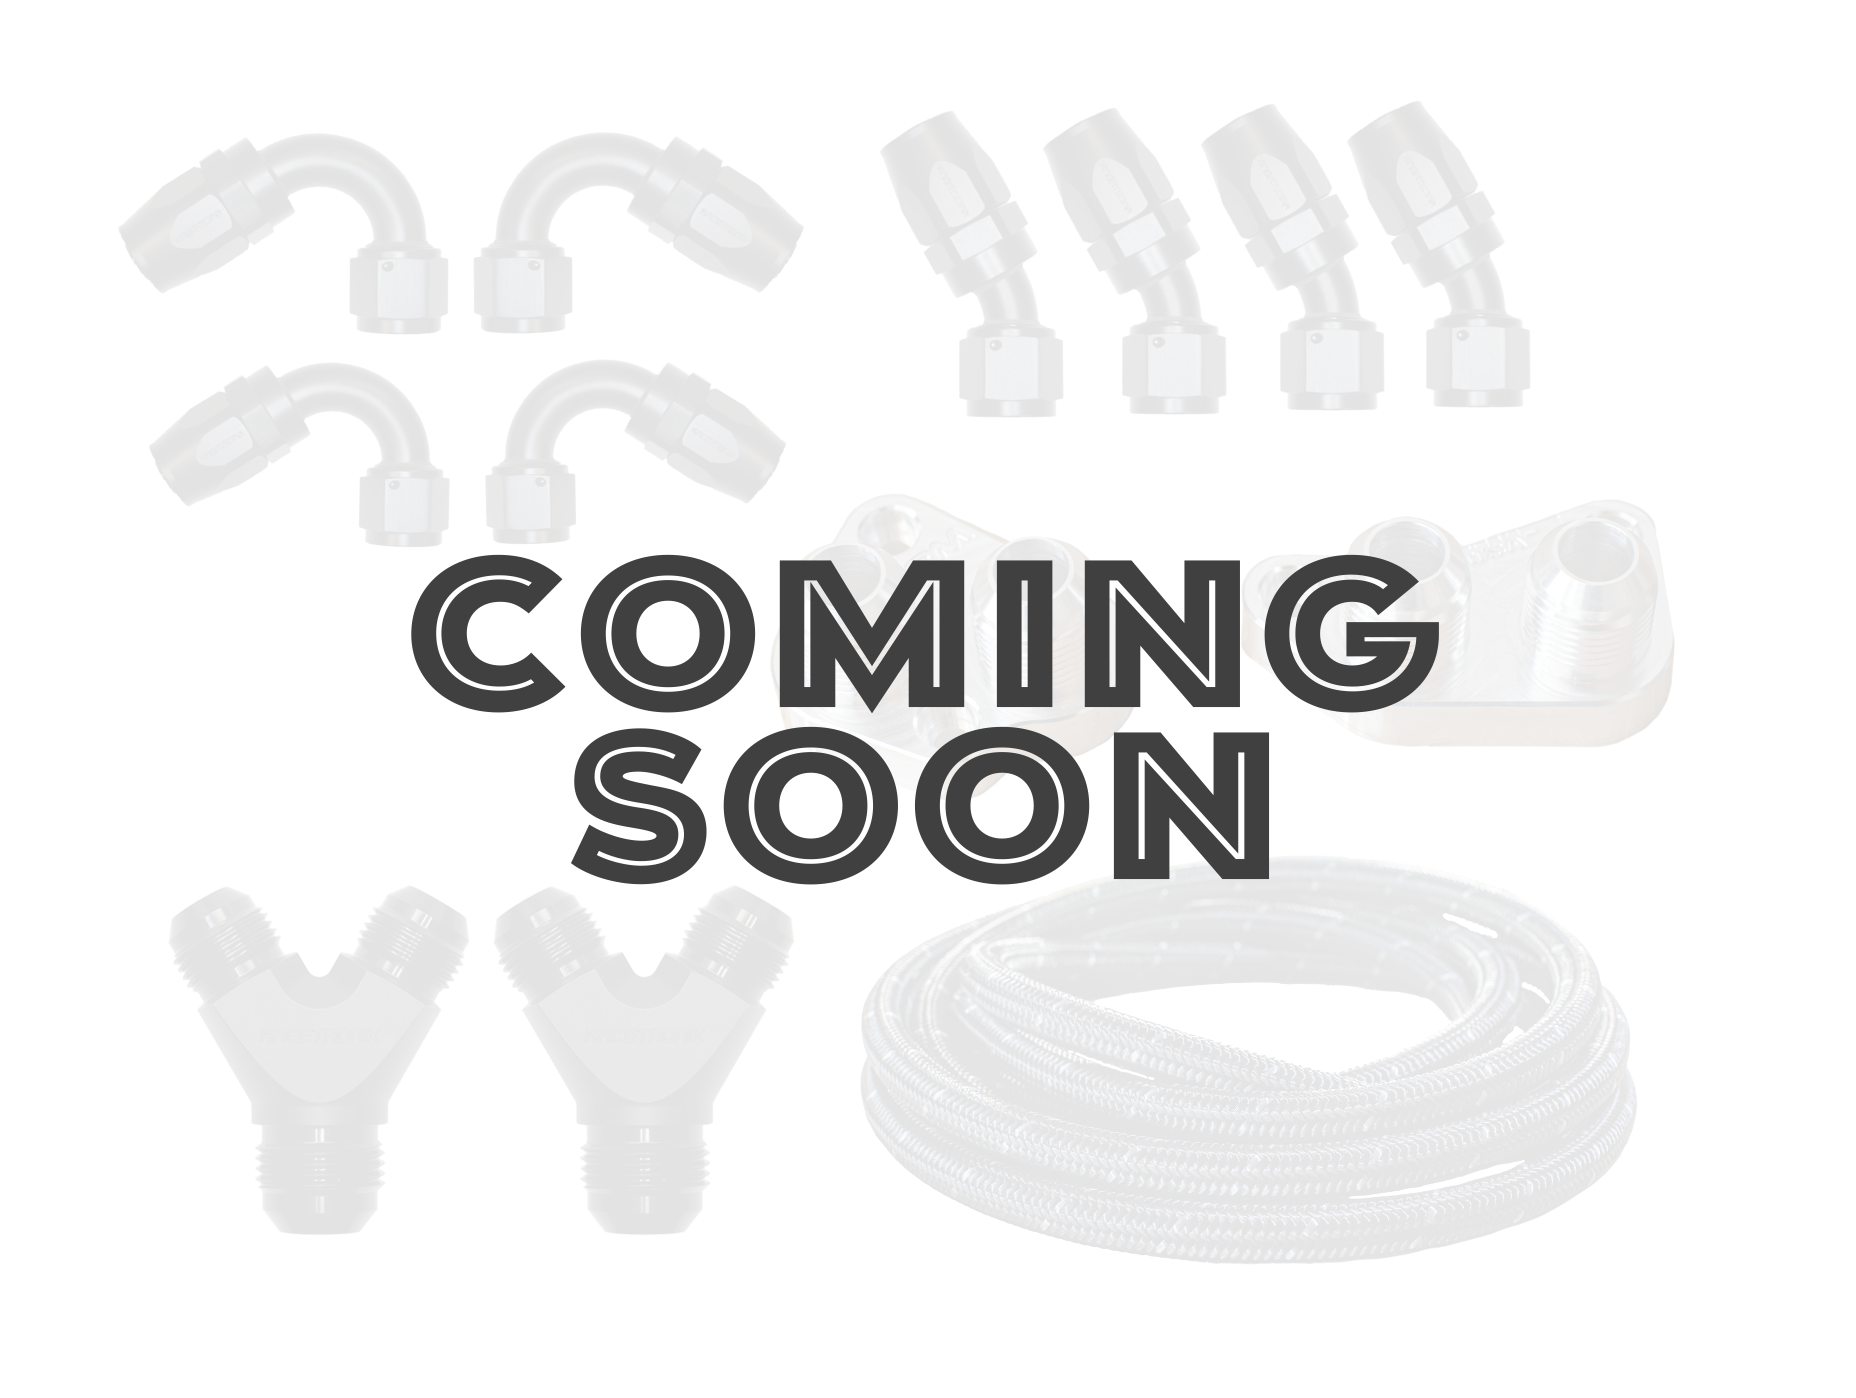 Image 1 of 14
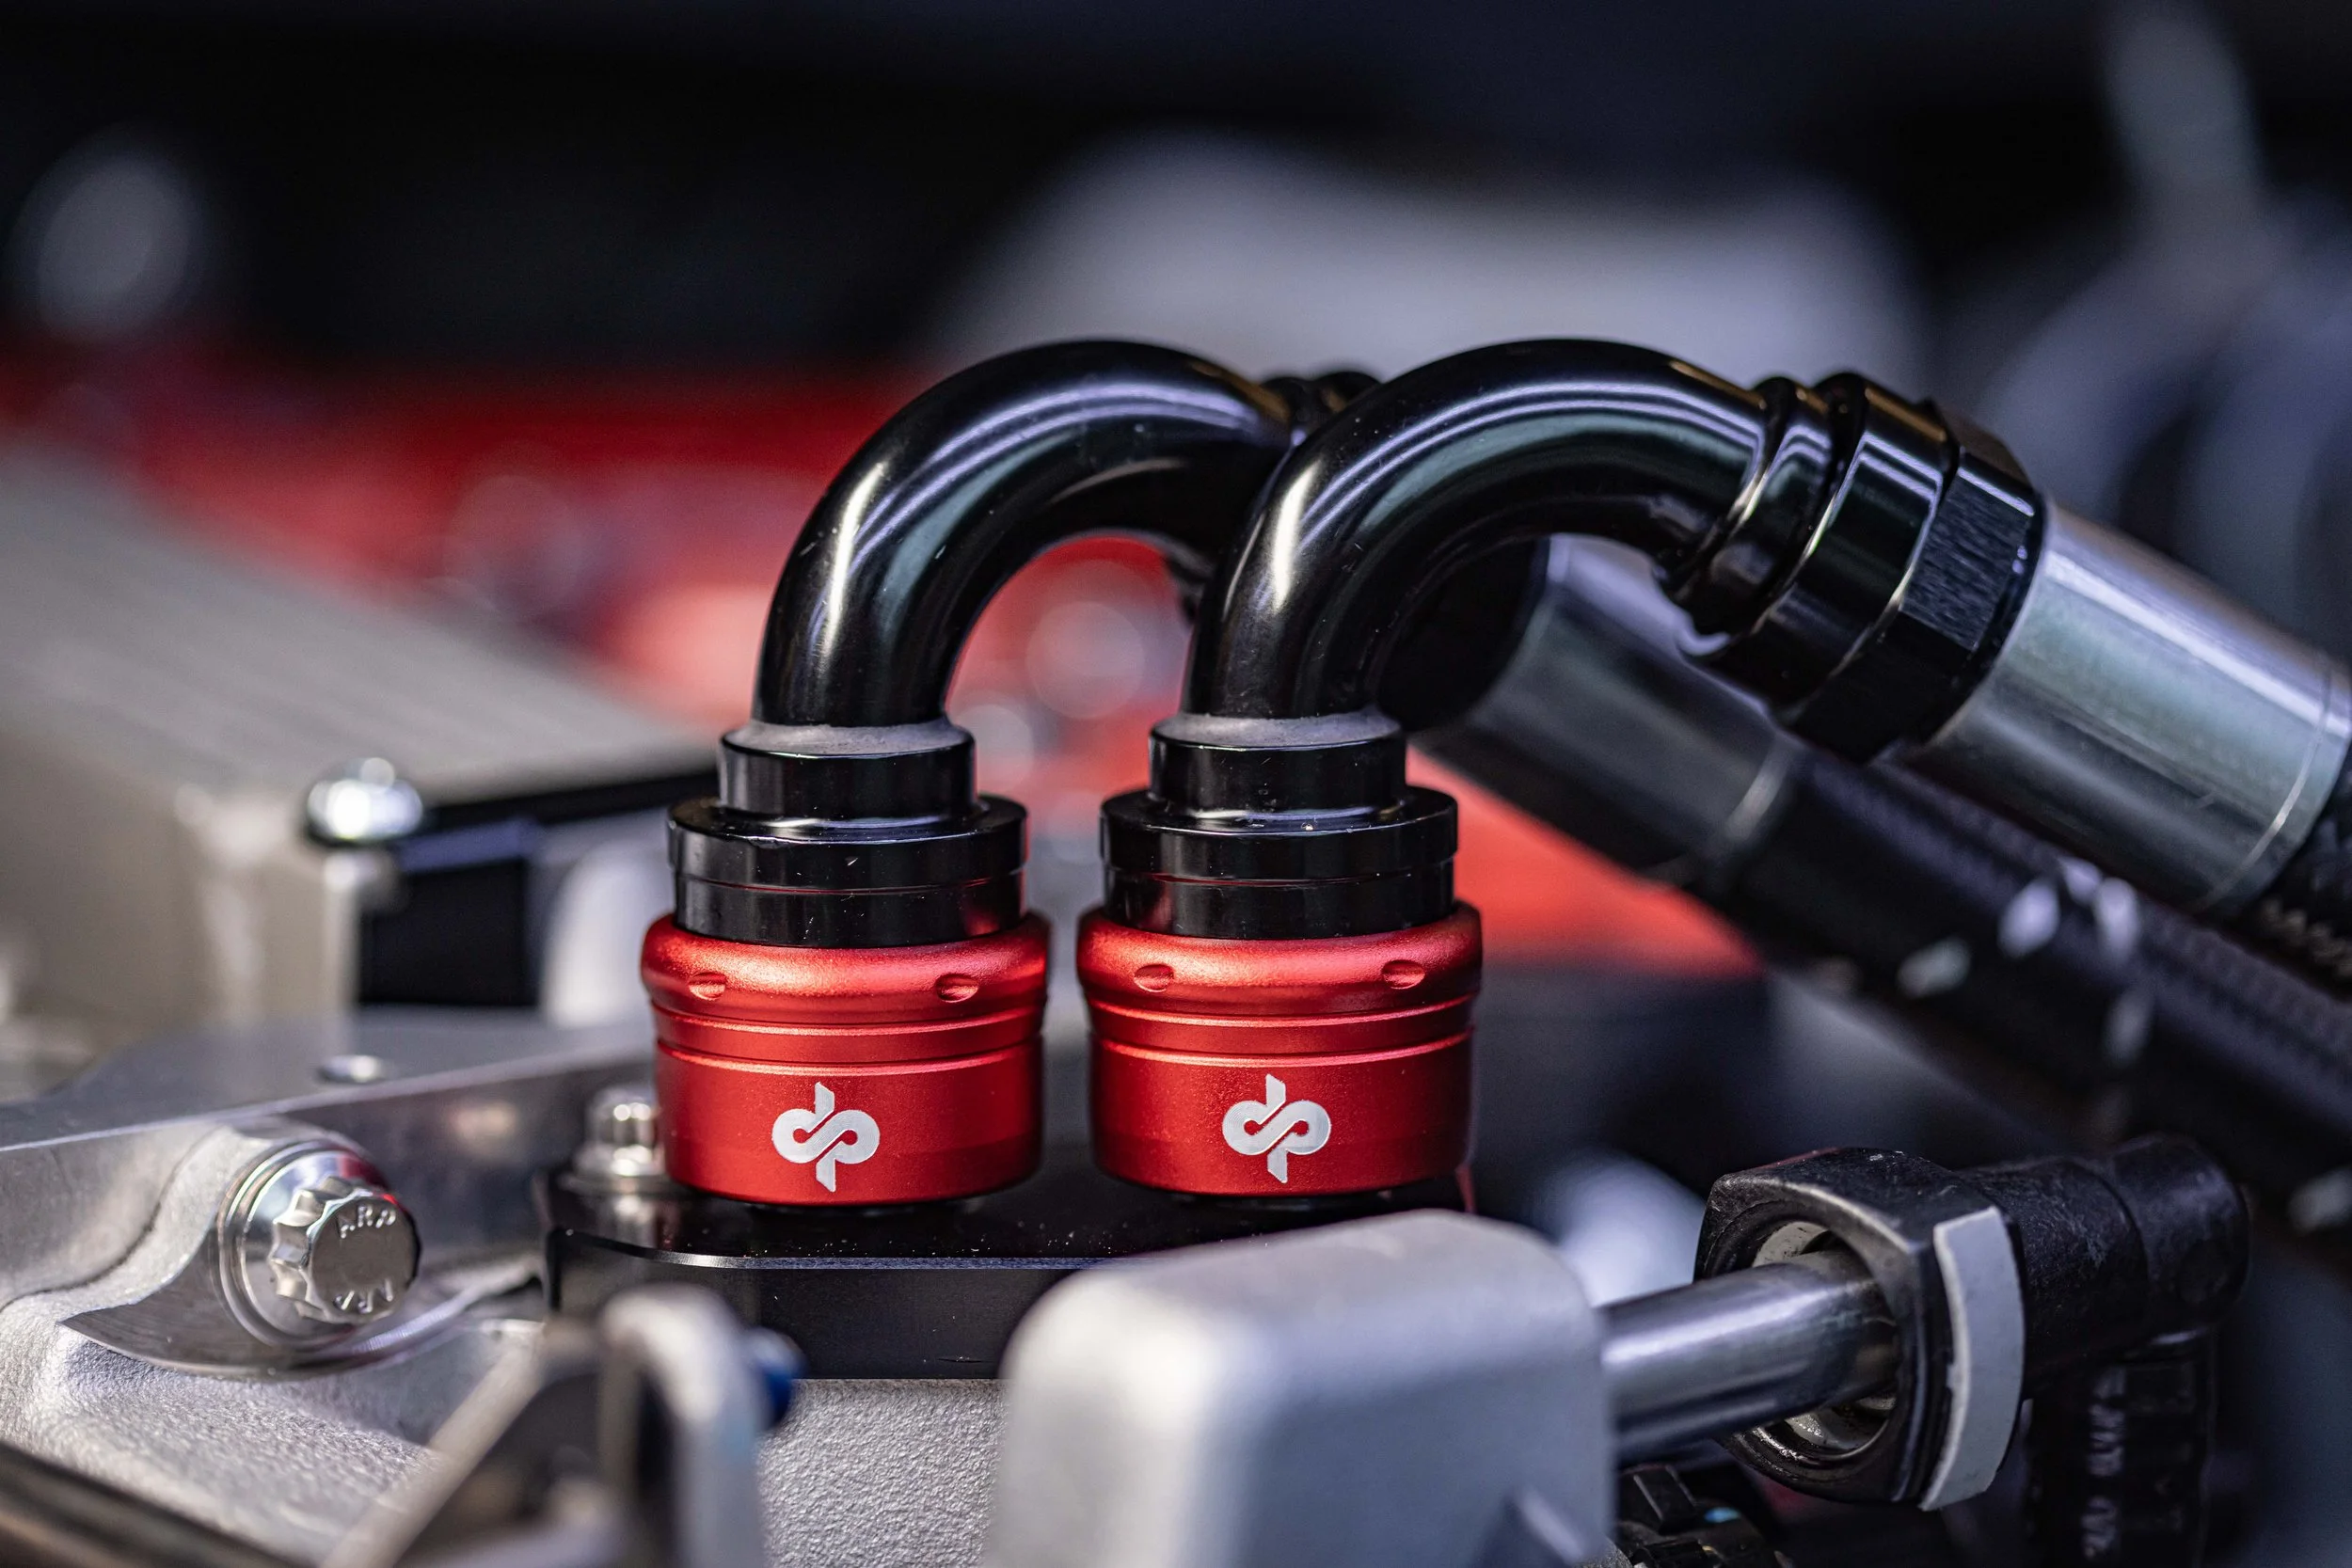 Image 2 of 14
 Image 3 of 14
 Image 4 of 14
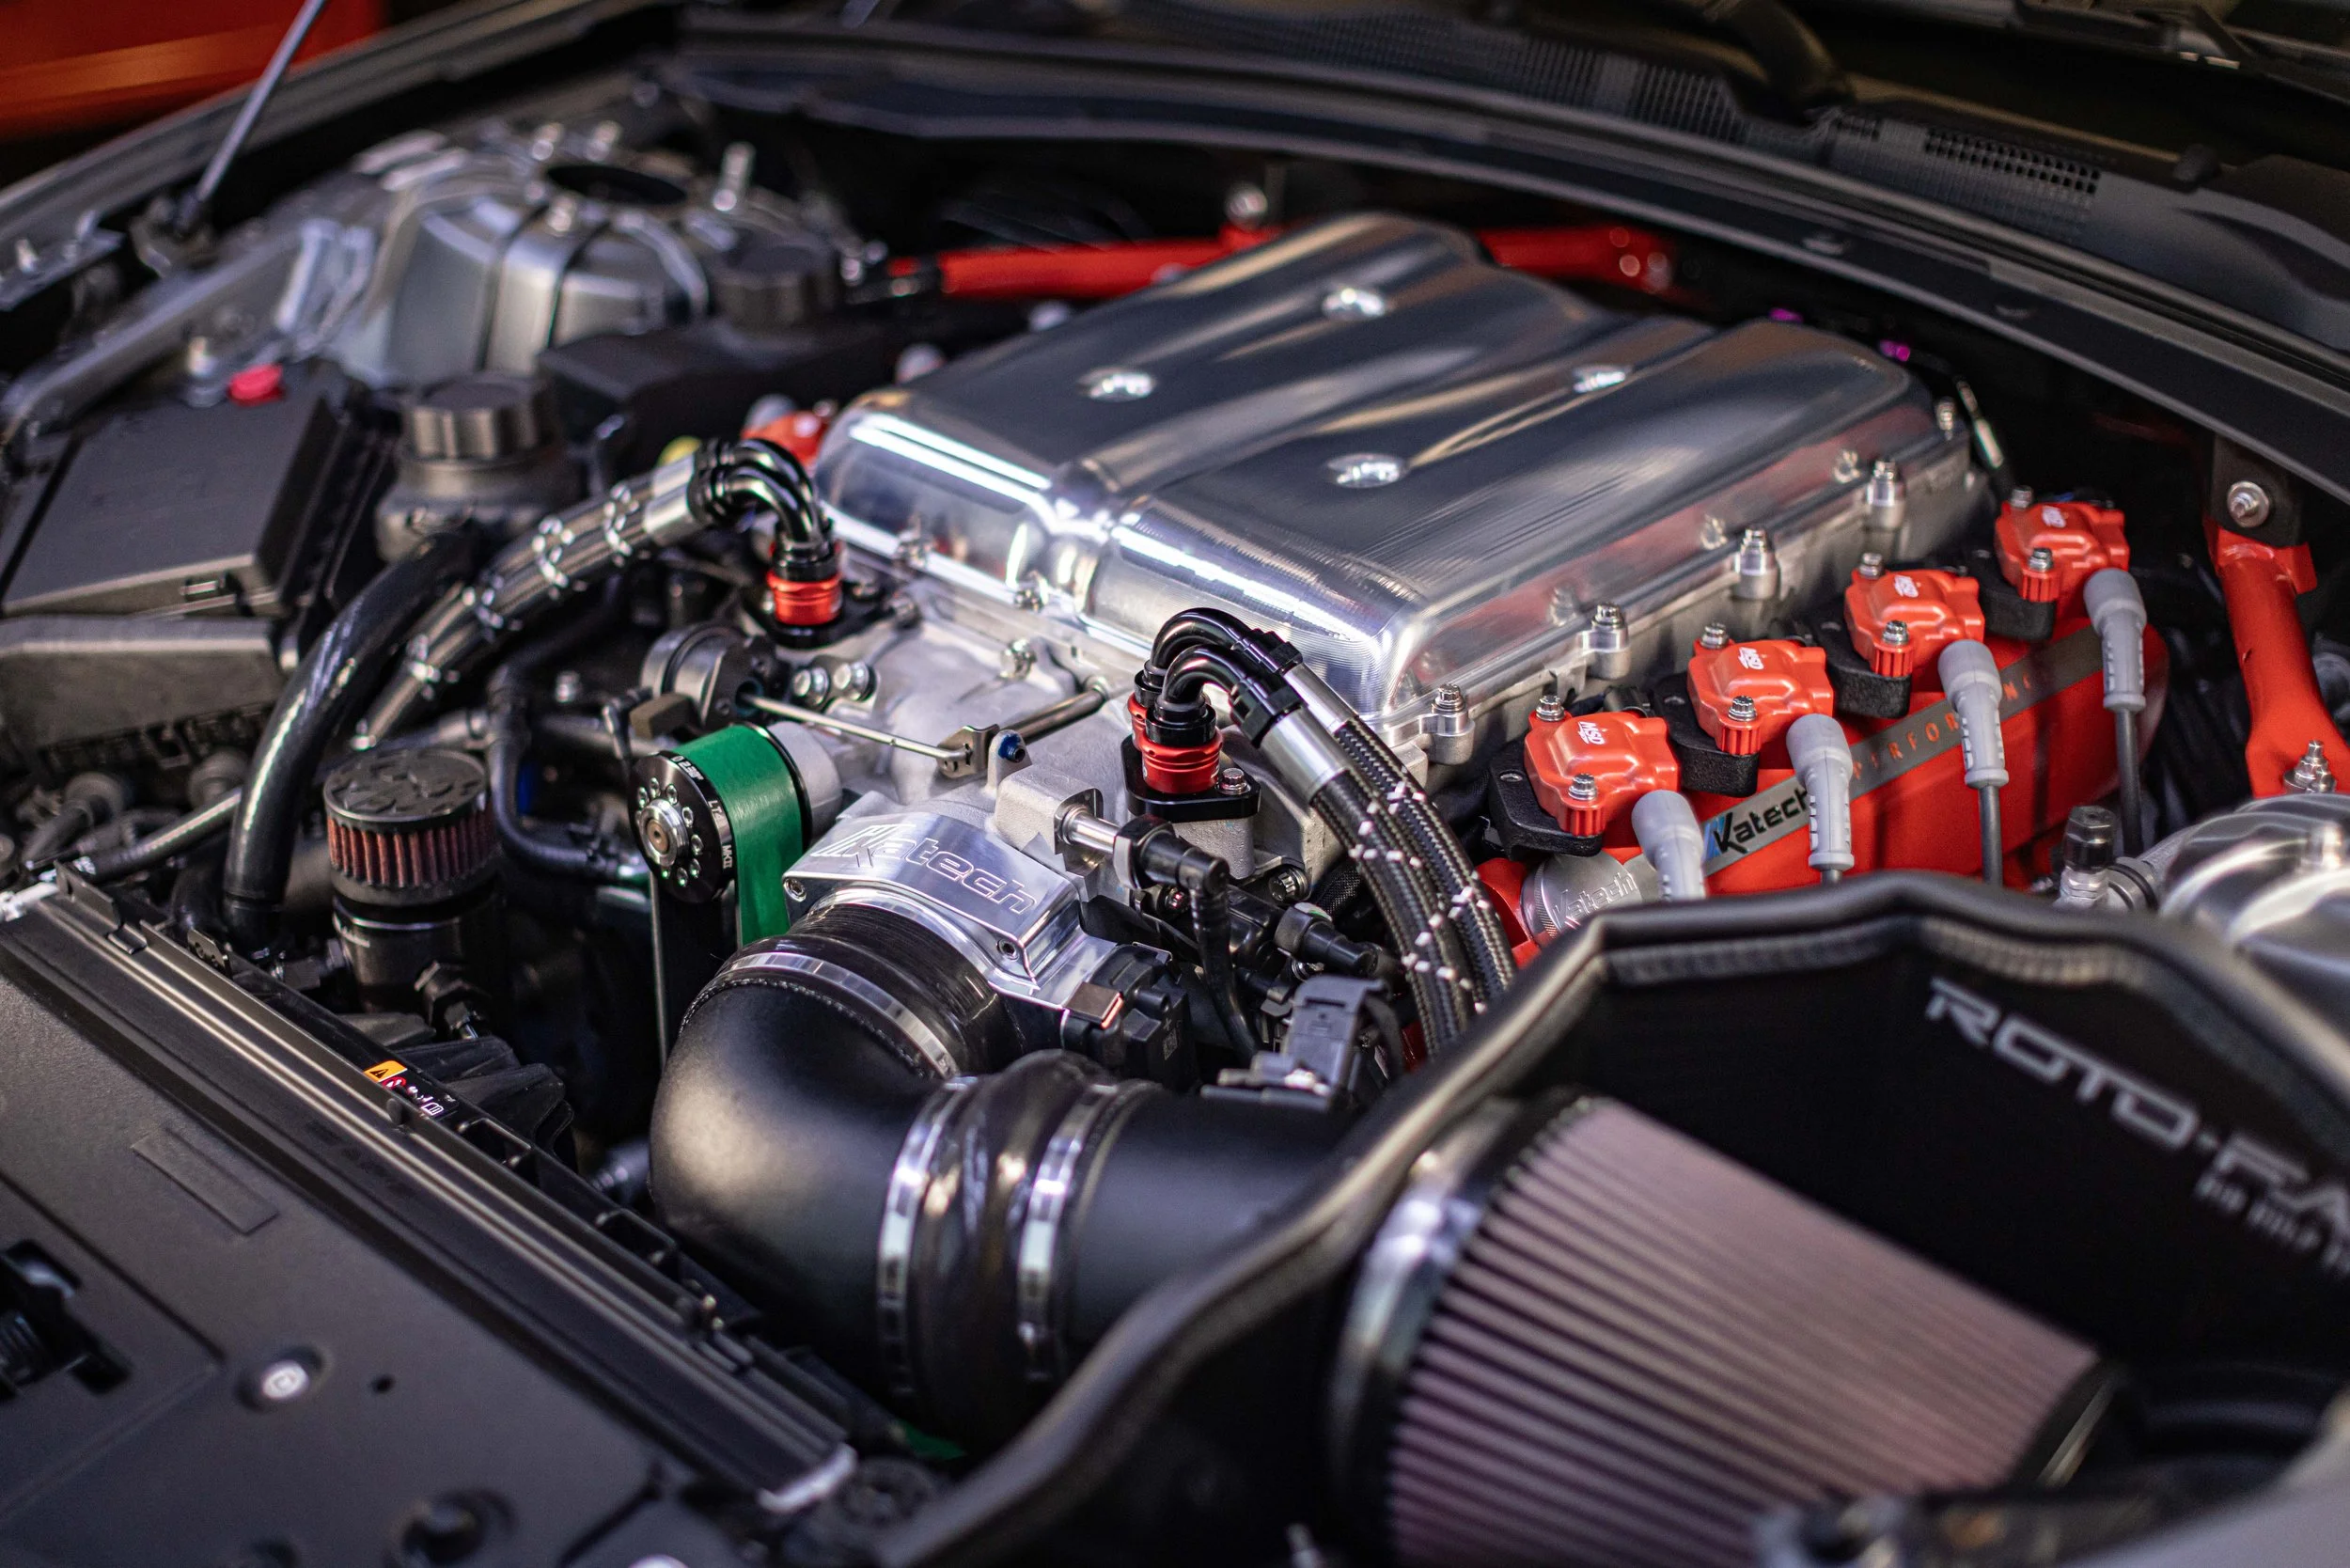 Image 5 of 14
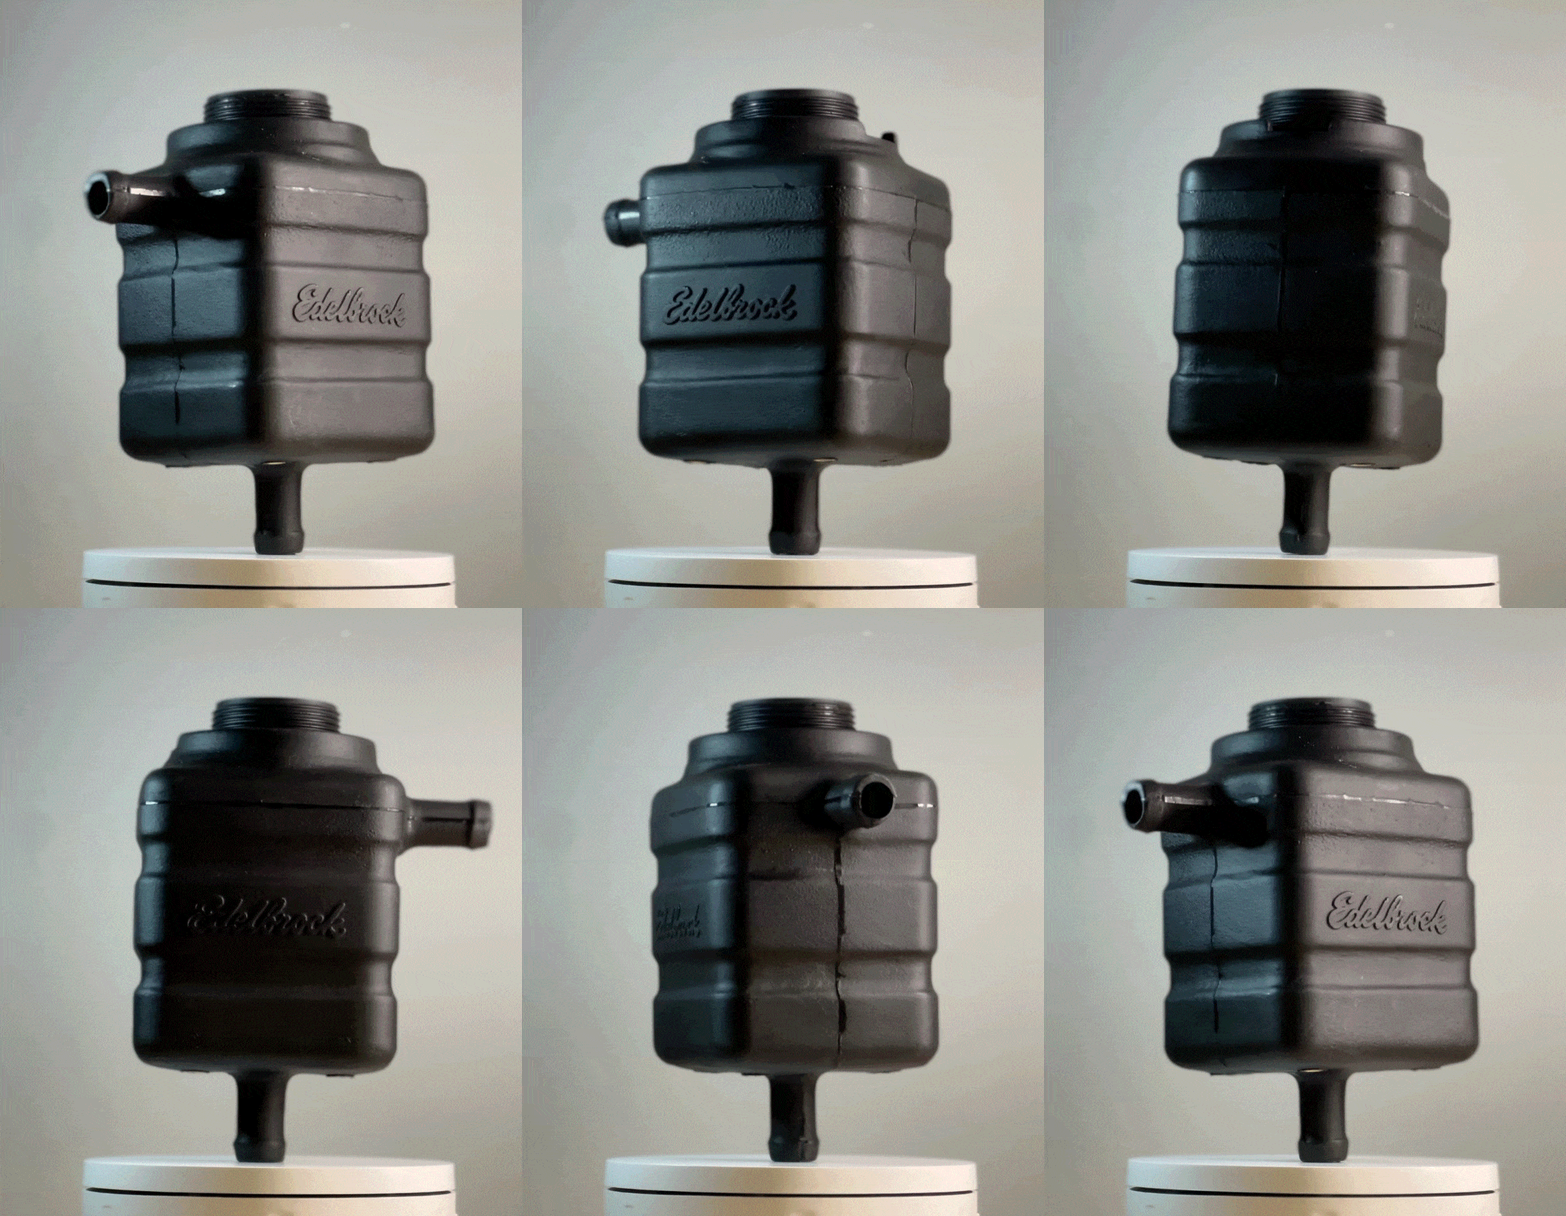 Image 6 of 14
 Image 7 of 14
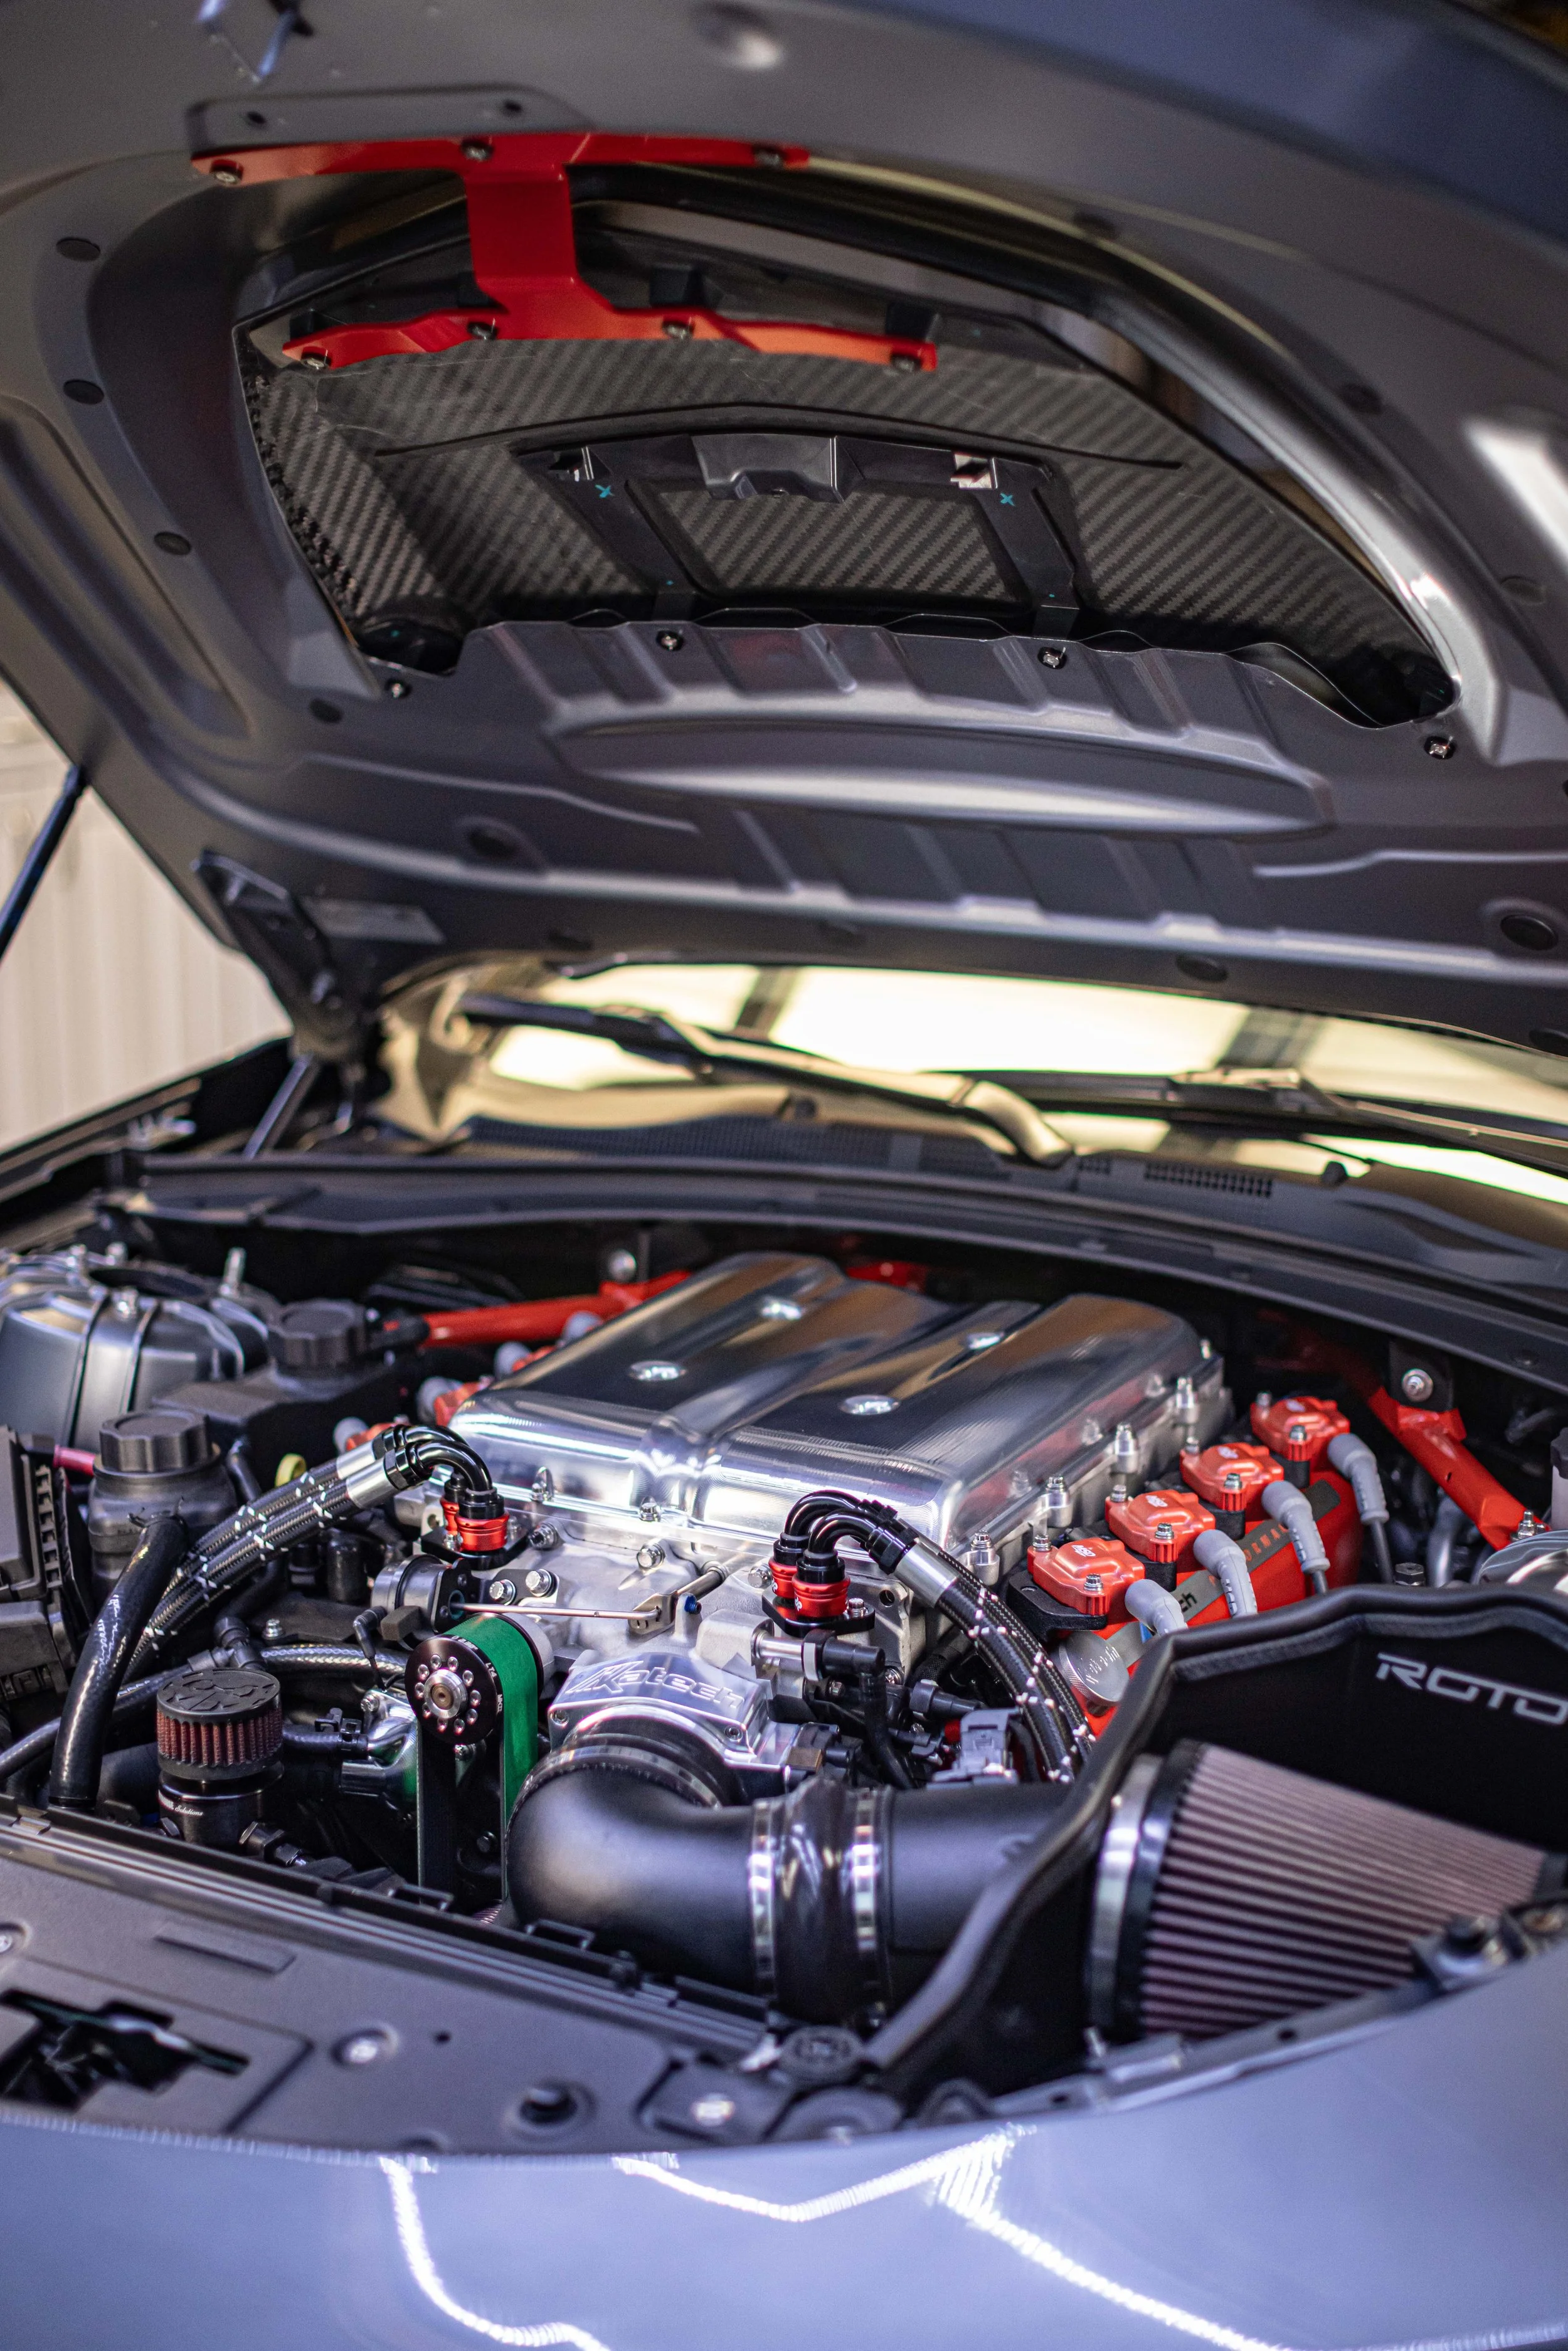 Image 8 of 14
 Image 9 of 14
 Image 10 of 14
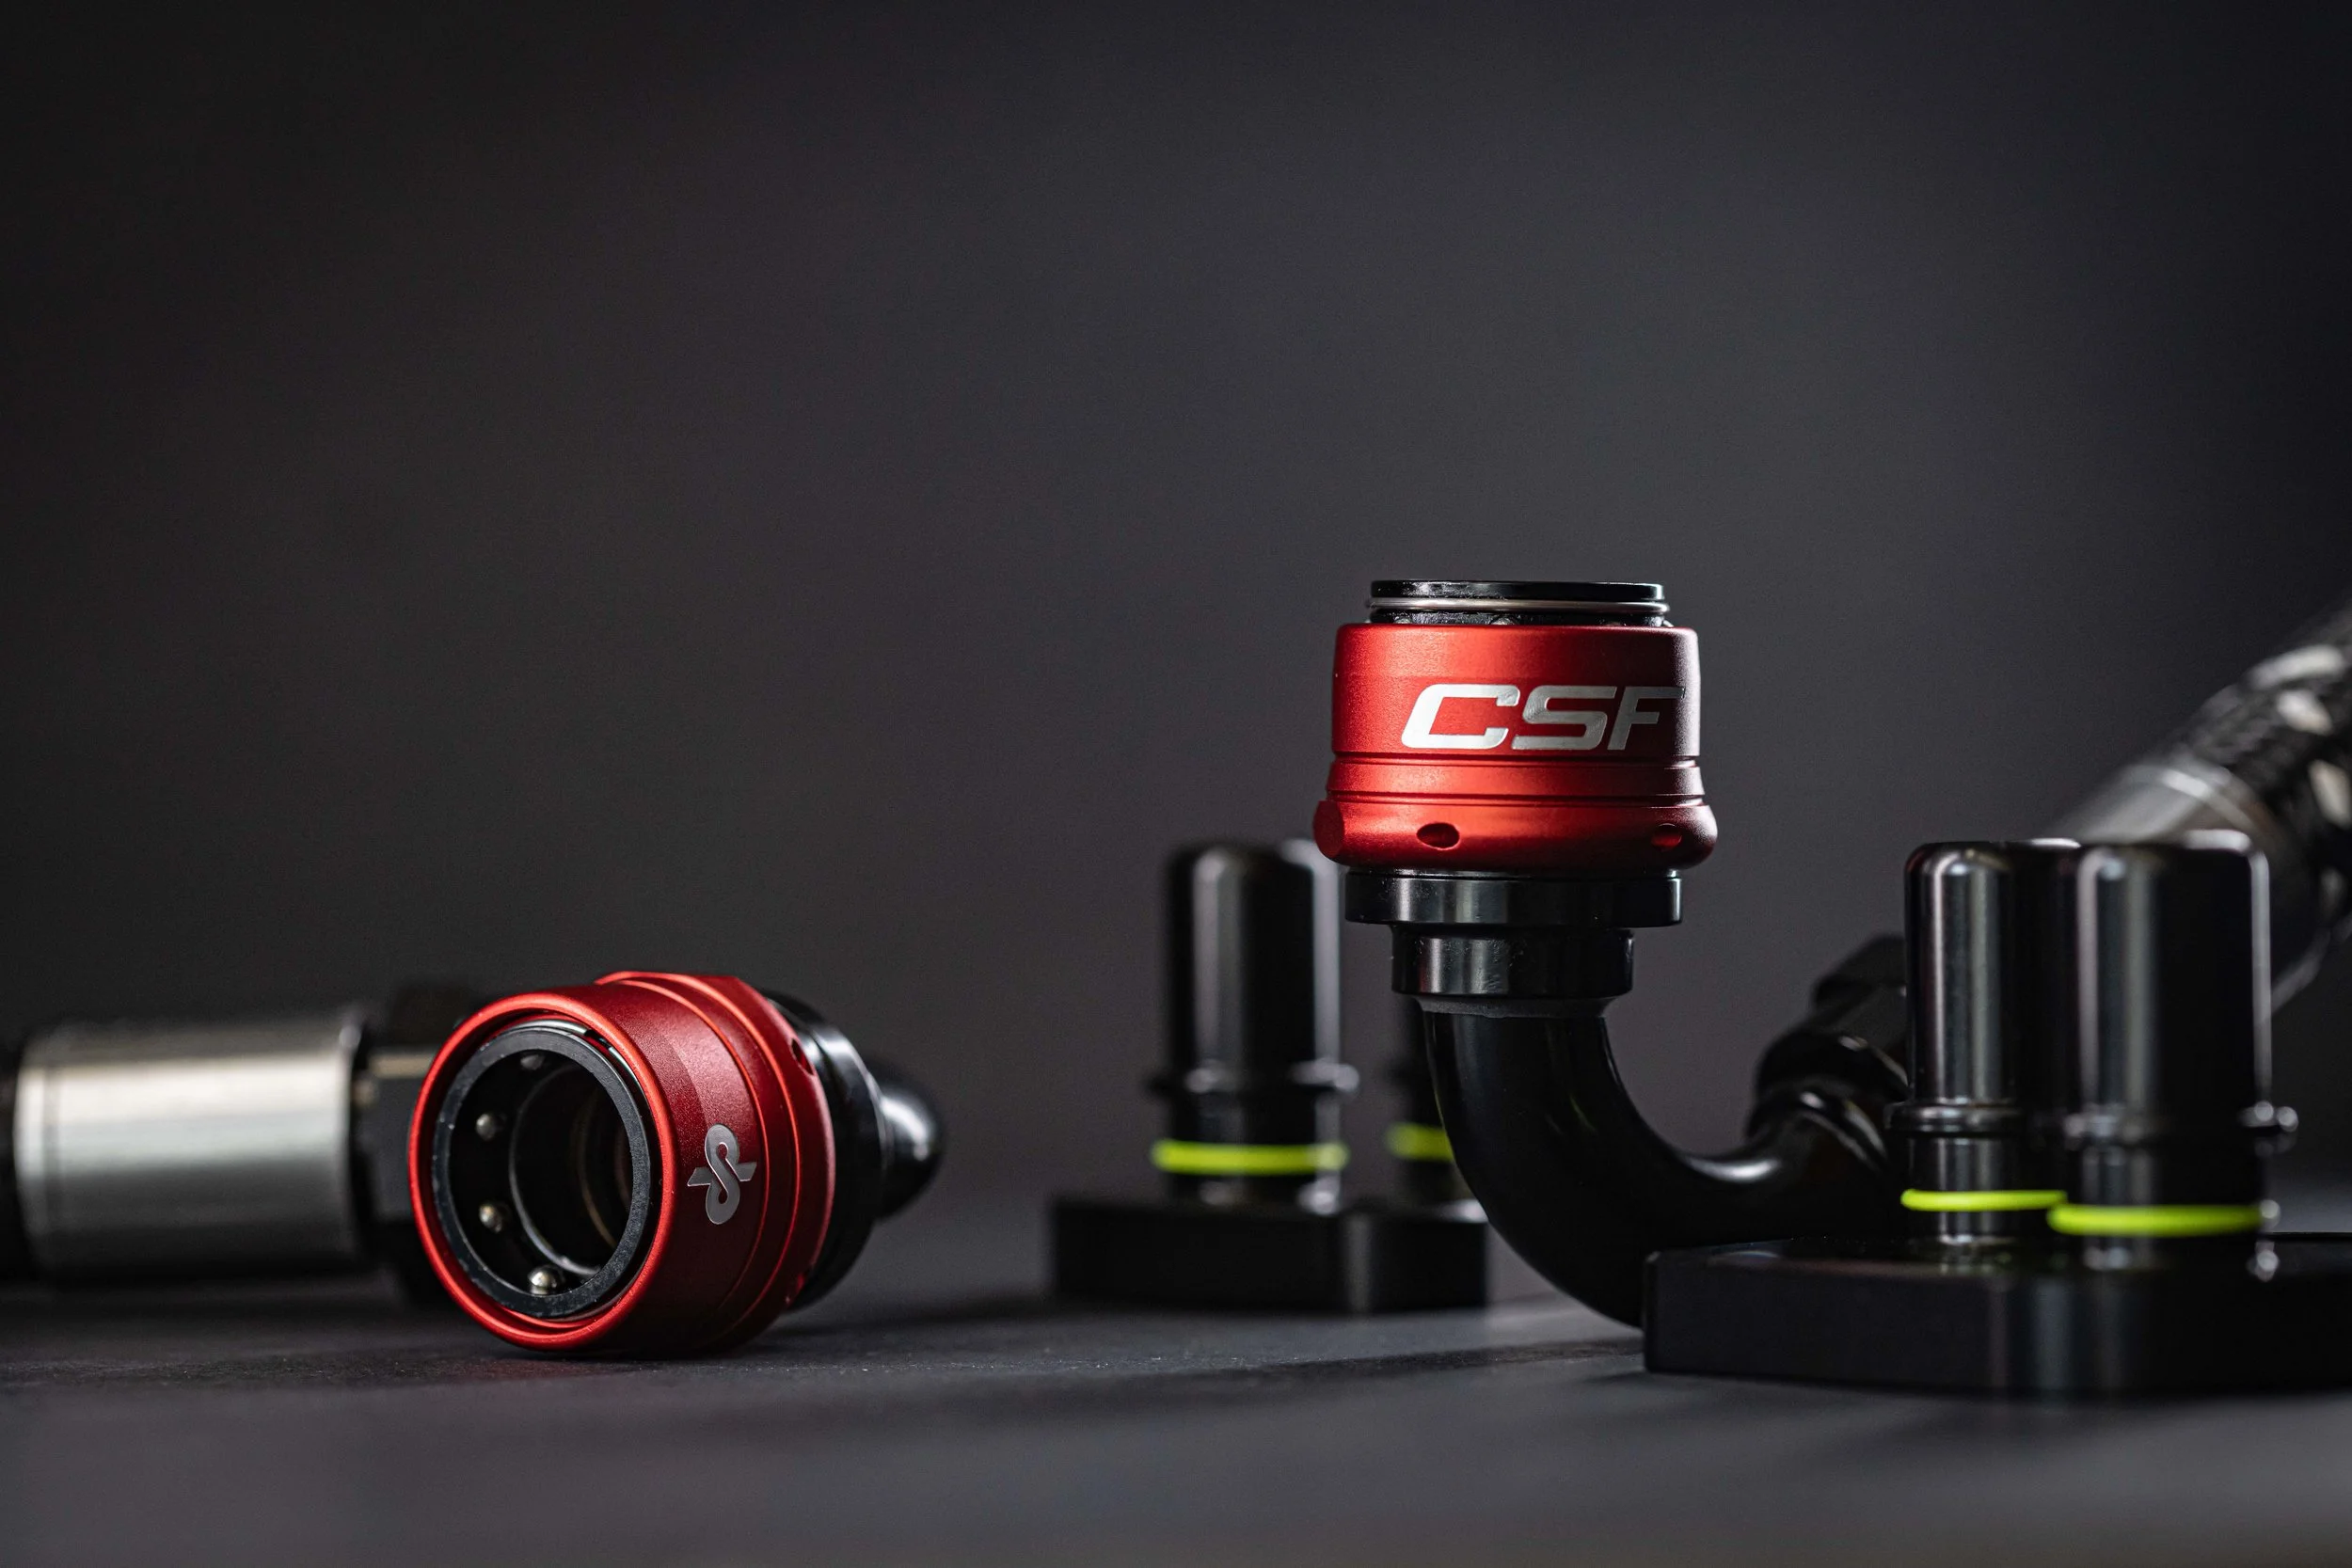 Image 11 of 14
 Image 12 of 14
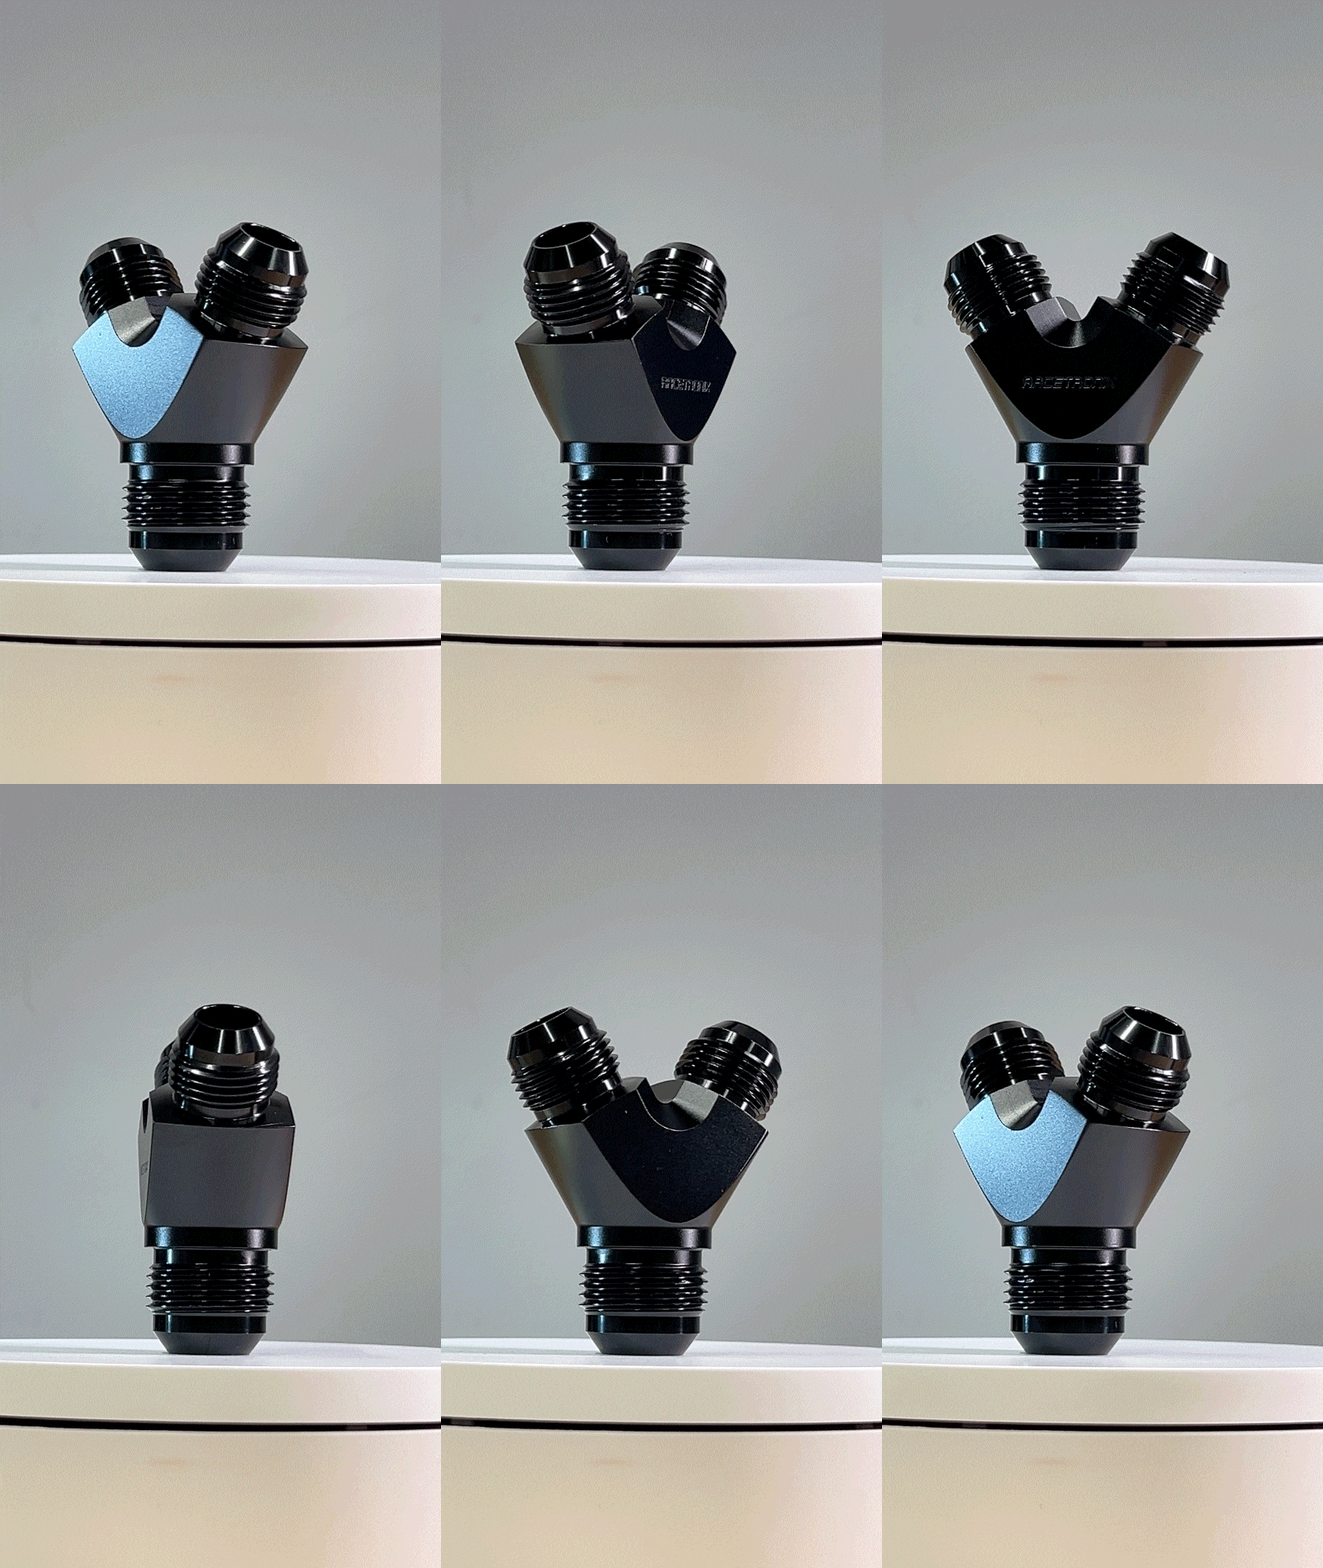 Image 13 of 14
 Image 14 of 14